"Walt's designs were simple to build and flew well. Ideal for kids in the 1950s and 1960s to enter C/L flying for less than $10. Still great fun for us Old Guys in their senior years! But nowadays, more like $70.
"At the other end of the display table were my StuntMaster, Me-109, Little Bipe. Wendell-Eillisms, and Curtiss F11-C2 'Goshawk'. All Musciano designs. I love building them but spread myself too thin and never get to finish them!
"Just a few of the 1/2A models at today's contest at Osborne Field. The rest were flying in perfect weather for C/L. Tons of adrenalin-pumping fun!"
Those are some nice looking planes!
Here's a pretty slick deal... make a quadcopter out of a bixler and fly it around as a VTOL craft. I'm going to give it a try!
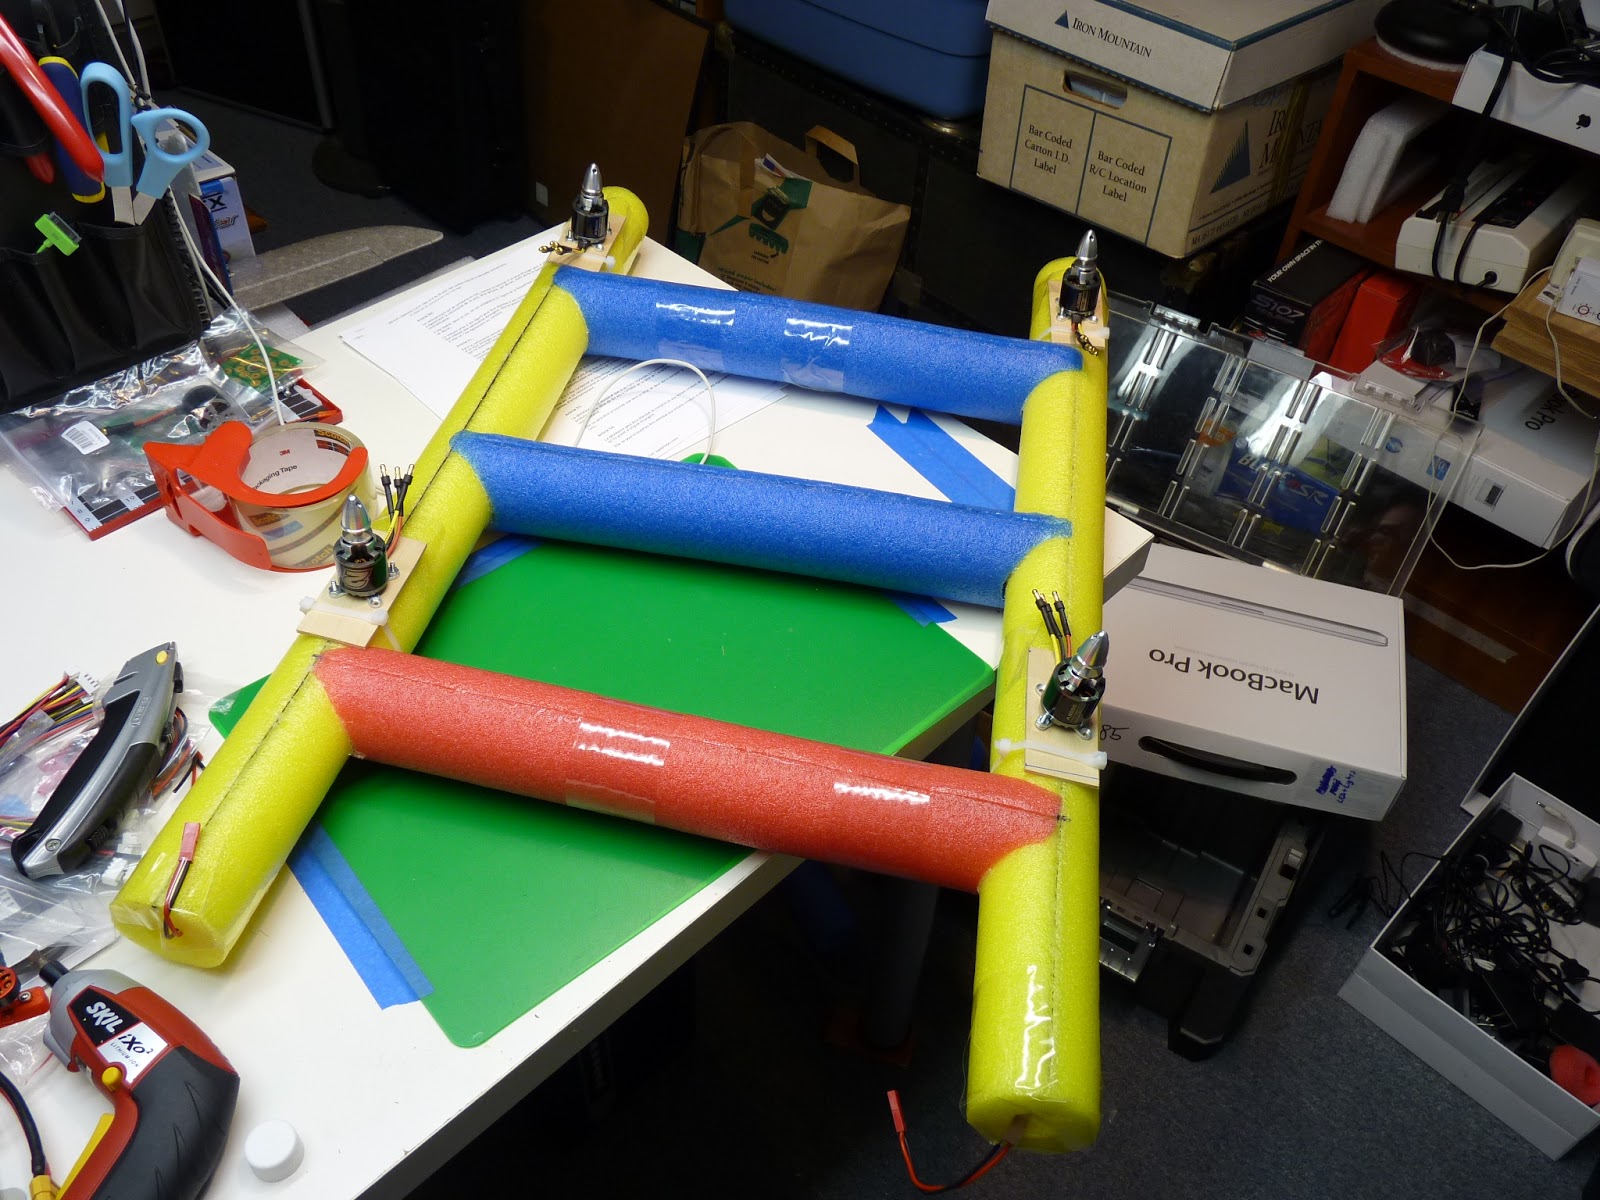
Fitted the NoodleCopter with lights... pretty easy, just ran LED strips down each hollow pool noodle. Worked pretty well! For quickness, I used four batteries, one for each strip and just taped them to the arms.
It looks really nice up in the air, with the colors of the pool noodles nicely standing out. This picture is a bit shot out, but you get the idea. I'm going to try to balance the brightness of the red and green arms with the yellow arms.
Update: Don't cut battery slots in the noodles! An unmodified noodle has some pretty reasonable torsion strength, but with slots cut into it it developed a lot of twist. I put two CF struts across the top to compensate.
Happy Test Pilots! It was our first night testing, so there was a bit of stress involved. But not to worry, everything worked out well. Hooray!
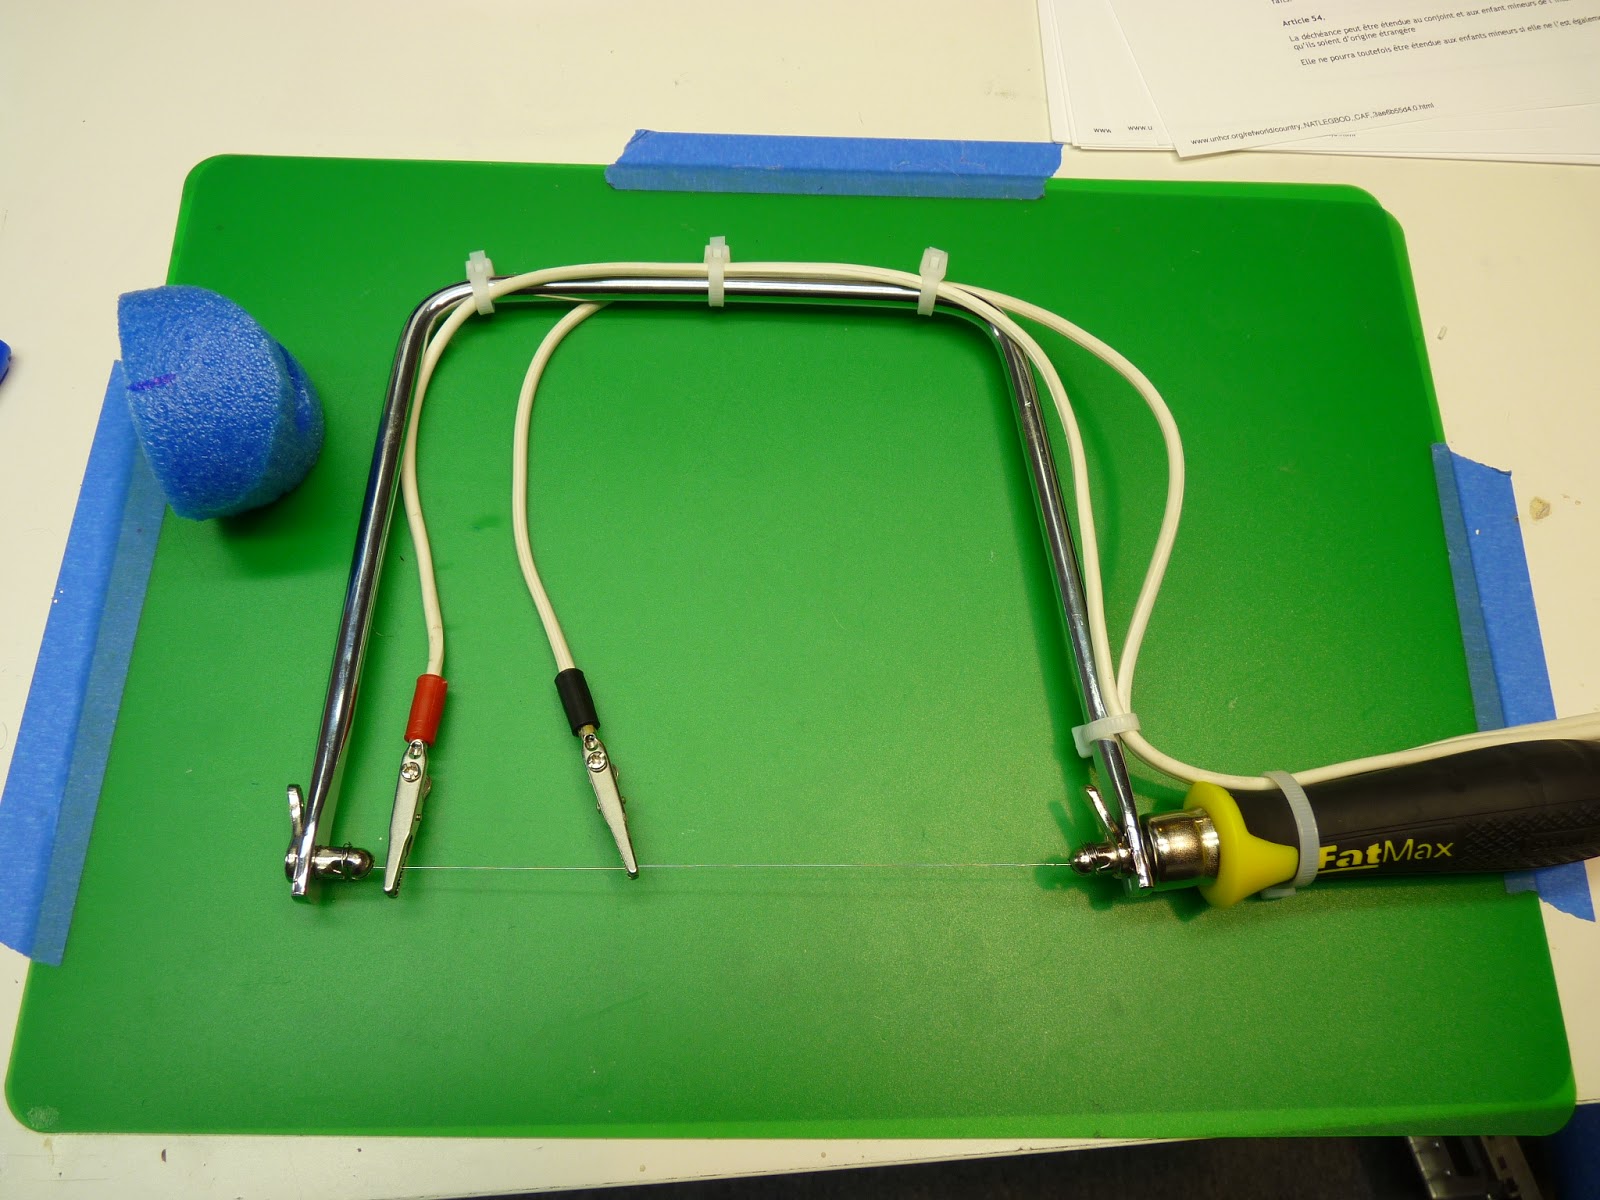
Here's how I put together a quick-and-easy handheld hot wire cutter. I started with a coping saw, removing the sawblade. I ordered some 28 gauge nichrome wire from ebay.
I loosened the handle, and wrapped the nichrome wire around both ends of the sawblade mounts, pulling it tight. Screwing the handle tight brings the wire tension to the perfect amount.
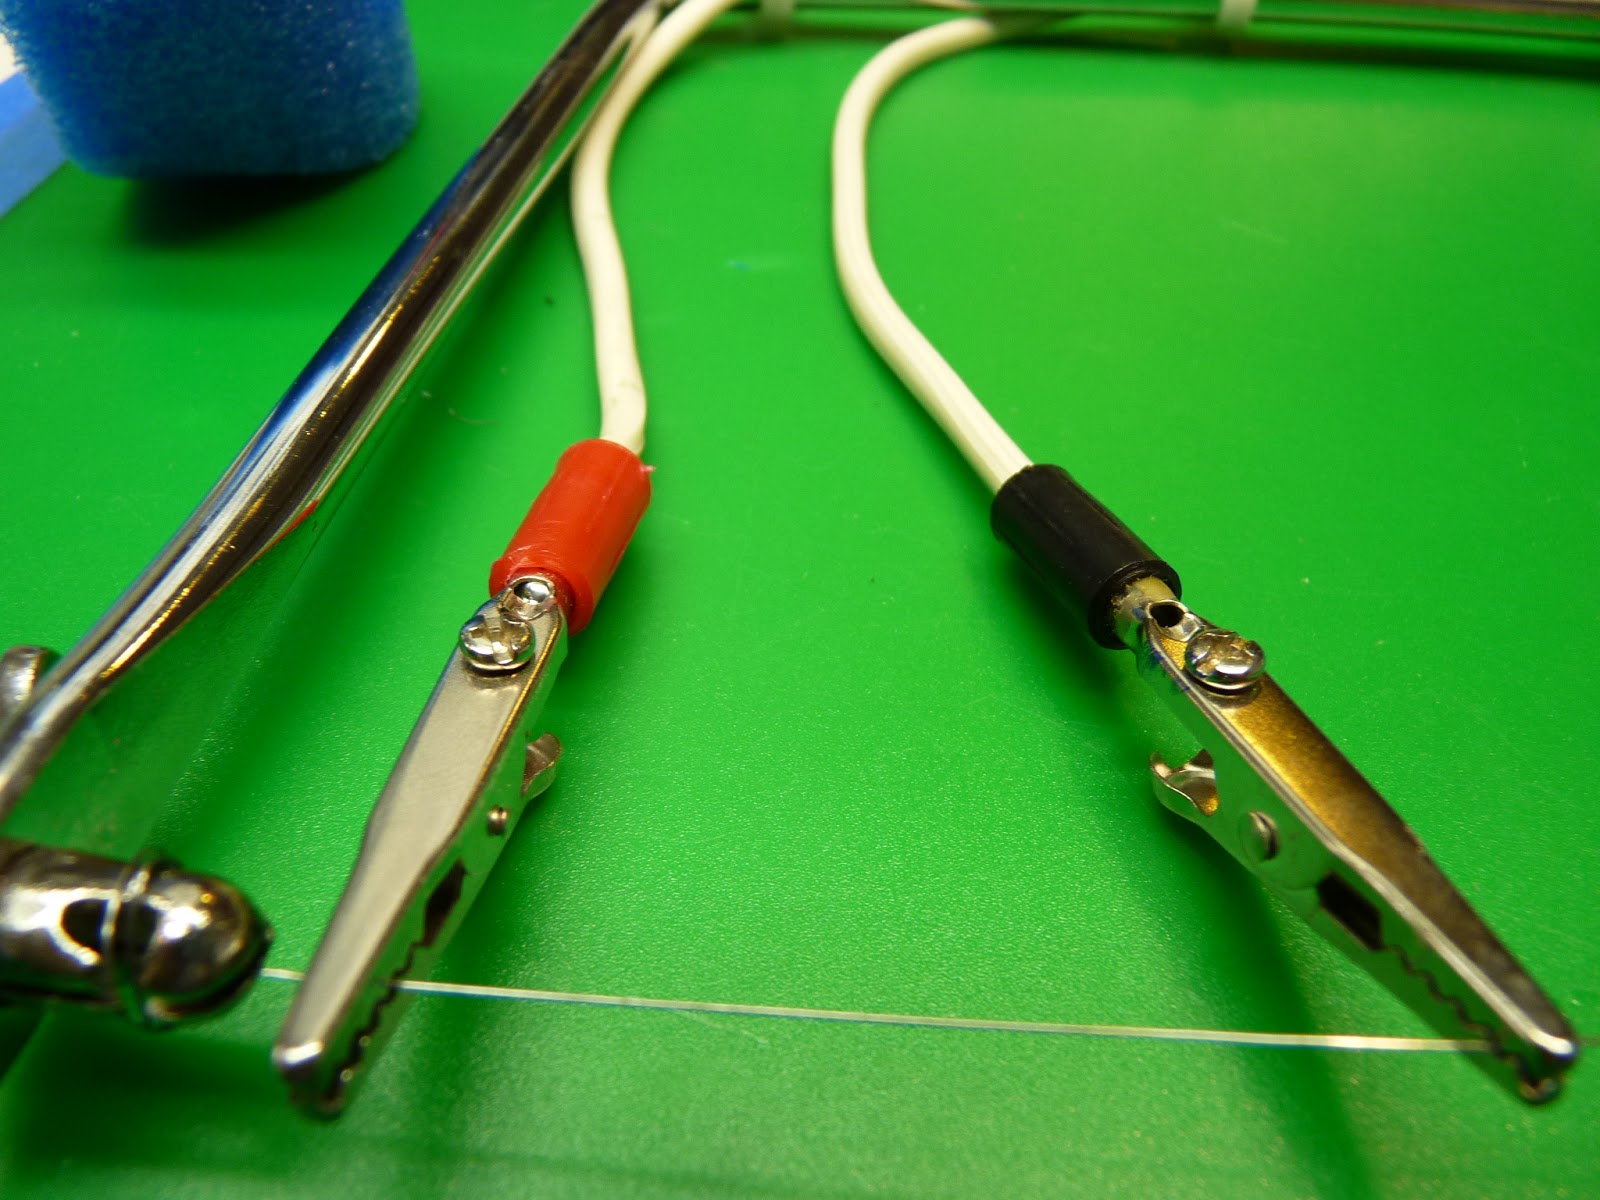
I split an old extension cord and crimped an alligator clamp to each half.
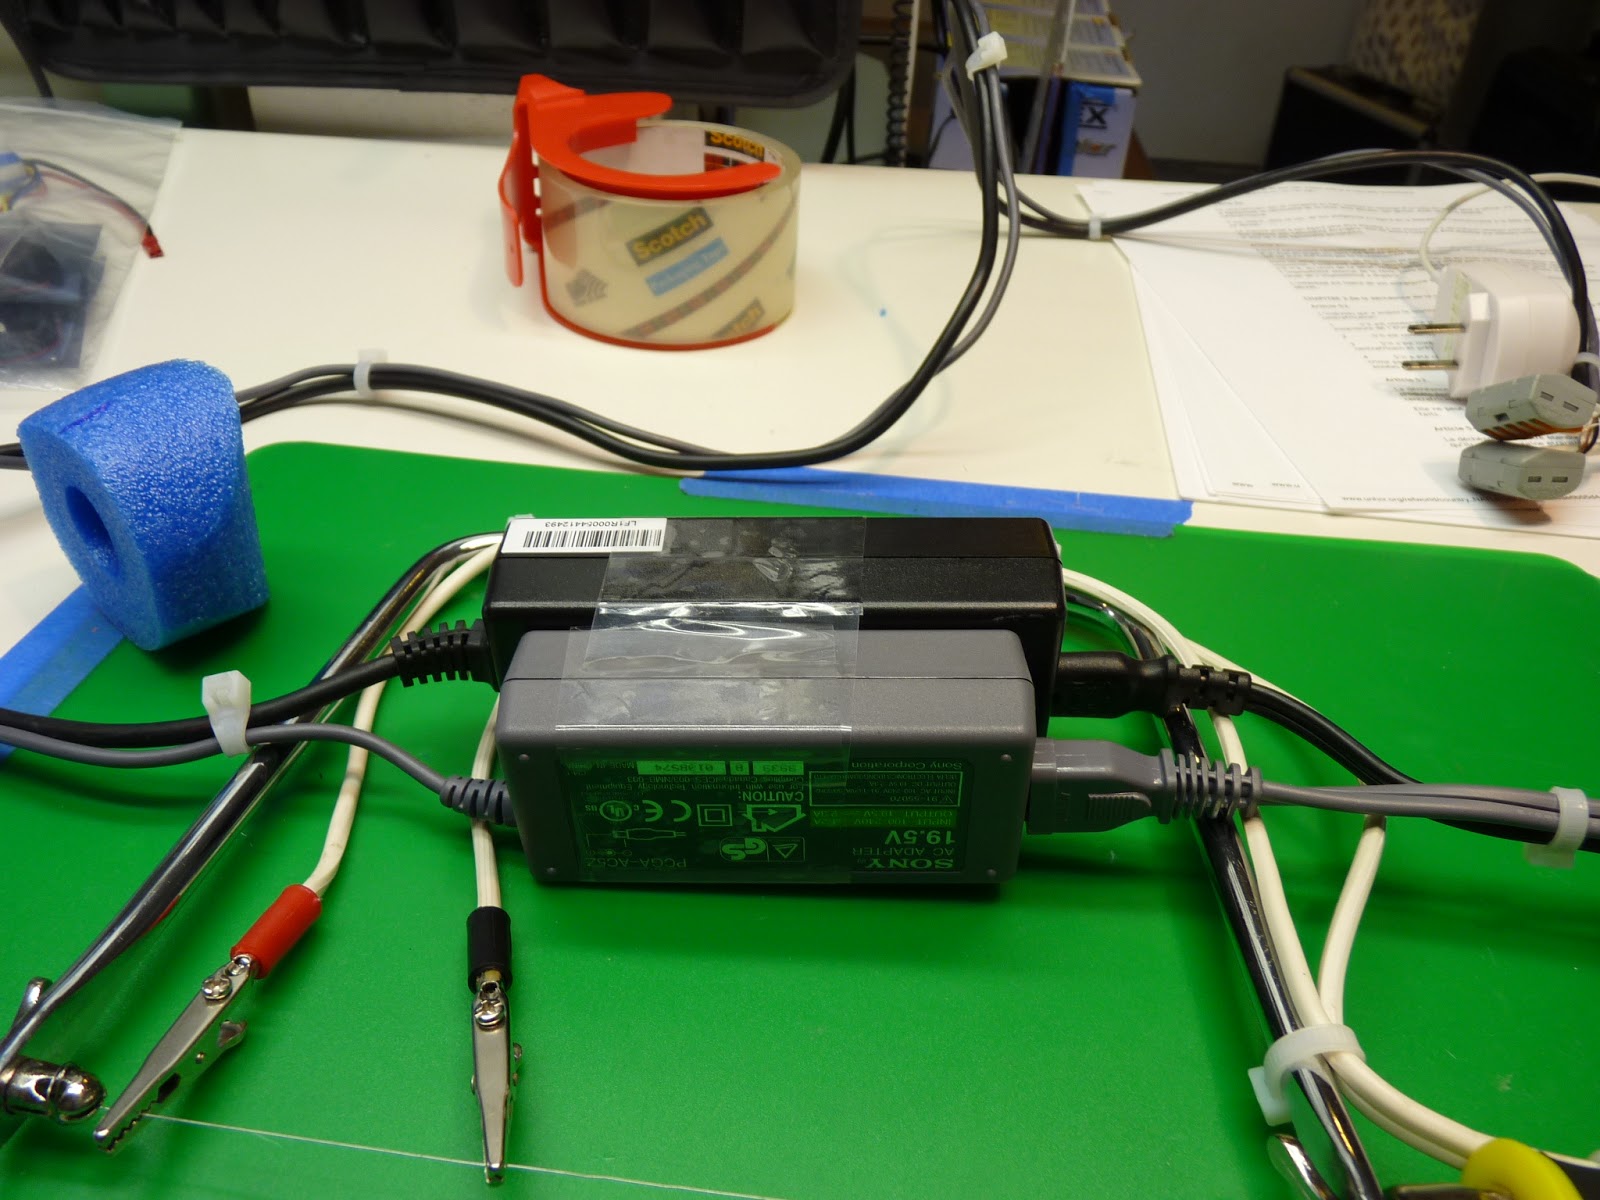
Attaching the wires to the power supply.
I had a couple of scrounged old power supplies sitting around. I had hoped to find an old printer power supply that was about 30V, but I only had a 12V and 9V. I put these together in parallel. It was just enough power for the small cuts I needed to do.
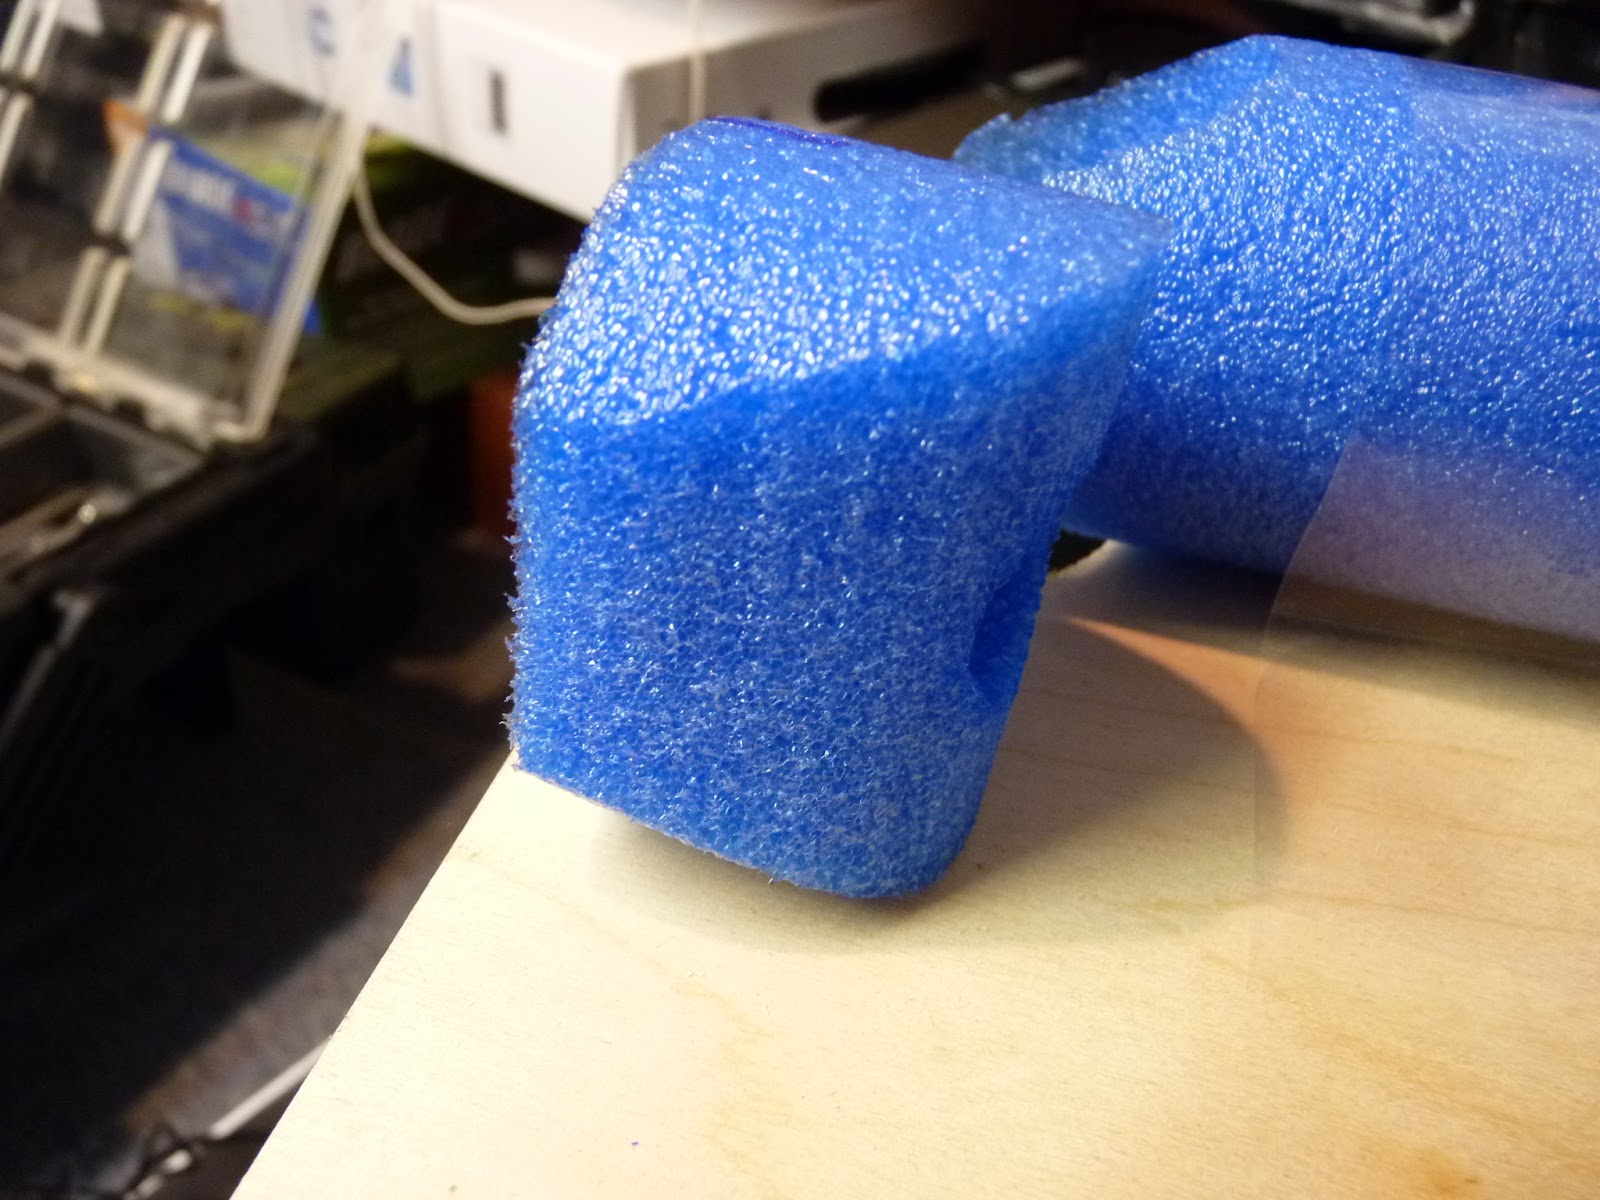
This was in service of the noodle copter, and I needed to cut some circular fittings on the end of the foam pool noodles. I used a 2 inch hole saw to cut a template in some 1/8'' ply. It was just about perfect.
Here's a cut off end. The wire was just hot enough for a clean cut.
Here's the prototype body, with the pool noodle arms glued together with Beacon Foam-Tac.
I'm still hunting around for a better power supply.
I'm going to try cutting out some flat wing surfaces by clamping the coping saw in the jaws of a Black and Decker Workmate.
For older receivers (e.g. D family), use the older failsafe method of pressing the button on the Rx.
Taranis and X family receivers have three failsafe options:
hold last input. Don't ever use this one, it's almost always the wrong thing to do.
no pulse. Some autopilots can be configured to handle this as a signal to start processing their own failsafe logic.
custom. This allows you to set the value of each servo channel. When the Rx loses contact, those values are set for each channel. When contact is resumed, control is turned back to the Tx.
While Binding or doing anything with your Rx/Tx, be sure and disable your props.
To set Taranis/X family Rx Failsafe
bind the Tx/Rx if not already bound.
on model menu 2, select Failsafe mode: custom
click [SET] to proceed to the failsafe menu.
For each channel, set the appropriate failsafe value.
save the failsafe value which Long-Enter.
To set Non-X family failsafe
bind the Tx/Rx if not already bound.
move the sticks into position.
push the failsafe button on the Rx. You will see a double-blink of the LED.
you can repeat this operation. each time sets the failsafe anew.
To clear failsafe on any FrSky Rx
rebind the Rx.
Verify your Failsafe
do all configuration with props off.
bench test several times.
test in the air under controlled conditions.
do these enough times to build up confidence in the failsafe operation.
Here's how to bind using an external module.
tl;dr: activate the module using the model configuration screen.
power off Tx.
pop off module cover on back.
insert module, be careful that the pins line up.
snap the module into place.
power on Tx.
go to model configuration menu 2
set Internal RF Mode to OFF.
Set External RF Module to PPM, CH1-8, 22.5ms, 300u, - (minus sign)
Now you're set for normal DSM2-style binding. I've got a LemonRX receiver ready to go.
power off Tx, Rx
insert bind plug on Rx bind port.
power up Rx
You should see a fast blink.
press and hold the module bind button.
while continuing to hold the module bind button, power on Tx
wait a few seconds
the module will beep, and the radio will slow blink, indicating successful bind.
remove bind plug.
Sometimes the Tx and Rx won't bind if the Tx and Rx are too close together. If you suspect this is the case, move the Tx away from the Rx about 5-6 feet and try again.
I've got one of the Taranis units that has a bit of a stick centering problem. No biggie, but I read that someone on RCG had their sticks center a lot better after the radio had broken in for a while.
So I thought, why not have the radio break itself in... if nothing else, it would be a nice way to fiddle with custom switches and get that figured out.
So I hot glued a couple of servos onto the radio, and connected them to the troublesome stick with some craft stick linkages. I left some slop in the connections so that nothing would bind.
It moves the sticks around pretty well. I'll let it go for a couple of hours and see if it helps the centering.
BUT, the important thing is that it's a good example of using custom switches.
Here's how to set this up.
First, we need to cover a bit about Custom Switches. A custom switch is a logical or virtual switch that can take on a value of -100 or 100, similar to a two-position physical switch. You define logical rules defining when the switch is on or off. You can typically compare two values... one stick is higher than a certain value, a telemetry value is lower than some limit, etc.
So, if we create a custom switch like this:
CS2 CH01 > 100
then Custom Switch 2 will be 100% when channel 1 is more than 100% (counting the scaling).
Now let's make a channel that will flip off and on:
CH15 (+110%)CS1 R (-110%)MAX Switch(CS2) R (+110%)MAX Switch(CS3)
This channel will be set to +/- 110%, depending on the state of CS1,CS2,CS3. Note that these custom switches are all based on the value of channel 1.
And finally, let's look at the channel controlling the servo:
CH01 (+100%)CH15 Slow(u0.8:d0.8)
Notice that this has the slow up and down parameters set. If we start off with CH01 at the maximum, then CS2 will be 100%, an the second mix rule in CH15 will apply, putting CH15 to -115%. This finally feeds into CH01, but it will take 0.8 seconds to move all the way down.
Once CH01 is all the way down, then CS3 becomes true, setting CH15 to +115% by its third mix rule. This causes CH01 to be set to +115%, but of course it takes .8 seconds to move to that value.
CS1 is necessary to kick things off. If CH01 is not outside of the range -115% to 115%, then CS1 will be either false or true depending on the values of CH01 and CH15. The actual values of these channels don't matter... if CH01 is less than CH15, then CH01 will start moving down and eventually cause CS3 to become true. Otherwise, CH01 will start moving up and eventually cause CS2 to become true. In either case, the logic picks up as above.
Whew, that's really hard to explain in words! Think of it like this:
When starting out, CH01 and CH15 may be random. CS1 handles these cases, and sends CH01 to -115% or 115%.
When CH01 is less than -100%, CS3 kicks in and sends CH01 to 115%
When CH01 is greater than 100%, CS2 kicks in and sends CH02 to -115%
Here's the final result. Thanks to w4kac for proofreading assistance!
Here's the settings to make a 6-position switch for autopilots.
tl;dr: Create two 3-point curves with the specified points. Mix onto channel 5 switches C and D using those curves.
Left Front/Right Back=Motor Wires=Blue(-)/Red(+)=CW
Right Front Back=Motor Wires=Black(-)/White(+)=CCW
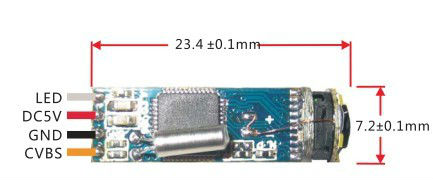
.4g camera module on AliBaba. "It can used for FPV Models,RC toys ,flexible video endoscope. Medical Video-scope, inspection camera,Industrial Video-scope, oral camera, fish-camera,under-water camera, Robot camera and so on. "
If you do the DIY endoscope, feel free not to let this blog know!
Amazing, it flies rather well! It catches the wind a bit more than the Arcticopter as might be expected. Orientation is wonderful... no doubts which end is which.
Alex is going to make another one for himself. It seems like it will be the perfect trainer craft... pretty much impossible to crack an arm in case of a crash, and I'm imagining that as loosely as the motors are mounted with the zip ties that the motor will shift before taking any serious damage.
Here it is flying in the front yard, in some pretty stiff gusts of wind that blows down the canyon that makes up our street. It's got a KK2 installed, since that what was lying around. Alex suggests transferring an APM into it.
Friday, August 2, 2013
Here's a really clear online text to speech system. I think I'm going to use it to record some Taranis-specific audio files for the APM. QueenElizabeth is I think a really good voice for this, as it seems to be quite legible (what's the audio equivalent of legible?).
Audio file parameters: mono, 32KHz, WAV, Signed 16 bit PCM, clear all metadata


 Happy Test Pilots! It was our first night testing, so there was a bit of stress involved. But not to worry, everything worked out well. Hooray!