Tuesday, August 18, 2020

Jumper R8 Notes

RCGroups thread:

Midelic Firmware thread:
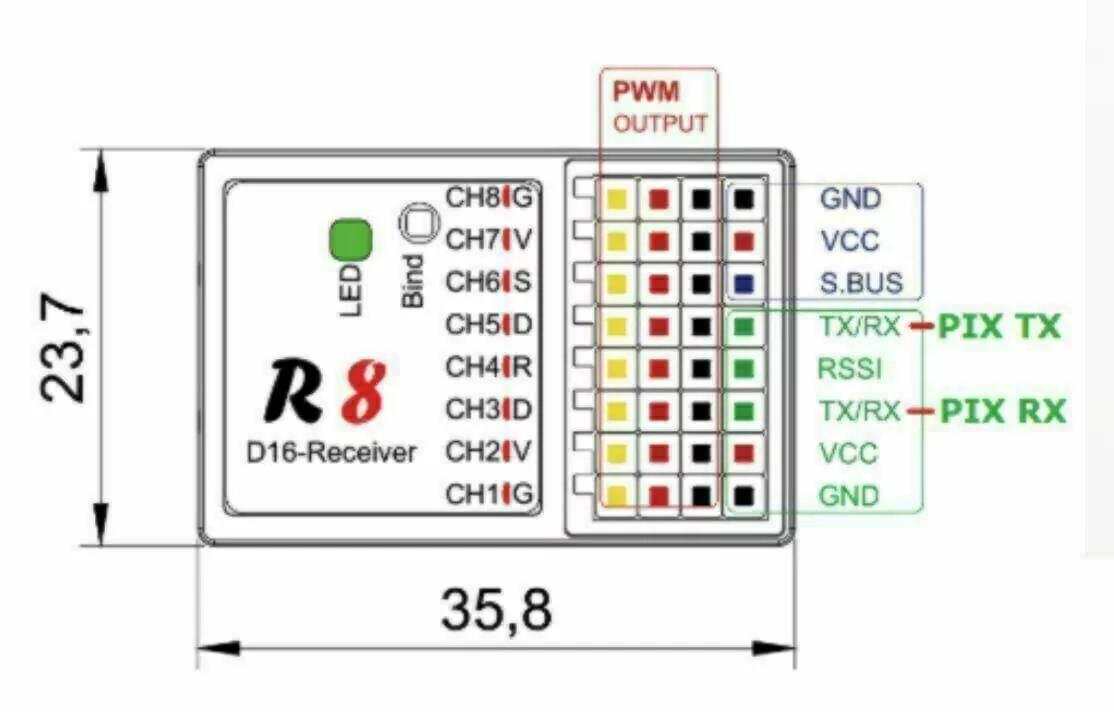
STM Flasher and Tutorial

For STM STM32CubeProg on Mac:
Double clicking the installed app just bonces the icon in the dock once and then quits . You can get it to run by right clicking on the installed package (STM32CubeProgrammer.app), selecting 'Show package contents' and navigating to Contents/MacOs/bin/STM32CubeProgrammer and right clicking 'open'.

CPU:
  • STM32 F103C8T6 6Q25E 1193
 LED colors

  • steady green: signal good
  • blinking green: signal bad
  • solid red: signal low
  • blinking green: signal bad
  • solid red: signal lost

Jumper Manual R8

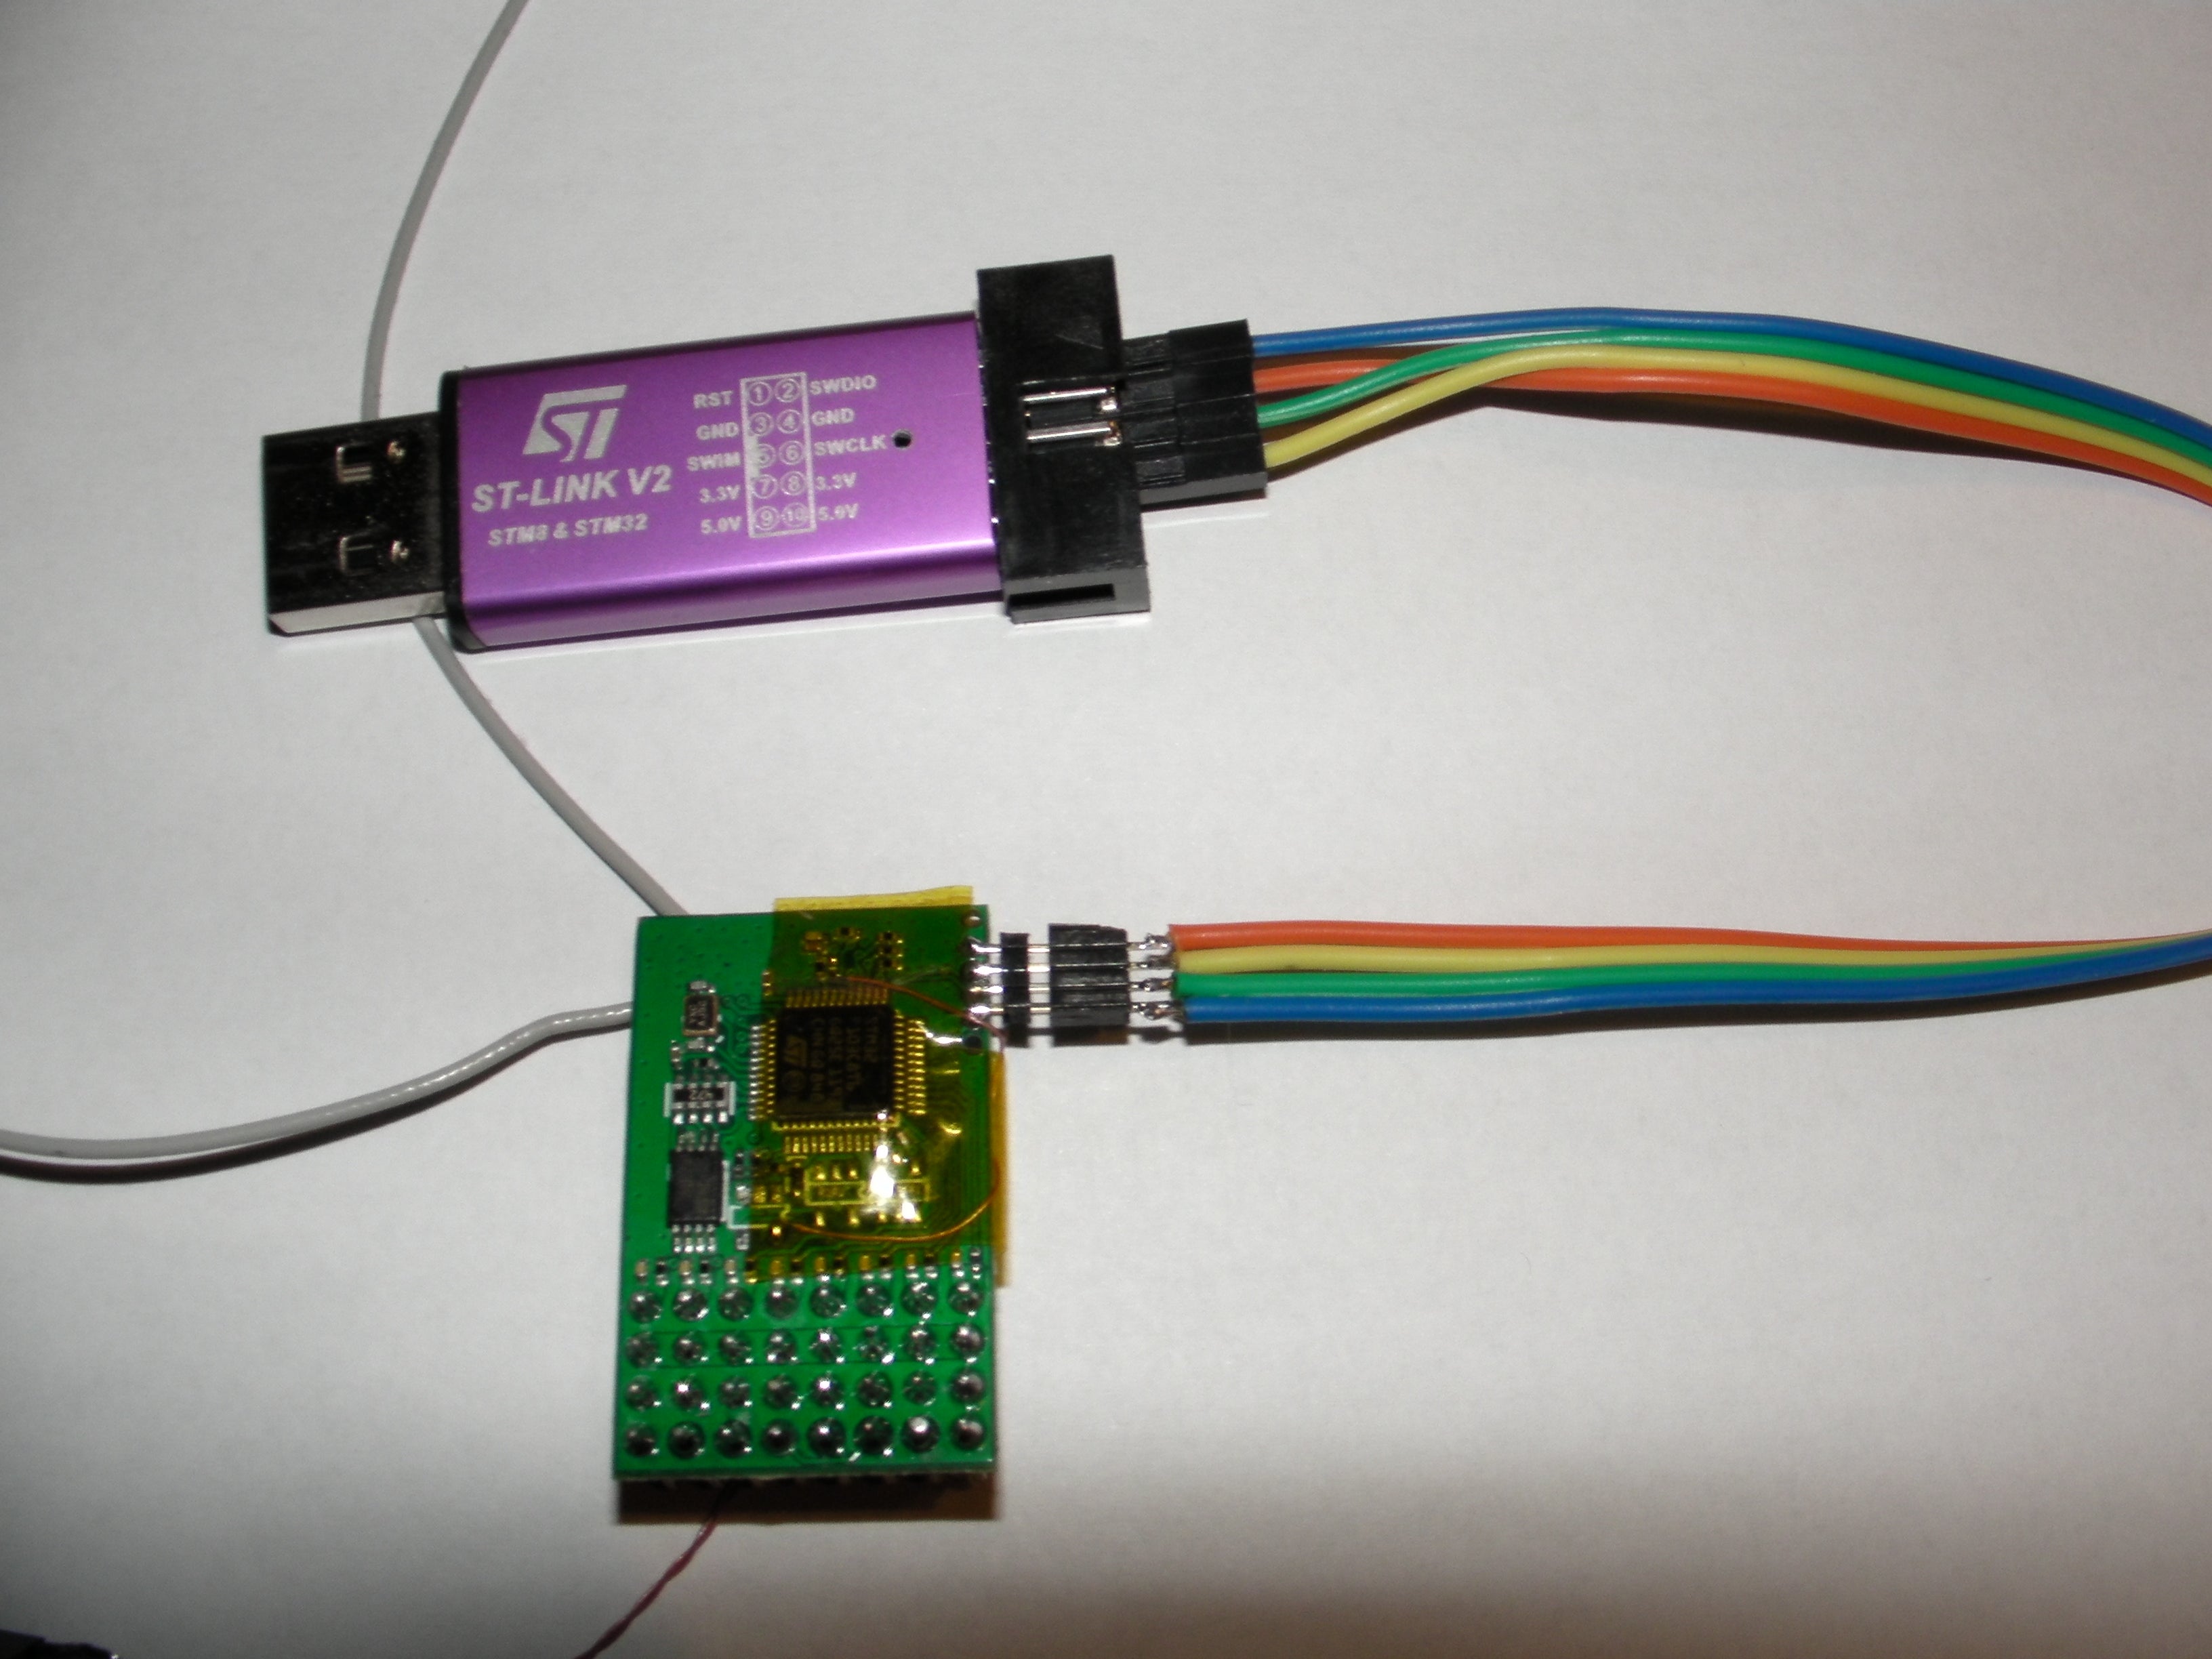
Flashing new firmware on Jumper R8 connections.

  • Use STlink V2 programmer.
  • connect STLink device ,press Target/connect.
  • If you receive "Read out protection" enabled warning, go into "Option bytes" and disable it.
  • Press "Erase/Chip" after that press "Program&verify" load the binary file to be flashed.
a12967115-35-Jumper_R8_1.png (1916×928)a12967117-191-Jumper_R8_2.jpg (3264×2448)


Monday, August 10, 2020

Powered Solder Sucker Notes

 Some good tips from the Amazon page.

  • BIT/DESOL3 is the replacement tip. Look at the other answers, they say it has a 2.1mm opening.
  • This isn't made to be used like a pencil like the non-heating ones. The button is near the back! The way you hold it is (to explain in words here) by opening your (right) hand and placing it in your palm with the plunger push-down at the same side of your palm as your thumb. Wrap your hands around it. Your thumb is now right on the release button! Hold it like you are stabbing the pc board. Place perpendicular to the board, wait maybe 3 secs, then use thumb to press the button. No shifting, jerking, momentum issues, etc. Just lightly tinned holes/pads after you are done.
  • For cleaning, Seller is wrong. Very cleanable. Instructions on pkg, but there is even a better way... Look closely at the housing/base where the plunger rod goes into the black end of the yellow tube. You can see the bigger outer housing you hold has a little partition at the top of the suction tube. The yellow tube is cradled in the outer tube. Use a small flat screwdriver and lever it slightly and it pops out - the whole tube. It comes apart for cleaning. An old toothbrush cleans the plunger well. It seems to all gather at the end of the plunger. It has a light coating of grease, probably silicone paste, so if you remove it by washing you may need to re-apply...
  • Properly tin the tip the very first time you heat it up, and treat it like a soldering iron!--ie: keep the tip wet with fresh solder while you work. *Adding* solder to a joint you want to *desolder* is a "secret" well-known by the experts because it keeps the joint fresh and flowing rather than brittle and plasticized so that the solder flows well and the joint is cleaned nicely when you press the vacuum button. Also be sure to hold the iron vertical to get good suction when sucking. And let me repeat: if you say the iron is not hot enough you are WRONG! (in 98% of the cases). What you need to do instead is *add fresh flux-core solder* to the iron tip--get it all up inside the tip even, then place the tip over your through-hole leg to desolder and now the fresh solder will flow the heat right into the joint--press the vacuum sucker button and voila! You've just cleaned that joint perfectly!

  • https://www.youtube.com/watch?v=UdGB7vD8ey0

Monday, August 3, 2020

HobbyKing Rarebear 620

AKA AngleWings RareBear


Wing Span: 620mm
Length: 535mm
Flying weight: 345g
Prop: 5.5x4.5 (3pc Included)
Motor: 2825-1950kv Brushless outrunner motor
ESC: 20A [Upgraded True 4S]
Servo: 3 x 8gram
850mAh 3~4S 20C Lipoly Battery


motor mount parts-2.jpg (1024×519)