Saturday, March 23, 2013

er9x: Elevon Mixing (good for Turnigy 9xr)

Here's some notes on elevon mixing with er9x.  It's pretty simple once you know the basics.  Here's some background on how elevons work.  Check out the calculations page... I think it's the only page on the Web with the mixing formulas -- at least as far as I could find!

Here's the mix.  The right and left elevons are on channels 2 and 3, respectively.  Note that the +/- values of the mix will be determined by the servo installation, so follow the technique on the video to make sure nothing is reversed.

2    100% ELE
  + -100% AIL
3   -100% ELE
  + -100% AIL

Here's some notes on elevon mixing for the DX6i and Stock 9x.  It's interesting to compare the different approaches.


Here's an express version of the video:

toc: Elevons, er9x

Some Bixler 2 Upgrades

Bixler2FPV has done a pretty comprehensive job documenting his upgrades.  If you're upgrading a Bixler 2, check it out!


I think I'm going to reinforce the wings as he did:


And AJ Baker notes:
You have a couple of choices to enhance the strength of the wing spar.1. Drill (see 1a) out the spar hole and put in an 8mm CF.1a. To make a "drill", wrap and glue a piece of 80 (or60) grit sandpaper on the end of a 7/16" dowel rod and drill out the spar hole - takes about 30 seconds.1b. Install new 8mm CF spar with the old 6mm spar slid inside it.1c. OR - put 3-3mm CF tubes inside the new 8mm spar.2. Almost as good - Put a 4mm CF tube and a 3mm tube inside the existing 6mm stock tube.

Wednesday, March 20, 2013

3D Printer Software

This post is mainly for my own convenience, listing out the software I've downloaded to do thing 3D-printerish.


  • MakerWare -- driving the MakerBot (update: ReplicatorG is better, use it)
  • ReplicatorG -- an open source alternative to MakerWare
  • SketchUp -- for drawing objects
  • OpenSCAD -- for programmatic generation of objects
  • Sketchup STL import/export -- plugin to import/export, here.  (update:If you get an error on import, it's most likely that your plugin directory is not writable.)

Tuesday, March 19, 2013

Bixler 2 Power System Upgrade

Here are two options for upgrading the Power System on a Bixler 2 if you've got the motor mount extension.

This seems to be a popular setup that many people use.


Here's one that even stronger... the 10 inch prop requires you to cut into the tail boom a bit.  Andreas and I are hoping that the extra power will be worth it when it's full up on FPV and autopilot gear.


(note: this motor has a limit of 32 amps, and as configured it hits 30 amps on the bench... be forewarned!)


BTW, regarding servos... you need 6 if you do the flaps.  I'm pleased with these.  If your radio can handle the mixing, you can use two channels for the flaps.  Otherwise, get a servo reverser.

Sunday, March 17, 2013

RC Hovercraft at Instructables

Here's a neat hovercraft over at Instructables. Looks like a lot of fun and not too much work to put together.


Metric Sizes at RTL Fasteners

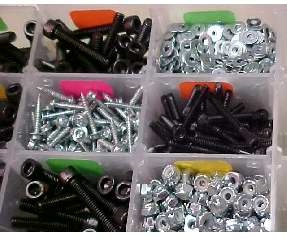
RTL Fasteners has a great collection of metric fasteners at what seems to be a pretty good price.  Way better than the local hardware store, where they seem to believe that M2 and M3 fasteners are made  from 24K gold!  The have a giant super-pack as well.

Saturday, March 16, 2013

Two Bixler 2 Extended Motor Mounts

Here's the Small Parts motor mount extension I got for the Bixler 2.  It's rated for up to 9 inch prop, but following Andreas' lead I trimmed a notch in the Bixler tail and fit a 10 x 4.7.  It draws 30 amps off a 3S battery.


HK now has a similar mount... no idea how it works, but it's certainly a bit cheaper.

Thursday, March 14, 2013

HD Keychain Cam Info

Some notes on HD keychain cams.  #16 v2 seems to be the good one.  eletoponline365 seems to be a good vendor.  The "D" lens seems to be popular for FPV coz it gives a wider field of view.


#16 HD keychain camera Lens A, B, and D comparison from tomfrank on Vimeo.

Thursday Miscellanea

Some nice airbrush tutorials on RCGroups.  Be sure and look at the first three posts.  More here.  And a store-bought checkerboard stencil.


Cheap GPS hackery here. Very interesting, and it can save on some projects.  Ebay searchage for "U-blox PCI-5S" and "GPS Ceramic Internal Patch 1575.42MHz Antenna 20x20x7mm" about $15 combined!


Servo City has some nice pin crimpers.


Arduino Power Management here.  Using the JeeLib to access the Atmel low level sleep functionality.


Monday, March 11, 2013

F-22 Foam-Tac Repairs

I do a lot of construction and repair with Beacon Foam-Tac.  It's safe on all kinds of foams, doesn't have stinky fumes, dries quickly, doesn't yellow, and maintains a rubbery, resiliant quality.


I broke off the nose of my F-22 yesterday, and thought I'd document the repair. EPP foam is great for this kind of disaster.  I applied the Foam-Tac to one surface, mashed and unmashed the surfaces together, let dry for a few seconds, and made the final join.


In under an hour the joint is firm.  I think the directions say  to let it cure for 24 hours for maximum strength.  As you can see here, it's nearly impossible to see the repair line.


Here's a video of the process.  Made with my new downshooter!


Thursday, March 7, 2013

New Downshooting Rig

Here's my new downshooting rig!  It's always been a serious pain to set up a tripod on the workbench to shoot, because it takes up all the room on the workbench!  I saw this instructable, and here's my version of it.  The clever bit is using the two linked pipe clamps to make the 90 degree connector for the boom.
I followed the instructable pretty closely.  I used 1 inch dowels for sturdiness, and didn't bother embedding the tripod mount, since I've got an iphone tripod mount already.  Instead of using wire to attach the camera holder, I just cut the dowel and used glue. I liked how the instructions for aligning the iphone brackets use the iphone itself, wrapped in a plastic shopping bag, which doesn't stick to the epoxy.
Here's a shot showing how I cut and glued the camera bracket.  I used PU glue (white gorilla glue) which was quick and filled up the gap from my crooked cut.
If the shaking is too bad, I'm going to mount the leftover bit of dowel as shown here (using two more pipe clamps) and brace the rig against the wall.  Hopefully that won't be necessary.
Here's a still shot.  The still camera has a wider viewing angle than the video.

Note: the camera was in portait mode, so I had to rotate this and the following pictures.  Be sure and put the camera in landscape mode if that's how you want to shoot.
Here's a shot where I was bumping the table.  It seems it may not be as much of a problem as I had feared.
Here's a shot while the rig is vibrating up and down.  Even with this, there's only a little distortion.
And a shot while the arm is oscillating side to side.  I gave the rig a pretty strong tug, far more than would ever be caused by a simple bump.  Watch this in the video, it's pretty alarming!


Overall, it looks like it might work pretty well, at least based on this first impression.  Here's a video showing the rig and taking some test videos.


Tuesday, March 5, 2013

Pendulum-style Camera Mounts

Here's an interesting idea... a pendulum-style camera mount, where the weight of the camera is counterbalanced by the weight of the battery.  I've found two models, both of which have lots of videos  and details at the links.

Here's the ECILOP EASY.  It seems to be the original design (RCGroups thread).


And the Glyder 600 from FoxTech (RCGroups thread).


Wednesday, February 20, 2013

Makerbot News

Just a few things on the 3D printing front...

Ordered this upgrade kit, designed by wphthomas and packaged up (with permission) by scvette.  Looks like a lot of people (including Bre) are saying nice things about this.

tldr: more reliable filament feed.


http://www.thingiverse.com/thing:42250
https://groups.google.com/forum/#!topic/makerbot/-8PWUKprZ6g
http://www.thingiverse.com/thing:42250#comment-795520449

And notes from one of our resident printmasters:

I recently experimented with some different print settings and thought I would share my findings.  Mostly with black PLA, though the final part was in red. 
240 deg / 60 extruder speed - the print starts getting messy.  I can see the extruder pushing around a lot of mush.  Too hot, IMHO. 
240 / 80 - filament gets very thin.  Feeding seems to be struggling to keep up.  No bueno.
Ended up going with 230 / 60, my tried and true settings for print you see in the attached picture.
 
If anyone else is making large, flat prints, you know they can be really frustrating to get off the build plate.  So I picked up a plastic putty scraper at Home Depot.  It now lives by the printer.  Go slow and keep the putty knife flat to the plate to avoid snapping your part in half (not that I would know). 

Wednesday, February 13, 2013

Things of Beauty

 At last night's meeting of the Concord Model Engineers, Ding presented a model he was working on, and gave some pointers about how to cut spars and assemble wings.  He cuts a template from aluminum with snips and files it to shape, and then cuts around the template.
 He brought this model he was working on, building from scratch without plans.  It was so nice looking I took a couple of snaps with my phone cam.  I was so struck by not just the impeccable craftsmanship, but the beauty of the frames.
 The final model will be in a contest where the minimum weight is 40 grams.  Ding is shooting for 35 grams, so that there will be some leeway for repairs.
There's some pretty impressive modellers in the CME, many with decades of experience.  Ding gets a lot of respect from these guys, as you can imagine.

Enjoy!


Monday, February 11, 2013

Adding some LEDs to the ArctiBaby

 I put some LEDs onto the ArctiBaby, hoping to make orientation a bit more visible.  Here's the 2S connector for attaching to the battery. I put an 82 ohm on the wire, which split to 4 power wires to each of the LEDs.  I'm using 28 gauge servo wire.
 Here's my mockup to make sure I was getting the circuit right.  I put one resistor in series with four parallel LEDs.  I'm going to ask some gurus if that's the right thing to do, but it seems to be working.
 Here's how I attached the wiring.  I zip-tied the end of each wire (where the LEDs are) to the end of each arm, with the LEDs pointing out.  The front had two 5mm frosted amber LEDs, and the back had two 5mm clear reds.  I put some scotch magic tape over the reds to get some frosting effect. It didn't work very well.
 Here's the final result.  I'll give it a try tomorrow and see how the visibility is.  Right off the bat I can tell you that amber/red is a pretty poor color combination for orientation differentiation.
I was using my jumbo 500 random LEDs for $2 package.  About 90% of the LEDs are red, and most of the other 5mm LEDs were amber.  There were a few tiny (2mm?) green LEDs.  So that's how I picked the color scheme.  I've ordered some 5mm frosted blue LEDs; I'll replace one color or the other and see if that makes it better.

Saturday, February 9, 2013

Notes on proposed Drone Legislation

Media Certified Drone Hobbyist!
Here's some notes I'm putting together on the legislation being proposed in Texas by Rep. Lance Gooden (R, Terrell) [1], but I think they're applicable in other cases as well.

It's interesting to note that the citizens of Terrell, Texas and Berkeley, California seem to have a pretty consistent set of concerns regarding this issue. [2][3] (and as a personal aside, I used to live near Terrell in Garland, Texas, and now live just down the road from Berkeley in Piedmont, California.  In many ways so different, and yet surprisingly similar!)

I'll be updating this posting periodically.  Please add your comments below if you think there's some use cases, thought, ideas, etc, that might be useful.

My goal is that this will be a useful information/idea source for Representative Gooden in particular, and others interested in drone legislation in general.

My emphasis will be on hobbyist, non-commercial, and "emerging commercial" interests.  I'm assuming "Big Drone" will be capable of speaking for themselves (but hey guys, if you do need some help, give me a shout!)

Background and Disclosure

I'm an RC plane pilot and self-described "drone hobbyist."  I've been featured as such by the Wall Street Journal, NPR, the AP, and CBS (details here [6]).  I don't have any financial ties to the industry, other than as a customer and beta tester for several RC products.  I blog both here at eastbay-rc.blogspot.com and at diydrones.com. By day I'm a software engineer.

One thing that started me thinking seriously about the legislative aspects of drones was when my AP story appeared on both the Fox News and Huffington Post websites.  People's concerns were almost identical across the political spectrum!

Text of Legislation

http://www.legis.state.tx.us/tlodocs/83R/billtext/html/HB00912I.htm

Some Use Cases

Here are some use cases that may serve to clarify some of the goals of the legislation.  My emphasis, it bears to repeat, is on the "small" user.

(in progress)

1. Hobbyist flying in neighborhood, with camera.

It will be hard to engage in recreational flight without having people's private property in the background.  In general, this is incidental and looks about like what you would see on Google Maps. This should be a protected use.

Question:  at what point/altitude does the FAA cede authority?  It's clear that flying a private plane over a neighborhood at 500 ft isn't considered a problem by anybody.  How about flying an RC drone at 400 feet? 100 feet? 10 feet?

2. Peeping tom spying on neighbor's swimming pool for non-commercial use.

It seems obvious that few people will approve of this usage.  The tricky part will be in getting the right language that catches this, while not catching up someone innocently flying a small copter in their own back yard.  How does the law handle someone standing on a ladder in their own yard, peeping over a fence at their neighbor?

Is there a useful distinction between having a video downlink, and making a recording of that video? Or sharing of that video?

3. Paparazzi taking pictures/videos of celebrity's swimming pool for commercial use.

Again, this seems pretty obvious.  We don't want paparazzi doing this.  Since they will be selling the pictures, it seems this easily falls under the current prohibition on commercial use.  If commercial use is licensed, that would be the proper place for regulations to be specified.

It may be the case that a blanket requirement that the aircraft be flown in a safe manner and within the guidelines of a generally accepted flight organization could take care of most of these cases, since remotely flying a quadcopter (for instance) close enough to snap pool bikini pics is probably flying too close for safety.

4. Pro or semi-pro drone pilot taking aerial photos or video of house for real estate advertisement.

This seems like a reasonable thing to do.  Would licensing be necessary?  I would imagine so, in order to ensure proper insurance coverage.

It seems to me that licensing on par with a Ham license would be appropriate.  A license on par with a private or commercial pilot's license would be overkill -- both too expensive, and covering a lot of unnecessary information.

5. Pro or semi-pro engaged in product development base on flying models.

It would be a shame to accidentally block a new high-tech industry, especially as Texas seems a prime area for development -- lots of open, flat spaces, many potential customers in the farming, ranching, resourcee management fields, etc., and a good business environment for small companies.

It would be great if the regulatory environment for small commercial-use drones were such that it encouraged innovation and growth in this sector.

It seems that requiring a commercial "small drone" license with appropriate insurance would cover the case of most small businesses.  Is there a gap caused by the hobbyist working on a potential product in his garage shop?

6.  In general, flying over someone's property.

This might be broken down into the types of property.  Flying over someone's open field (say for example at a large church on a weekday) is different than flying next to someone's window.

My Analysis of This Legislation

Googling didn't reveal the text of the proposed regulation. I've contacted Rep. Gooden for a pointer, but if you know where it might be please leave a comment!  For now I'm going by what has been reported in several venues. [4][5]
update: Rep. Gooden's office has provided a copy of the text.  It's online here: [1]

(in progress)


Suggested Language

Based on the previous sections, here are some suggestions for how to clarify the proposed legislation.

(in progress)


References

[1] http://www.legis.state.tx.us/tlodocs/83R/billtext/html/HB00912I.htm

[2] Erk. My home town, Berkeley, wants to establish a "no drone zone"
[3] Berkeley rejects proposal to ban drones

[4] Lawmakers Aim to Limit Drones and Safeguard Privacy

[5] Texas "Anti Drone" Laws Would be Toughest in USA
[6] Press coverage


Thursday, February 7, 2013

MakerBot Replicator 2 Notes

Very exciting, I was able to try out the new MakerBot!  Here's some notes on getting things set up.

Note: Replicator 2 uses only PLA.

I'll come back and revise some of the missing parts (e.g. the menu instructions) after  I get a chance to go through the steps again.


Power on (switch on rear right)

Load Filament

  • snake the filament through the clear tube, from the back
  • detach clear tube from printhead
  • select menu:  utilities/filament/load (left arrow is back)
  • feed filament into head
  • you will feel the feeder take over
  • let filament go until it touches the baseplate
  • push the M button to stop filament feed
  • attach clear tube to printhead
Printing from computer
  • attach usb cable; usb cable falls between the two tables, fish out through the middle
  • run makerware, get your model ready
  • click "The Replicator 2" button
  • advanced parms:  set feed travel to 60 cm/min (default is 80) for better results
  • select raft and supports if you need them
  • see notes below on detaching
  • do something to disable sleep or you will blow your print.  on our macs, push the mouse to the bottom left corner.
  • click print.
  • when the unit starts, it will draw a line of filament from the front left corner to the start of the model.  watch for that, if this filament line is bad cancel your print.  

Printing from SD card
  • fiddle with your settings as above
  • we're still pre-7 firmware, so save as S3D
  • use an SD card of 2G or less
  • put your card in the slot
  • menu: utilities/filament/unload

To Detach
  • the baseplate will detach, push the rear tab back
  • blue painters tape can be put on the baseplate to ease detachment
  • lightly sand the tape for better adhesion, so the melted filament doesn't move around
Wrapping up
  • log piece(s) in logbook
  • unfeed filament (menu:)
  • power off
And here's my first test piece!  It's a sizer for metric nuts and bolts.  No numbers printed in this version though.  Next up:  camera carrier for Bixler 2.

Monday, February 4, 2013

Turnigy 9XR Programming Cable

Here's the programming cable you need to hook up your 9XR to your computer's USB port.  It's actually called an "AVR programmer" and can be useful for other things -- some quadcopter boards and microcontrollers will use this instead of USB.

USBasp AVR Programming Device for ATMEL proccessors

Sunday, February 3, 2013

er9x: uploading firmware

Here's how to flash the er9x firmware to your Turnigy 9XR.  Basic steps:

(note: after you write the firmware, you will get a throttle alert message.  this is normal, since the calibration settings have been cleared from writing the new firmware.  recalibrate your sticks and all will be well.)

  • attach data cable.  You might need to download some drivers -- some notes on this are upcoming.
  • download a copy of the firmware from this page: http://code.google.com/p/er9x
  • download and install the eepe software on your computer: http://code.google.com/p/eepe
  • in eepe, use the "write flash firmware to transmitter" option
  • reformat eeprom memory (radio does this automatically)
  • recalibrate your sticks and voltage meter


Monday, January 28, 2013

Turnigy 9XR: Radio Calibration

You need to calibrate two things when you're setting  up your 9XR -- sticks and voltmeter.

Both are in the radio setup menu -- Click the left arrow to get there

Sticks and Pots  -- setup menu 5 will give you a three-step process to calibrate the sticks and pots.  Don't over-stretch the sticks, just move them along the axes for the full range of motion. Be sure and center the pots by moving the blue notches to the topmost position.

Battery Voltage -- if you have a multimeter, you can calibrate the radio voltage display on setup menu 4. Most of the screen displays internal register settings and is used for debugging, but the bottom item is used to calibrate the voltage.  Attach a voltmeter to your battery, and match the radio's voltage level to that of you voltmeter.  Back on setup screen 1, you can see the voltage alarm level.  For LiPo batteries, 9.6 is a good value.


Friday, January 11, 2013

Turnigy 9XR with modules

Here's some quick pictures showing how my current 9x modules fit into the 9xr.  This is the FrSky module with whip antenna.  This is the module that I anticipate using the most, so I'm happy to report that it's a perfect fit and the antenna is nicely positioned.  Laying the radio down flat isn't a problem.
 Here's the original FlySky module, the one you have to unsolder from the 9x when you first get it.  Case fit is good.  As with the 9x, it's painful to see the weight of the case resting on the antenna, although as a practical issue it doesn't seem to present a real problem.  I used enough epoxy to patch a battleship, so I'm not too worried about it.  I possibly might replace this module with a store-bought FS TM002 module, which has a profile similar to the FrSky module.
 Here's the FrSky with the patch antenna.  Super-happy with how it contours to the case.
The odd duck in the bunch is the OrangeRX DSM module.  It's a tight fit in the case, so I use my pocketknife screwdriver to release one of the tabs (update: fit has loosened up, so no problem now).  The module align properly, so there's no stress on the Tx pins.
I'm not sure why HK positioned the antenna connector the way they did, but it's not in a good position.  The radio basically pivots on the antenna.  I'm not too concerned about this, since I plan on getting the 9xr DSM module whenever it comes out. (update: I'm still using the module, and it's continuing to work well. No problem with the odd antenna position!)

Saturday, January 5, 2013

Aerotestra Hugo: New Features

 Sean stopped by with a few of his latest improvement to the Hugo.  First up: Ardupilot Mega!  It flies nicely with the default settings.

Also very nice, an external power switch for disconnecting the battery power.
 Here's a closeup of the APM 2.5 holder.  It's really nice... the unit fits into the holder snugly, the GPS unit screws onto the top, and the receiver velcros onto the bottom.
 And a sonar unit has been added.  It was an old Sparkfun unit that Sean had sitting around, model number unknown. We haven't configured the APM to use it yet.
 The USB cable fits nicely in the ventilation gap.  Sean's going to figure out something to attach to the cable to stiffen it up so it will be easier to plug in without removing the cover.
And it looks quite fine in its new case as well!