
Thursday, December 26, 2013
What's the wind look like?
Tuesday, December 24, 2013
Taranis Battery Notes

- The illustration is from the Taranis manual, which also notes that the operating voltage range is from 6 to 15 volts. You should read the manual.
- Don't charge anything but the stock batteries with the internal charger. Specifically, don't charge LiPo or LiFe with the internal charger.
- The Taranis originally came with 800 mAh battery pack. Currently ships with 2000 mAh battery pack. This battery pack is also available at FrSky dealers.
- On older models, charge light was solid. On newer models (the ones that came with 2000 mAh battery), charge light blinks.
- Internal charger shuts off automatically when battery is full.
- If you change battery types, update the voltage range and warning values on menu 1 of the radio setup screen.
battery high low warn notes
NiMH 800 mAh 8.0 6.5 6.5 stock battery on older models
NiMH 2000 mAh 8.0 6.5 6.5 stock battery on newer models
3S LiPo 12.6 9.9 10.2 need to make plug/adapter
3S LiFe 10.8 8.4 9.9 need to make plug/adapter
Superfly Tuning
Tram has some great advice on tuning a Superfly. Since RCG posts tend to get buried and lost, I'm copying it here.
tl;dr: 1/8 inch up trim for level flight.
I would definitely go with a CG that suits you. Any time a kit has a recommended CG, that's all it is - a recommendation. Some folks will fly a little more nose heavy, some folks will fly a little tail heavy.
If the plane is laying flat on a table, and the elevons don't have a little up at neutral stick, it's not going to fly as it should, as the nose is being pushed over due to aerodynamic forces.
All flying wings need a little reflex. Essentially "up trim" at level flight. Superfly's need about 1/8th inch.
I'm no Bernoulli, but as a wing develops lift, it naturally wants to pitch forward. What most aircraft use to counteract this force is the tail. Flying wings are missing this. So, a little up elevon (reflex) at the rear of the plane helps to counteract the force and thus, push the nose back up to attain level flight.
You said previously that your having to use half stick up to keep it level. Try adding some reflex and then adjust from there.. Lay the plane flat on the table and give it 1/8" to start. You may have to add more. Once this is accomplished, the aircraft can be subjected to the "dive test" to find true CG state and adjust accordingly.
Dive test:
From level flight at typical cruise trim, enter into ~30* dive.
Let the airspeed build a bit and let go of the sticks.
If the plane pulls up sharply you're nose heavy.
If the plane pulls up nice and slow, the CG is pretty much spot on.
If it stays where it was or increases the dive angle you're tail heavy.
Sunday, December 15, 2013
My Favorite RC Pilot


HobbyKing PUMQ Notes

- Using the Cesco PUMQ V4 build. Build as Leonardo, ran and connected to MultiWiiConf with no problems.
- Micro prop balancer here.
- Easy way to remove micro props using side cutters.
- Attach micro props with white glue or clear contact cement after roughing up the shaft. Don't use super glue.
- Interested to try BradWii and see how the autotuning works.
- The battery connector is placed pretty inconveniently, with the battery cable hard to hold. It would be nice if the connector were on the edge.

Results of first indoor flights.
- PIDs seem OK, but it's super sensitive on pitch and roll. Added about 60% expo which smoothed it out a little, but I'm hoping to get something close to Ladybird stability.
- Climb was super hard to control, couldn't keep it level very easily. That could be because I was flying it indoors and didn't have a lot of space to get used to it.
- Bound the Rx using an OrangeRx 6 channel Rx, using the OrangeRx module.
- Popped a prop. Will attach as per above.
- Calibration reminder: ACC right stick down, left stick upper left, GYRO left stick lower left.
Nice Looking Paint Finish on Foamies

747pilot covered his EPP Skywalker with Krylon Shortcut. He mentions "Dries fast. Full set up in a few hours. Just don't use any type of tape on it afterwards. Tape control surfaces or whatever prior. You can find it mostly at Michaels crafts store."


Neither posting has any mention of the weight of the paint.


Saturday, December 14, 2013

Royal Aeronautical Society Library Catalogue

This catalogue lists over 100,000 items held in the library, including books, journals, technical reports, regulatory material, images, letters and manuscripts. Please click the button above to start browsing, and do not hesitate to contact our expert librarians if you require assistance. Contact details and library opening times can easily be found within the catalogue."
http://aerosociety.cirqahosting.com
Sunday, December 8, 2013
Jason's Homebrew APM Transmitter

I hope Jason will say some more about it later (note to Jason: no more prestigious venue than EastBay RC!); I was really impressed. Custom electronics and code, a nice 3D printed case which felt nice in my hands, a really nice job.
He didn't know it, but it's the same glorious yellow color as the old Kraft radios!
CME Minutes, Nov 12, 2013

Concord Model Engineers
MONTHLY MEETING MINUTES
Nov 12, 2013
ATTENDEES: 24 GUESTS: 0
Wednesday, October 16, 2013
HobbyKing 9XR Pro Notes

Product link
- 9XR Pro (Mode 2)
- 9XR Pro (Mode 1)
- (if you're not sure of the mode, get Mode 2)
Interesting Notes

I've set up this page to collect information about this great development.
(update 31-Jan-2014)
Some more details from Brent:
- Haptic buzzer
- Firmware and models updated through the SD card, so no USB driver problems.
- The Frsky DJT telemetry plugs into the Futaba connector ,and all the Data is displayed on the LCD screen , as well as spoken voice alerts.
- 0.7 watts of Audio output
- Extra connections for user add-ons like Bluetooth and a rotary encoder.
Brent provides some notes on the board and enhancements. It will be pretty neat if the unit can be connected to the computer via bluetooth instead of USB! Brent also mentioned that he's encouraging Hobby King to sell higher end gimbals as an upgrade option.
It has "real" keyboard switches and even a gold plated pcb... looks real nice.
Connectors for adding a Rotary encoder , Bluetooth module and a external telemetry COM port connection. Just plug and play.
(update 11-Nov-2013)
Brent provides some notes on power and physical packaging:
It uses a 5V ,1.5A switching main regulator, which supplies power to the 3.3V 1A Linear regulator.
There is no co-processor , it was replaced with a dedicated RTC chip.
There is also a switched battery connection on the Futaba port , for powering external accessories , the port can also be easily hacked to provide a telemetry connection for older FRsky RF modules.
The Pro is a Sky9x re-designed to fit in the 9XR, There are spots for a I2C connection , rotary encoder , Haptic , Bluetooth Com port , 1 wire Com port, and a couple of spare control inputs.
The biggest problem was shoehorning it all to fit in the limited space inside the 9XR , and have spots and room for the connections.
Preliminary information:
- Cortex M3S8 based, audio processor, designed for hacking.
- will be in 9xr case, with same gimbals.
- entire radio expected to be priced less than what the Sky9x board sold for, sub-$100.
- Sky9x designer Brent Nelson ("SkyNorth") is doing this in cooperation with HobbyKing.
- Expected by "Christmas" (LOL if you remember the 9xr Christmas craziness!).
- Won't be compatible with the 9x form factor.
SkyNorth summarizes:
- It uses real Tact switches , and has support for a Rotary encoder , and a Haptic buzzer
- Built in USB socket and micro SD card slot , full sound / voice output , RTC + battery backup , 5V - 1.5A Switching power supply,
- Battery capacity monitoring, Hardware support for telemetry connections. (RS232 or logic level) through 5 pin RF connector. There is also a spare switch input , and spare A/D channel and a second PPM output and spare serial ports for future hacking , such as the addition of a Blue Tooth module.
- It will definitely raise the bar on the entree level radios , and allow a lot more people access to the Advanced (ARM) versions of the Open Source firmwares (er9x and OpenTX)
- It will also provide a great working platform for the DIY'ers wanting to build their own radios.

Here's some details on the original Sky9x. Note that this was an add-in board for the 9x, so some of the features will change. This should still be a good start for understanding some of the capabilities of the 9XR Pro.
- Atmel SAM3S Arm Cortex M3 32 bit Microprocessor (256K EPROM , 48K RAM , 64Mhz)
- Built-in USB port for loading new firmware and to access the SD card as a Mass storage device.
- Connector for LED Backlight , with software dimming control
- 1/2 Watt audio amplifier with 8 Ohm Speaker Output and support for a headphone jack
- 4Mb EEPROM provides on board storage for 20 - 40 models depends on software used.
- Support for Koycera 64x128 LED backlight LCD
- Two , internal RS232 Serial communication ports with support for external 2.5mm jacks..
- FrSky Telemetry can hook directly up to board (no convertors needed)
- Micro SD Card Socket for Sound , Model and Telemetry logging / storage.
- One , TTL Serial Port , for hookup to a Bluetooth Module , Like RN-42
- Hardware PPM , PXX output .
- Haptic Output connector
- AVR Co-Processor , ATtiny167 AVR , provides 12 more I/O channels and provides RTC (Real Time Clock) functions , with on board 3V Lithium Battery
- On Board CR2032 Lithium Battery Holder
- On Board Current Sensor monitors the current being drawn from the battery , and stores the amount of mAH used up.
- 5V Linear Pre - Regulator supplies the Main LDO 3.3V Linear Regulator. For better heat management , and a 5V Switching Regulator Upgrade is available for using 3S Lipo batteries
Tuesday, October 8, 2013
Minutes, Concord Model Engineers, October 8, 2013

Concord Model Engineers,
MONTHLY MEETING MINUTES
October 8, 2013ATTENDEES: 18 GUESTS: 1
Sunday, September 22, 2013
Taranis OpenTX Elevon Mixing

It's a pretty straightfoward procedure:
- mix the elevator stick on both channels. The value will be either 50% or -50%, depending on how your servos are set up. If the control surfaces move in the wrong direction, swap the sign.
- mix the aileron stick on both channels. The multiplex parameter will be "add", and the values will also be 50% or -50%. Proper motion: when the stick moves left, the left control surface should raise and the right control surface should lower. Vice versa for moving the stick right.
Here's some notes on how elevon mixing works:
http://eastbay-rc.blogspot.com/2011/05/v-tail-mixing.html
http://eastbay-rc.blogspot.com/2011/05/elevon-v-tail-mixing-calculations.html
Here's my mix. Yours should be the same, possibly swapping out the positive/negative values.
Ch 2 Ele 50%
+= Ail -50%
Ch 3 Ele -50%
+= Ail -50%
Tuesday, September 10, 2013
Concord Model Engineers, September 10, 2013

CONCORD MODEL ENGINEERS
MONTHLY MEETING MINUTES
Tuesday, Sept. 10, 2013
CALL TO ORDER: 7:30 pm ATTENDEES: 21 GUESTS: 2
MEETINGS
Monthly meeting, Second Tuesday, 7:30 at Concord Airport Terminal.
Friday Fun Fly, Third Friday, 7:00 - 9:00 pm.
Gym at the Church of the Nazarene, 1650 Ashby Dr., Concord
This month's Fun Fly is on Friday, Sept. 20. Chuck won't be there with the collection bucket, so it's Free Fly Friday!
Thursday, September 5, 2013
Some Hovercraft Notes


There's even a hovercraft folk song. Who knew!
Tuesday, September 3, 2013
Small JST Connectors

- JST-XH is 2.5mm pin spacing (same as 0.1inch for all practical purposes)
Not micro size but very common. Used in most balance plugs on LiPos and is the "standard" header spacing in many electronic components including PCs. The standard Futaba/JR style servo plugs are this spacing. - JST- ZH is 1.5mm pin spacing
Used in the Spektrum AR 6300 system and a compatible DSM2 Rx from DelTang (DelTangs are available with all 3 connectors). - Molex PicoBlade is 1.25mm pin spacing.
Used in Futaba, FlyDream, Walkera and the new Hobby King Micro (DSM2) 2.4G systems. The HobbyKing 1.7 and 2.2g Servos have this connector. The 2 pin version is used on the PZ bricks as a battery connector. - JST-SH is 1.0mm pin spacing.
Used for servo connection in Spektrum AR6400 "Brick" and the HobbyKing SuperMicro (not DSM2) systems. Most linear servos have this connector.
Monday, August 19, 2013
Report from the Walt Muciano Fly-In

"Walt's designs were simple to build and flew well. Ideal for kids in the 1950s and 1960s to enter C/L flying for less than $10. Still great fun for us Old Guys in their senior years! But nowadays, more like $70.


Those are some nice looking planes!
Wednesday, August 14, 2013
Night Ops Success!


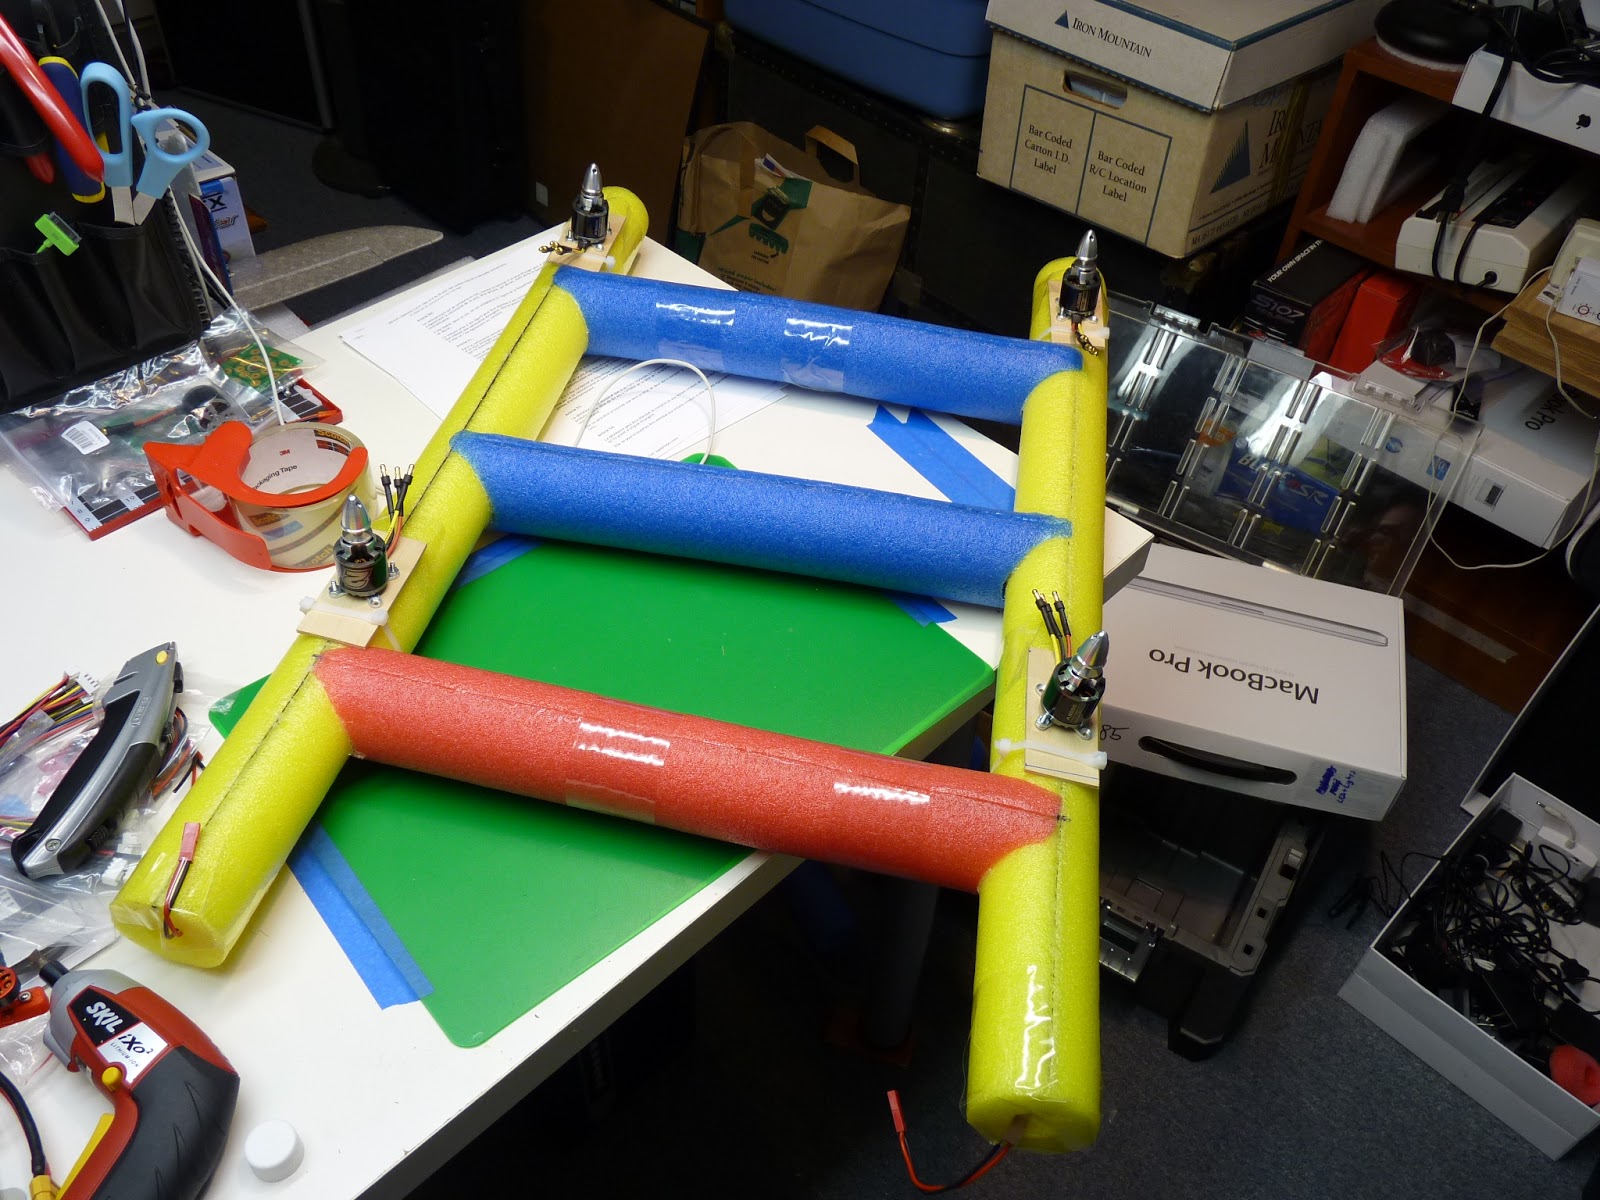
Update: Don't cut battery slots in the noodles! An unmodified noodle has some pretty reasonable torsion strength, but with slots cut into it it developed a lot of twist. I put two CF struts across the top to compensate.
 Happy Test Pilots! It was our first night testing, so there was a bit of stress involved. But not to worry, everything worked out well. Hooray!
Sunday, August 11, 2013
DIY Handheld Hot Wire Cutter
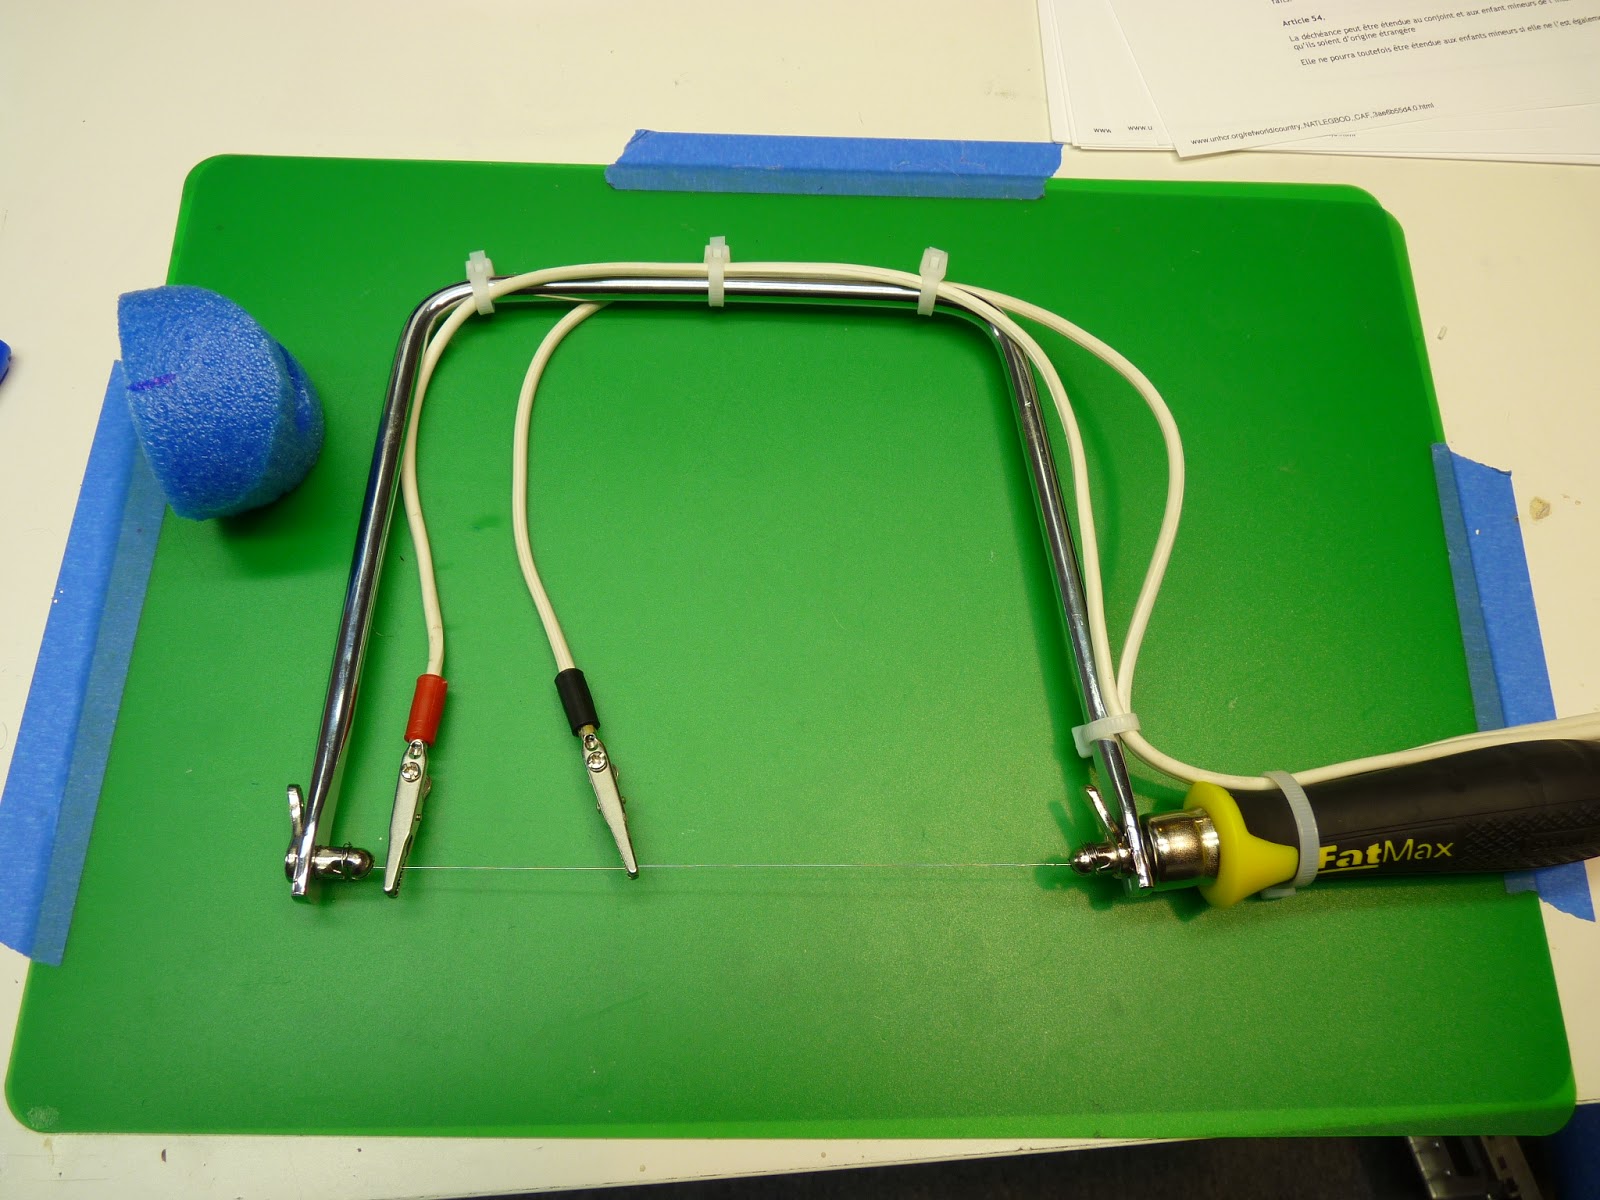

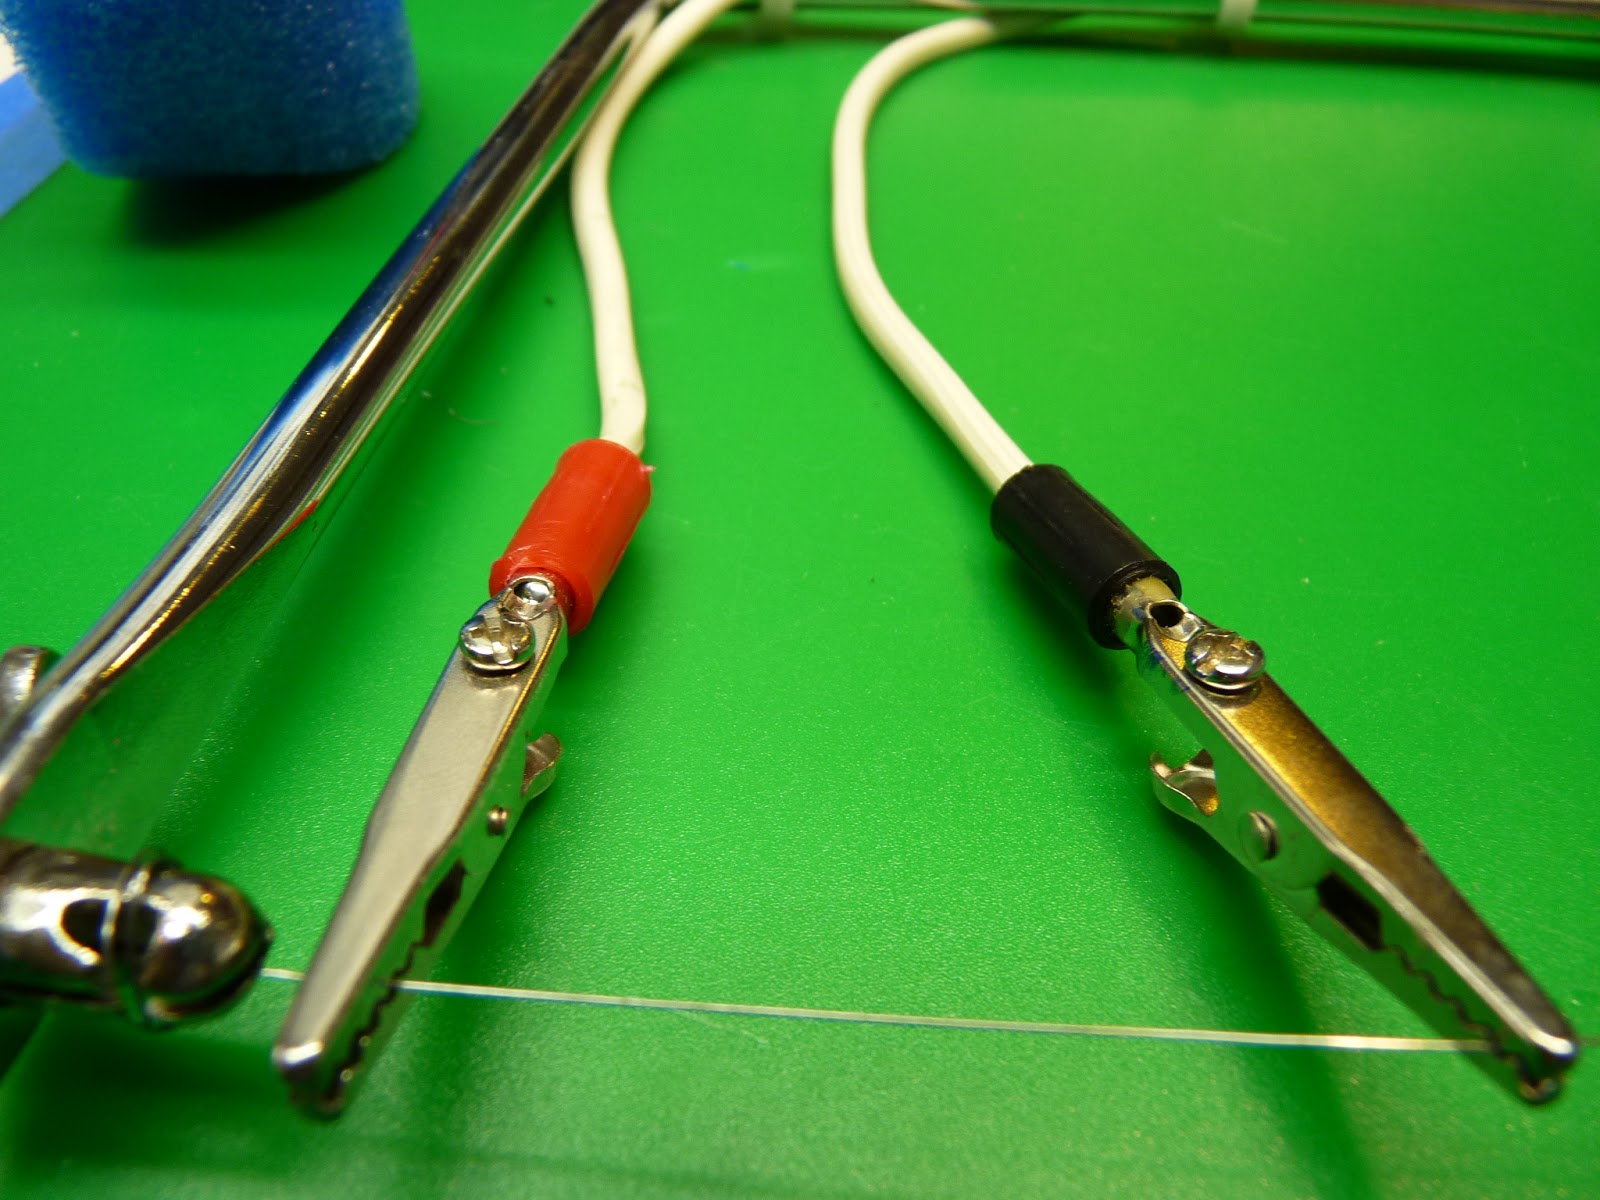

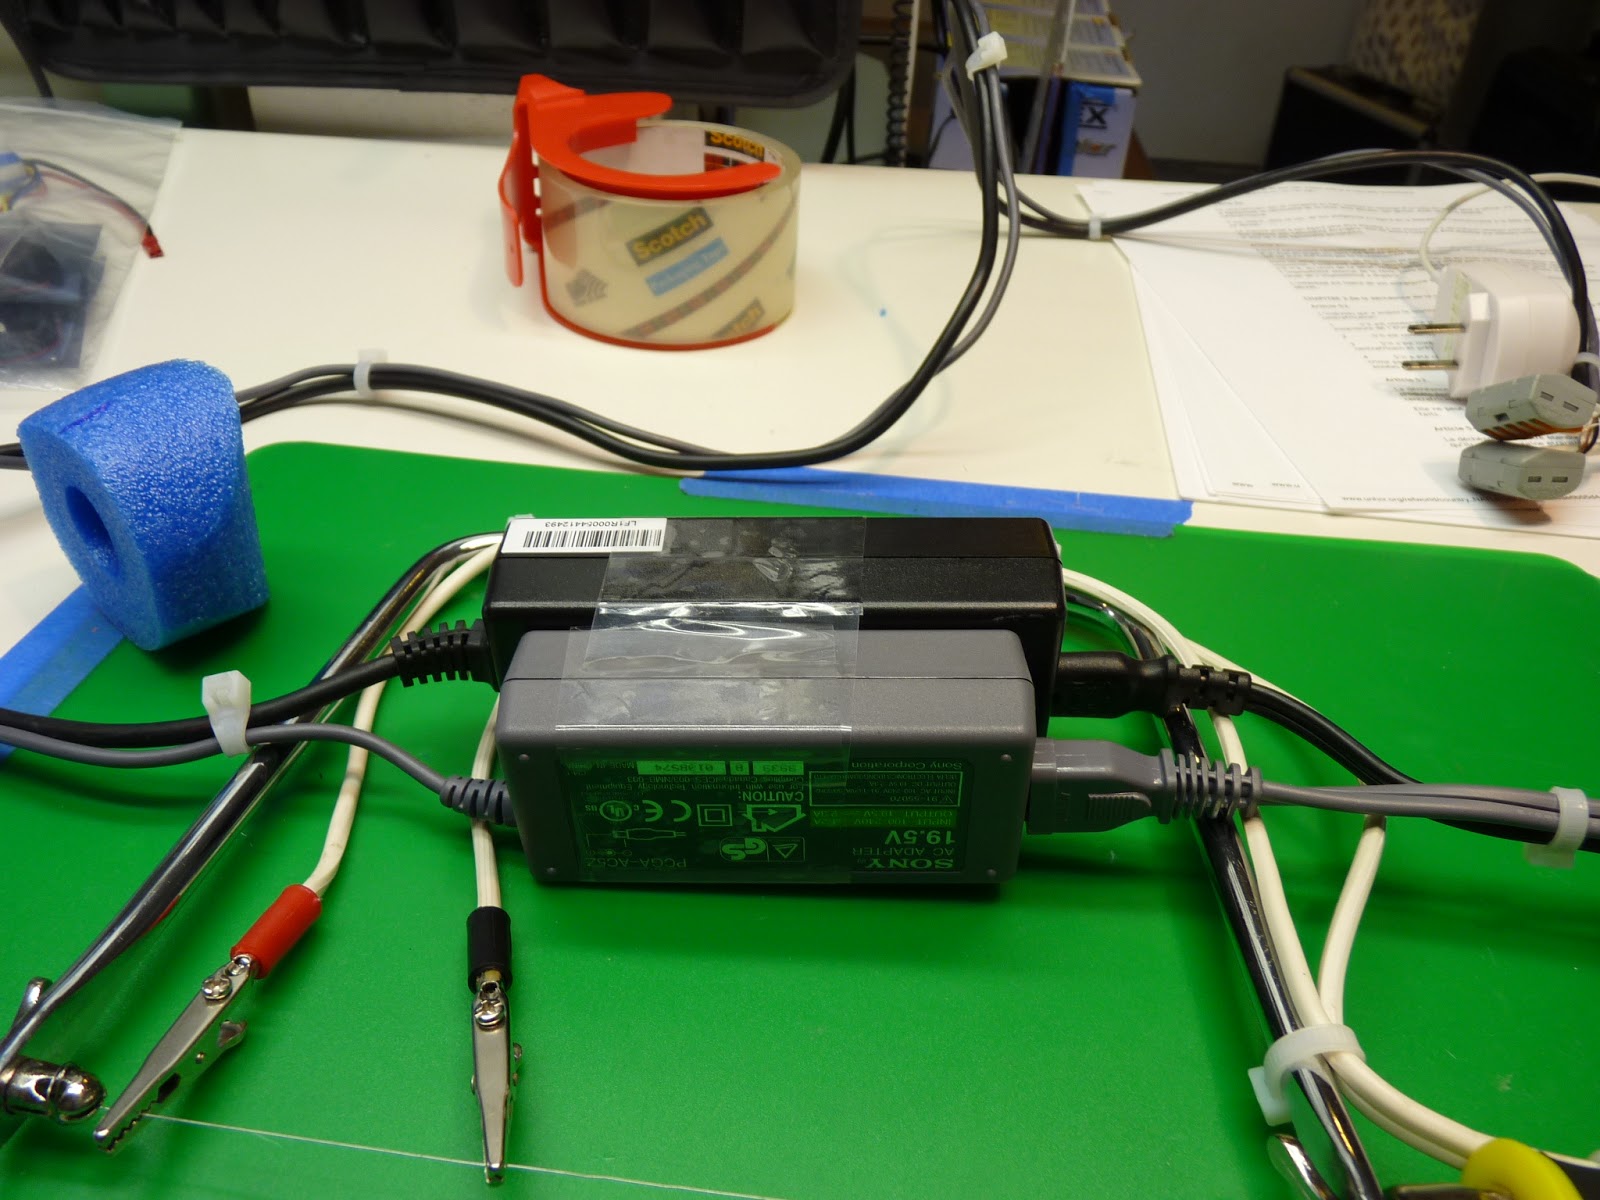

I'm still hunting around for a better power supply.
I'm going to try cutting out some flat wing surfaces by clamping the coping saw in the jaws of a Black and Decker Workmate.
Taranis Failsafe

- All FrSky receivers have failsafe
- For X family receivers, set using model menu #2
- For older receivers (e.g. D family), use the older failsafe method of pressing the button on the Rx.
Taranis and X family receivers have three failsafe options:
- hold last input. Don't ever use this one, it's almost always the wrong thing to do.
- no pulse. Some autopilots can be configured to handle this as a signal to start processing their own failsafe logic.
- custom. This allows you to set the value of each servo channel. When the Rx loses contact, those values are set for each channel. When contact is resumed, control is turned back to the Tx.
While Binding or doing anything with your Rx/Tx, be sure and disable your props.
To set Taranis/X family Rx Failsafe
- bind the Tx/Rx if not already bound.
- on model menu 2, select Failsafe mode: custom
- click [SET] to proceed to the failsafe menu.
- For each channel, set the appropriate failsafe value.
- save the failsafe value which Long-Enter.
To set Non-X family failsafe
- bind the Tx/Rx if not already bound.
- move the sticks into position.
- push the failsafe button on the Rx. You will see a double-blink of the LED.
- you can repeat this operation. each time sets the failsafe anew.
To clear failsafe on any FrSky Rx
- rebind the Rx.
Verify your Failsafe
- do all configuration with props off.
- bench test several times.
- test in the air under controlled conditions.
- do these enough times to build up confidence in the failsafe operation.
Related FrSky Failsafe Videos
FrSky: Binding and Setting FailSafe: http://www.youtube.com/watch?v=kV4T968HHPM
setting failsafe starts at 1:16: http://youtu.be/kV4T968HHPM?t=1m16s
Setting Ardupilot Failsafe FrSky: http://www.youtube.com/watch?v=r7B0Sfyb6Uo
autopilot failsafe starts at 4:58: http://youtu.be/r7B0Sfyb6Uo?t=4m58s
Saturday, August 10, 2013
Neat looking foam model, CNC cut in sections


Thursday, August 8, 2013
Taranis Binding - External DSM2 Module

tl;dr: activate the module using the model configuration screen.
- power off Tx.
- pop off module cover on back.
- insert module, be careful that the pins line up.
- snap the module into place.
- power on Tx.
- go to model configuration menu 2
- set Internal RF Mode to OFF.
- Set External RF Module to PPM, CH1-8, 22.5ms, 300u, - (minus sign)
Now you're set for normal DSM2-style binding. I've got a LemonRX receiver ready to go.
- power off Tx, Rx
- insert bind plug on Rx bind port.
- power up Rx
- You should see a fast blink.
- press and hold the module bind button.
- while continuing to hold the module bind button, power on Tx
- wait a few seconds
- the module will beep, and the radio will slow blink, indicating successful bind.
- remove bind plug.
Wednesday, August 7, 2013
Taranis Binding

tl;dr: there's not a bind button, it' on the model menu.
- If the Rx is in an aircraft, disable the prop!
- Start with Tx, Rx off.
- Press the bind button on the Rx.
- Keeping the bind button depressed, power on the Rx.
- The RX will show a solid red light.
- Turn on the Tx. There's no bind button to press.
- Go to model menu #1.
- Select the bind menu option.
- The Rx will blink to confirm the bind.
- The Tx will beep to confirm the bind.
- Unplug and replug the Rx.
- Everything should be bound!
Tuesday, August 6, 2013
Taranis/OpenTX: Programming Custom Switches

So I thought, why not have the radio break itself in... if nothing else, it would be a nice way to fiddle with custom switches and get that figured out.

It moves the sticks around pretty well. I'll let it go for a couple of hours and see if it helps the centering.
BUT, the important thing is that it's a good example of using custom switches.
Here's how to set this up.
First, we need to cover a bit about Custom Switches. A custom switch is a logical or virtual switch that can take on a value of -100 or 100, similar to a two-position physical switch. You define logical rules defining when the switch is on or off. You can typically compare two values... one stick is higher than a certain value, a telemetry value is lower than some limit, etc.
So, if we create a custom switch like this:
CS2 CH01 > 100
then Custom Switch 2 will be 100% when channel 1 is more than 100% (counting the scaling).
Now let's make a channel that will flip off and on:
CH15 (+110%)CS1
R (-110%)MAX Switch(CS2)
R (+110%)MAX Switch(CS3)
And finally, let's look at the channel controlling the servo:
CH01 (+100%)CH15 Slow(u0.8:d0.8)
Once CH01 is all the way down, then CS3 becomes true, setting CH15 to +115% by its third mix rule. This causes CH01 to be set to +115%, but of course it takes .8 seconds to move to that value.
CS1 is necessary to kick things off. If CH01 is not outside of the range -115% to 115%, then CS1 will be either false or true depending on the values of CH01 and CH15. The actual values of these channels don't matter... if CH01 is less than CH15, then CH01 will start moving down and eventually cause CS3 to become true. Otherwise, CH01 will start moving up and eventually cause CS2 to become true. In either case, the logic picks up as above.
Whew, that's really hard to explain in words! Think of it like this:
- When starting out, CH01 and CH15 may be random. CS1 handles these cases, and sends CH01 to -115% or 115%.
- When CH01 is less than -100%, CS3 kicks in and sends CH01 to 115%
- When CH01 is greater than 100%, CS2 kicks in and sends CH02 to -115%
Here's the final result. Thanks to w4kac for proofreading assistance!
Mixes:
CH01 (+100%)CH15 Slow(u0.8:d0.8)
CH02 (+100%)CH16 Slow(u0.9:d0.9)
CH03 (+100%)Rud
CH04 (+100%)Ail
CH15 (+110%)CS1
R (-110%)MAX Switch(CS2)
R (+110%)MAX Switch(CS3)
CH16 (+110%)CS4
R (-110%)MAX Switch(CS5)
R (+110%)MAX Switch(CS6)
Custom Switches:
CS1 CH01 < CH15
CS2 CH01 > 100
CS3 CH01 < -100
CS4 CH02 < CH16
CS5 CH02 > 100
CS6 CH02 < -100
Monday, August 5, 2013
Taranis/OpenTX APM Mode Switches

tl;dr: Create two 3-point curves with the specified points. Mix onto channel 5 switches C and D using those curves.
Upcoming: adding voice notification!
CH05 (+100%)SC Curve(Curve 1)
(+100%)SD Curve(Curve 2)
Curve 1, type: 3 points (17,50,83)
Curve 2, type: 3 points (-100,0,0)
Tuesday Miscellanea


Left Front/Right Back=Motor Wires=Blue(-)/Red(+)=CW
Right Front Back=Motor Wires=Black(-)/White(+)=CCW
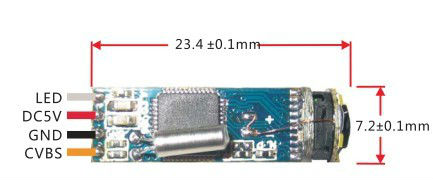
.4g camera module on AliBaba. "It can used for FPV Models,RC toys ,flexible video endoscope. Medical Video-scope, inspection camera,Industrial Video-scope, oral camera, fish-camera,under-water camera, Robot camera and so on. "
If you do the DIY endoscope, feel free not to let this blog know!
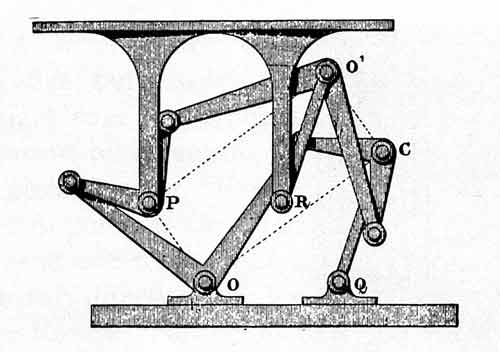
Kinematics of Mechanisms from the Time of Watt over at Project Gutenberg. I love these old things!

Subscribe to:
Posts (Atom)