Wednesday, November 9, 2011

HobbyKing KKBoard Notes

For $25, I couldn't resist getting one of the Hobby King V2 KKBoards. The minimalist elegance of  3 gyros, 3 pots,  and 4K of AVR Assembler speaks to me! KapteinKuk is one of my favorite RC people!


Programming Instructions

Dadde87 has everything here.  Note that his programmer connection diagram is mirrored from how a lot of people think about the connectors.  I've written down my connector interface below.


Programmer

Using this USBASP AVR Programmer purchased from EBay seller egochina8848 designed by fischl.de. It's usbasp in KKFlashTool.

      (BUMP on top)
MOSI NC   RST  SCK  MISO    <-- looking at pins
VCC  GND  GND  GND  GND


KKFlashTool

Flash Tool is here.  Be sure and flash the "1 Sec Clock Test" and see if the LED blinks once per second to ensure you're AVR programmer is working properly.


My Connector

I took two servo wires and cut one end off, leaving the female plugs.  I attached male servo pins to each of the wires on the other end and covered them with 1.5mm shrink tube.  You can do the same thing with a servo extension wire.  I attached the servo plugs to the six pins of the board (white wires towards the motor pins, and with the right plug labelled), and inserted the individual pins into the programmer as per the notes above.  Once I tested the unit I put a piece of 7mm shrink wrap around the wires near the single male connectors to help keep them in the holes.


Monday, November 7, 2011

MultiWii Camera Test

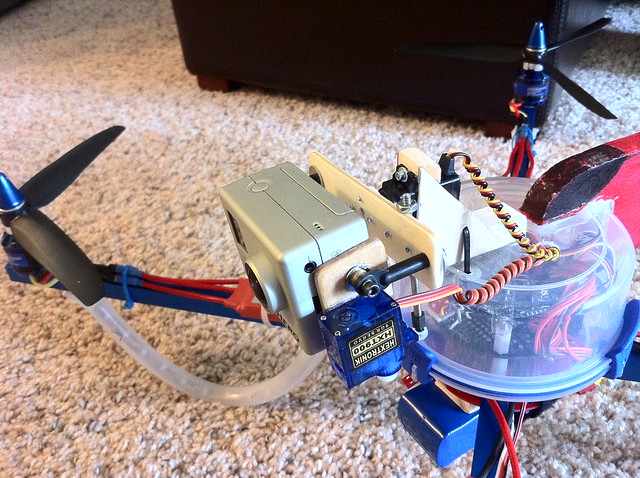
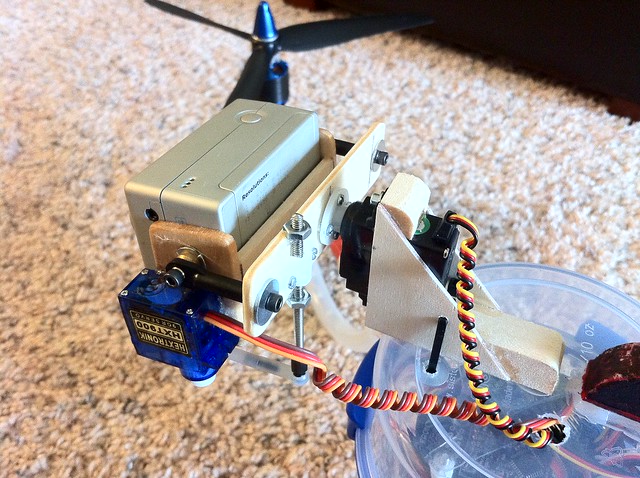
So, I've been wanting to try out the camera stabilzation features on the MultiWii controller, and prompted by an interesting camera stabilization link from my friend Craig I went ahead and put a quick prototype together.  I had been waiting to put together something like this nice gimbal;  I'll get to that soon, but in the mean time here's what I did with hot glue and spare parts sitting around.  There will be lots of jitter with this design, but we'll see if the roll and pitch adjustments are close.
I started by configuring the MultiWii software (notes below) and enabling stabilization in MultiWiiConf.  To hold the camera, I noticed that the Radical RC quad motor mount was the perfect size to hold a GoPro.  By using a clamp while CA'ing the joints (careful not to drip!) I was able to get enough of an angle so that the camera fit snugly enough so that for testing I didn't have to use any other mechanism to hold the camera.
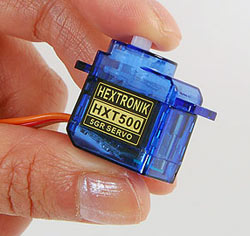
I used two 9 gram servos to make a two-axis gimbal.  Note that this isn't the final plan, but for quick prototyping it's hard to beat, taking about 15 minutes to assemble everything after 30 minutes of fiddling with various parts trying to figure out what fit best where.
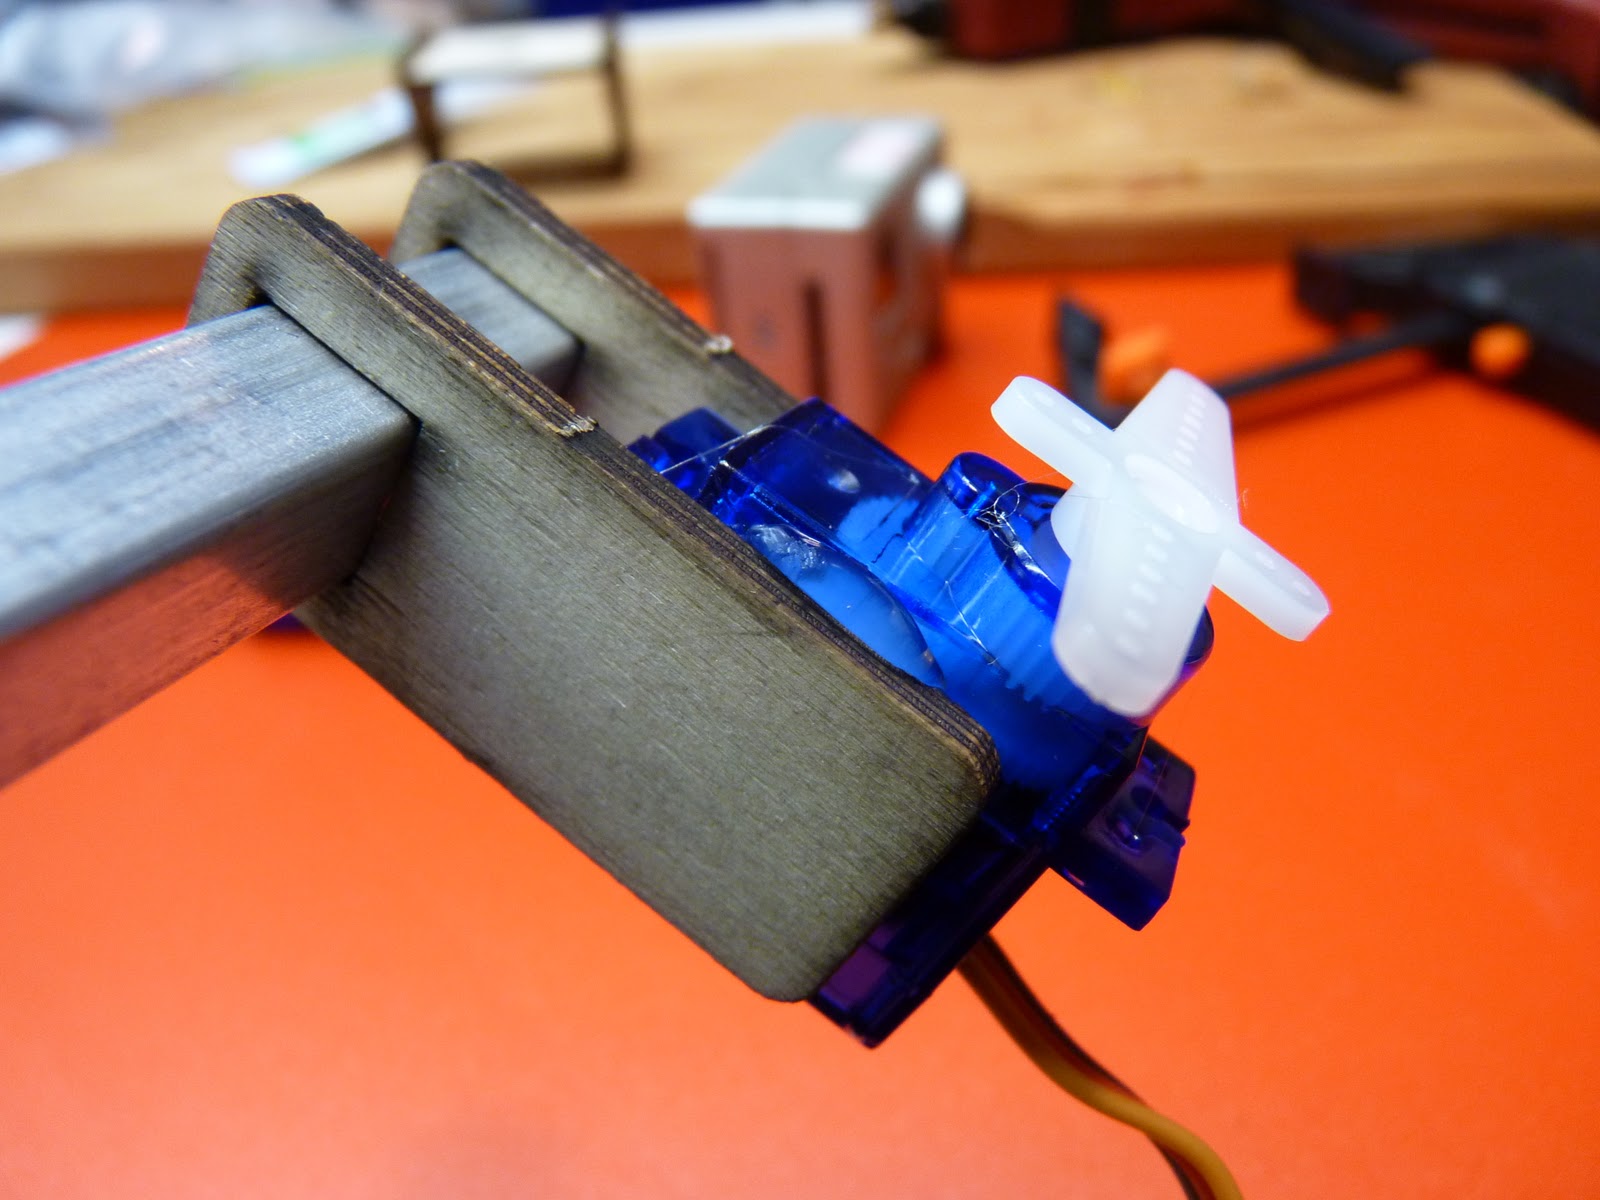
I sandwiched one servo between two Radical RC boom mounts and fixed it into position with hot glue.  Put the mounts on the boom and it will be easy to align.  Be sure and use the high temperature setting on your glue gun or the plastic servo body won't stick very well.  Attach the cross-shaped servo arm for maximum surface area to attach the second servo.  Don't forget the screw!
Remove any labels and then hot-glue the second servo onto the  servo arm.  It should be perpendicular.  If you get it wrong, you can clean up the glue joint with rubbing alcohol and try again.
Finally, attach a cross-shaped servo arm to the second servo and hot glue it to the camera mount.  Be sure and check your alignment; my first attempt was very crooked and I had to redo it.
Here's what the mount looks like when it's attached to the rear mounting arm of Arcticopter IV.  I put it in the back so that the Arcticopter arms would appear in any test videos to show the real motion of the unit.


Here's a couple of videos showing the result.  The first one is an overview.  The second is from the GoPro pointing at my iPhone, and the third is from my iPhone pointing back at the GoPro.

Overall I'm pretty pleased with the results.  Ignoring the jitter resulting from the horizontal extension, the camera stays remarkably still.  I need to adjust the rates a little in the software, but it's pretty close as it is.  I had expected the most jitter when pitching down (resulting in the camera moving up); I was a bit surprised that the major jitter was the opposite... the servo would attempt to move the camera downward, gravity would pull the camera down, causing the servo to push back up.  Repeating this through the pitch movement set up an oscillation that really forced the jitter.

Although I must say that if the Arcticopter were moving around like this in flight and if I were the pilot, the last thing to be concerned about would be camera jitter!

Overview video:

Making sure the gimbal motion would clear the mechanism:

Stabilized view from the GoPro, with appropriate jitter disclaimers:

Another view, from the workbench:

Configuration Notes.  If one of the servos is going backwards to how it should be, make the TILT parameter negative.


MultiWii_1_8_patch2 $ diff config.h-orig config.h
66c66
< //#define SERVO_TILT
---
> #define SERVO_TILT
74c74
< #define TILT_ROLL_PROP    10
---
> #define TILT_ROLL_PROP    -10
103c103
< //#define BMA180
---
> #define BMA180

In MultiWiiConf, enable camera stabilization in all modes.


Crazy-J's rather nifty GoPro gimbal

This gimbal is what I'd like to make.  Like everything he does, it reeks of awesomeness!

http://www.bayrc.com/boards/viewtopic.php?f=50&t=8380


"It is using a HXT 9gram servo for pitch, and a HS85MG for roll. Essentially, I built a basswood cradle that fits the GoPro snug and then created a pivoting system around it. The cradle is reinforced with .5oz fiberglass cloth and thin CA. There are two Dubro 4-40 ball links that screw into 4-40 blind nuts installed in the cradle. The 4-40 ball links are the pivoting point for the pitch axis. I don't get a whole lot of pitch movement, but that can be changed easily if I want to. The whole system without the camera weights less than 3oz (just a guess, it might be less!)."
Update: here's the new gimbal from diydrones.

Night Vapor Improvements

Some nice Night Vapor improvements mentioned on RCG:

  • prop twisting -- if you're not getting good thrust, twist the 5x3 prop to restore the pitch.
  • upgrade to this beautiful 5x3 CF prop from bsdmicrorc.com.
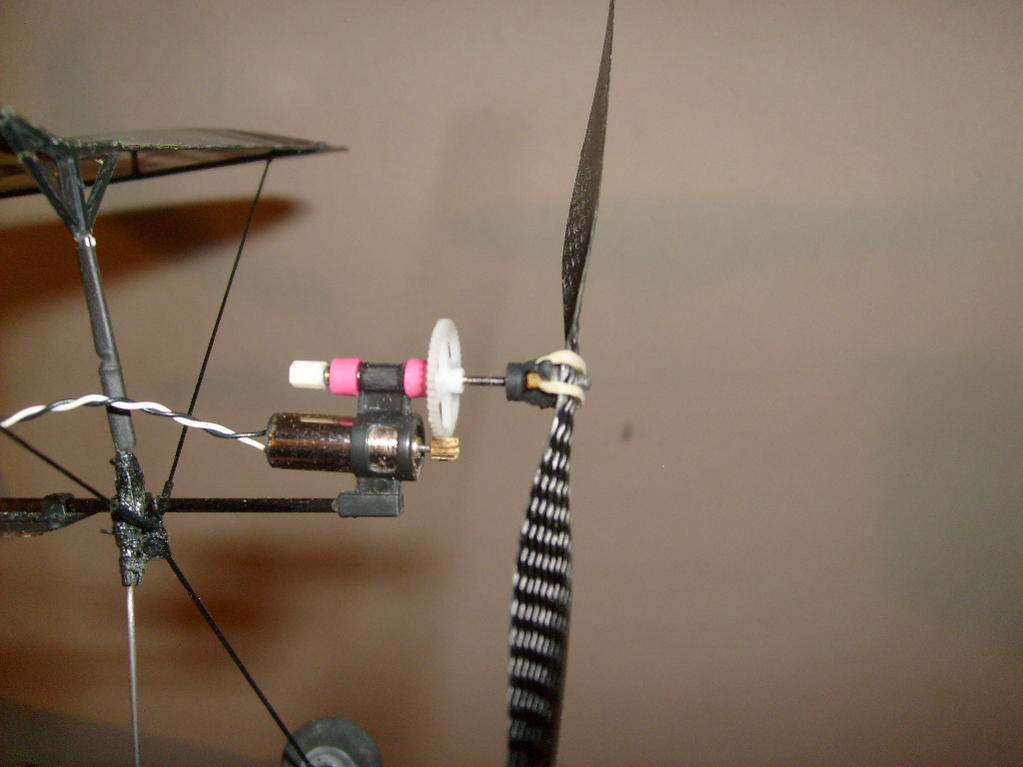
  • upgrade to an Ultra Micro J-3 Cub motor.  You will need to extend the wires but otherwise it's a direct swap.  You will be able to hover and pull out.
  • add .5mm CF supports to front rod and elevator.


Thursday, November 3, 2011

Arcticopter IV indoor maiden

Got everything put together and tuned.  For the video, I had my iphone sitting on its side on the landing next to me, so I had to fly in the ground effect to keep it in frame.  I had stabilization on, and it handled quite nicely I think.


MultiWii with gyros and accel.  About 9.5oz without batteries.


Wednesday, November 2, 2011

Encyclopedia of RC Foam

Some Vendors

  • rcfoam -- EPP 1.3#, EPP 1.9#, Deppron, XPS, carbon and other materials.
  • Dollar Tree -- 36x24 6mm sheets from Adams, with paper.
  • Model Plane Foam -- top quality Adams foam, without paper.


Types of Foam

Here's a summary of various types of foam used in RC modeling.  I'm no expert in this area, so let me know of any inaccuracies.  Thanks to TP16 and RogueTitan on rcgroups for some of the material below.  This is a work in progress.  If you have more information or more types of foam leave a comment below!

First, a few definitions:

Expanded foam is melted and injected into a mold.

Extruded foam is cast as large blocks and cut into sheets.  In real life this foam is often used as building insulation.

Polystyrene, Polypropylene, etc, are different types of materials with different characteristics regarding weight, strength, flexibility, etc.  Wikipedia discusses them at a level of detail far beyond my freshman chemistry class.

And the foams:

EPP a.k.a. Expanded Polypropylene.very durable sheet material, bounces well, holds up to rough treatment.  Very floppy, so needs to be reinforced. comes in densities of 1.3 and 1.9 pounds per cubic foot.  Typically sold in sheets up to 24x36 inches, in 3mm, 6mm, and 9mm thicknesses.


Depron. Sheet foam, very stiff but much easier to break than EPP.  Easy to cut and sand, comes in white, gray, and black.  Used in Europe as flooring base.


Depron Aero.  even lighter than depron.  Popular in competition indoor pattern flyers.


Elapor. Trade name for Multiplex's EPP foam.  The Easy Star is made from this and is renowned for being a durable model.


Z FoamFrom Horizon Hobby, this is a proprietary reinforced foam construction method.


Blue Core, Pink Core, etc. Extruded Polystyrene.  Sold in home improvement stores in sheets of various thicknesses.  The color depends on the manufacturer.  Lacks beads and is generally sandable and shape-able.

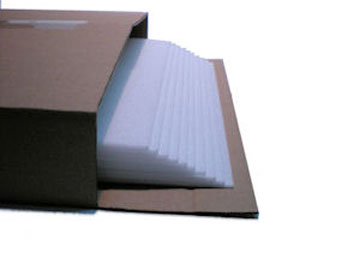
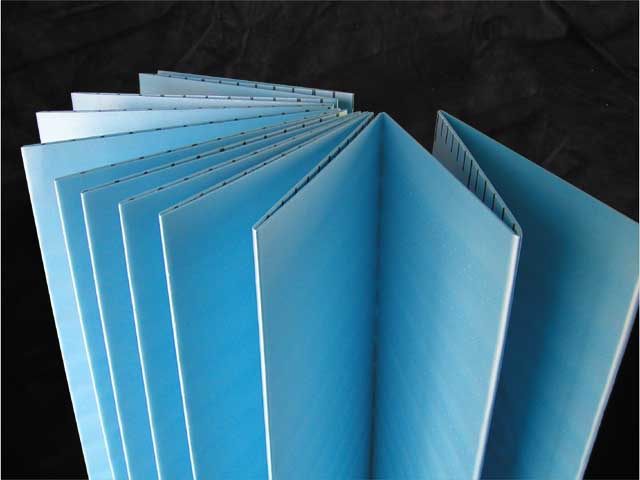
Fan Fold Foam, aka FFF.  The same material as Blue Cor, but in 1/4'' thick 2 feet x 50 feet sheets, fan-folded every two feet.  Cheap and popular for scratch-built models.  Between EPP and Depron in terms of strength and flexibility.  You can see here that it's labelled as being Extruded Polystyrene.


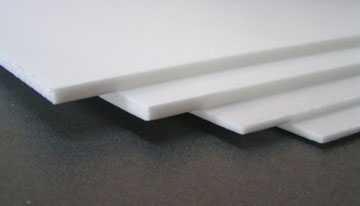
Dollar Tree Foam Board, a.k.a. Rediboard. 3/16'' thick, 20x30 inch. Sold at Dollar Tree stores for $1 each.  Official product name is ReadiBoard.  Flimiser than FFF, but easier to get in warmer places where FFF is not stocked.  Reinforced paper backing on both sides, people usually remove it to reduce weight.  Spray with water or window cleaner, let dry, and the paper will peel off in one piece.  Elmers foam board is similar but heavier.


EPP, a.k.a. Expanded PolyPropylene. This is another sort of bead foam. Generally held to be some of the most durable stuff out there, it can be flexed and twisted without snapping. Because of this, it's got very low structural integrity so airframes have to be strengthened by other means such as CF or fiberglass. Comes in a couple different densities.


EPO a.k.a. Expanded PolyOlefin. Similar to EPS but different as well. It's reportedly stronger and has a smoother, more finishable surface.  Used by manufacturers such as FMS.

EPS a.k.a. Expanded PolyStyrene. This is your basic beer-cooler foam. Little white beads, various densities. Note that "EPS" is also occasionally used for Extruded PolyStyrene, which is a different material entirely. Still foam, but made by -you guessed it- extruding rather than expanding.

Daemon on RCGroups notes:


EPS is easiest to do injection molding. EPO is trickier (and varies from manufacturer to manufacturer). EPP is a real pain (requires a lot more vents in the mold, which create all those little dimples on the finished product). EPS can be the most rigid, but it's also the most brittle and hard to repair as regular CA and any solvent based glue totally dissolves it, and foam safe CA has various limitations. It's the worst around heat, so can't use iron on covering and if you crush it or bend it, it stays crushed and bent.

EPP is the least rigid per weight, but is totally bounceable, does not dent or scratch and not all that hard to stiffen up with some added stiffeners (carbon ribbons and tape). EPP is the most resistant to heat so can take any covering.

EPO is a mix of the two, so it has more rigidity per weight than EPP, and it can bend more like EPP, but still will dent or scratch. If it's a "good" EPO (Skywalker EPO, or Multiplex Elapor), it can be repaired with regular CA (creates a nice chemical bond that's stronger than the foam itself), and you can take the dents and scratches out and straighten bent or crushed foam with proper application of heat (165-170 degree water or steam). Have to be careful when applying iron on coverings (Monokote,
Ultracote, Laminating film) to not overheat the foam and puff it up.


blogodex = {"toc" : "foam", "idx" = {["suppliers", "EPS", "EPO", "Depron"]};

Tuesday, November 1, 2011

Theraband Data

Here's a thread on RCGroups where jackerbes goes into great detail about using 1/8'' slices of blue Theraband to make high quality prop savers.

Sparklet follows up and shows how they make good vibration dampers for quad photography.  He uses it to attach two bolts together

It seems that ebay vendor drdcsupplies is the goto guy for retail quantites of Theraband.  At the time of writing it's $1.50/foot postpaid for yellow (thin), red (medium), green (heavy), and blue (extra heavy).

Full specs and info are on the manufacturer's page.  Here are the physical dimensions of each kind of tubing:


Color  Dimensions                      Part Numbers
Tan    .062 ID x .031 wall (.125 O.D.) #21010 #21110
Yellow .200 ID x .045 wall (.290 O.D.) #21020 #21120
Red    .200 ID x .057 wall (.314 O.D.) #21030 #21130
Green  .200 ID x .069 wall (.338 O.D.) #21040 #21140
Blue   .200 ID x .085 wall (.370 O.D.) #21050 #21150
Black  .200 ID x .098 wall (.396 O.D.) #21060 #21160
Silver .200 ID x .125 wall (.450 O.D.) #21070 #21170

Sunday, October 30, 2011

Some MultiWii links

Got the Arcticopter IV put together with the MultiWii, but couldn't get the MultiWii Conf to talk to the board.  Have to check with Andreas to see what's up with that.

Here's a few links.
Stick Controls
  • lower-left: disarm
  • lower-right: arm
  • lower-left / down: gyro calibrate
  • lower-left / up: accelerometer calibrate
  • up / up,down,left,right: accelerometer trim
Setup Notes

  • sticks should be 1095 / 1500 / 1905 low / mid / high

LiFe battery in Turnigy 9x

 Here's how the 1500 mAh LiFe fits into the Turnigy 9x transmitter.
 It uses the servo-style connector.  From the left, it goes black-red-empty.  I put a sticker in so I won't forget it.
There's plenty of room inside the battery compartment.  I put the wires on the right side.  The cover fits on very easily now!

GoPro FPV Setup (cables)

Output cable is: 2.5mm 4-pole jack
From inside, connections are: ground, video, audio, unused
yellow: video with shield (ground) , white: audio with shield (ground)
connecting to servo plug:

  • two grounds together, to servo black ("ground")
  • video, to white/bronw ("signal")
  • audio: to red ("power")

Two versions of off-the-shelf cables from ReadyMadeRC:


Nice tutorial from RCTestFlight:


Friday, October 28, 2011

The Servo Database

Truly the Internet has everything!  Everything you ever wanted to know about servos.

Wednesday, October 26, 2011

APM carrier for Hawk Sky and related planes

Inspired by the new Bixler Accessory Chassis on diydrones, I thought I would tidy my own setup and make my own adaptation for the Hawk Sky.  I haven't quite finished it but it looks promising enough to write up, and I think something similar would work on other models with a front hatch.

I cut the horizontal top plate using the opening as a template.  I just cut the cardboard "close enough" and then traced the opening directly onto the cardboard.  I used scissors for the cutting.

 I then did the same for the forward and rear risers.  I attached the three pieces with epoxy.  I positioned the pieces on the plane and then spread the adhesive on the front and back joints.  I used enough so that the joint didn't need any extra reinforcing.  Note that the fuselage opening bends down towards the front.  I attached the top plate to the front riser in such a way as to keep the top plate level.
 I tried a couple of different ways to attach the APM.  What eventually worked best was a cardboard carrier  bent to the appropriate size and hot glued to the top plate.

I cut some holes to run wires, see the ABC lights, and reach the reset button.  I attached the xbee and GPS on the top plate with velcro.  I didn't make a GPS mount like diydrones did; if I have reception problem I will do so.
 I uncased the Turnigy 9x receiver both to save weight and get clearance for the battery.  I replaced the standard 3-wire connectors with single wire connectors.  Later I'll get the rectangular 6-way connector and use that instead of multiple single wire connectors, but it doesn't seem to be a problem for now.
 The unit sits on top of the battery.  With the receiver case removed, there's just enough clearance for the 3S 2200 mAh 15C battery.  I velcroed the reciever on the bottom and hang the antenna wire out the side.  That's roughly equivalent to what I've been doing and haven't had a problem so far.  I provided some strain relief for the antenna by hot gluing it onto the board.
c
AUW for the unit with velcro is 13.3g. Still to do:  put some magnets to hold everything down, velcro or otherwise attach the APM to the lower carrier, and attach the pitot tubes.  I'm hoping to attach the tubes to the carrier if I can.

I'll update later when I've applied the finishing touches and gotten the thing into the air.

Spherical flyer from japan

Amazing spherical flyer from Japan Defense Dept.  350 grams, 42cm diameter, made from off-the-shelf components costing about $1,400.  Hobby King, get busy!


Saturday, October 22, 2011

Thursday, October 20, 2011

Sugru: repairing DX6i charger port

Another note to Sugru about repairs.  This to my DX6i where the charge port had busted loose.

Here's a simple, unglamorous repair that saved me time, money, and the expense of being without a radio transmitter that I use frequently.

The battery recharging port had worked its way loose, due to a crack in the groove that holds the connector in place.  It's a standard sized connector that's available at any local electronics
store, but it turns out this particular piece is a nonstandard size and can only be replaced by sending the unit in for warranty service.

I was actually opening the case each time the unit needed to be charged; in addition to being inconvenient, I was worried that the wires attached to the case would undergo more stress than they were designed for and might work their way loose.

I considered using epoxy, but then the connector would be permanently bonded to the case, and if it ever went bad I would have even more work to put things right.

The sugru worked perfectly; the connector is held very tightly and resists the pressure when the power cable is attached;  and if I should ever need to remove the connector, the Sugro can be easily scraped away with a small blade.

The work took about 10 minutes including opening and closing the case, and I let the Sugru cure overnight before testing, so I didn't have any downtime related to the repair.  I didn't bother making it
pretty since (a) there wasn't a lot of room for my fat fingers, and (b) with any luck it will be many years before somebody has to look at the inside of the case again.  I guess if it ever gets stolen I'll have the perfect identifier -- my fingerprints permanently embedded inside the case!

And the package of Sugru was so much cheaper than the shipping cost of returning the unit to the manufacturer (via tracked mail) I'm money ahead as well!

Thanks again Sugru, you've saved me time and money!

Sugru: repairing macbook feet

I recently bought a package of Sugru.  It's neat stuff and I'm happy with the results, so I sent them a note and picture to their gallery, and reproducing it here.

For some reason I seem to be pretty hard on the plastic "feet" on the bottom of my macbook pro.  I've busted three of them right off and the fourth was looking pretty dodgy.

So, I popped the fourth one off and replaced them with sugru feet.  I used one package of black sugru, divided it into five equal pieces and reserved one piece for an unrelated repair. The remaining four pieces I shaped into chubby "coins" the same size as the original feet.  Underneath the feet the case is open to the inside, and I wanted to be careful not to fill up the guts of the computer by squishing the Sugru through the holes.

Using pressure around the edges gave a nice convex surface and ensured a good bond with the case, in addition to keeping the Sugru on the outside of the case.  After it looked like all the feet were pretty equal, I put a bit of soapy water on a flat tabletop and set the computer down for a second or two to make sure everything was level and the unit wouldn't rock.  I turned the computer over to let the Sugru cure.

The Sugru is working much better than the original plastic feet. In addition to being a lot more sturdy, the grip of the sugru on a desk or tabletop is excellent.

And as a bonus, my macbook pro got much quieter!  I had not realized how much of a loud hum the disk drive made with the missing foot.

Thanks Sugru, I don't know what else would have worked so well!

Tuesday, October 18, 2011

What's a "400" size motor?

I've seen this specification mentioned many times and couldn't ever find out exactly what it meant.  A quick query on rcgroups and all has been revealed!

Here's the original Graupner Speed 400. It was one of the original brushed electric motors when they started to be introduced.

Sunday, October 16, 2011

DragonPlate Carbon Fiber

These guys look like the Leonardo Da Vinci's of the CF world... every possible formulation of CF: sheets, rods, trusses, tubes, core sheet goods, with a gorgeous mirror finish.

Friday, October 14, 2011

Motor Balancing

Not just props, you should balance your motors too:


EasyStar upgrade

(Oldie but goodie... I typed this in and didn't publish)

Here's some notes from Andreas on some mods he has made to his EasyStar.  (It's interesting how we met:  he lives about 5 minutes away from me in our little town; he dropped me a note after reading a comment I had left on rcexplorer.se.  I've worked with one of his old neighbors for almost 10 years!  It's a small and crazy world!)
  • To really make the Easystar fast, you need a brushless motor, esc and lipo. I just used the equipment from the first helicopter I wrecked. Original propeller fit too. With that power I can fly in any wind with no problem. Performance similar to this rocket.
  • This is a full mod-project but I did not find any structural re-enforcement necessary:
  • The Easystar's rudder is too small. Especially once you add more power. I found this credit card trick the simplest and very effective.
  • All hinges should be replaced with real plastic hinges instead of just bending the foam.asdfa
  • Also the center of gravity is often too far aft, even on stock EasyStar. Must add enough weight on nose to make it controllable. So I think it can lift a lot of weight (FPV, more electronics for your autopilot etc).

Update:  I've done all these and they make the EasyStar a very nice flyer.  I changed to a Hawk Sky for the ArduPilot platform.

By The Numbers: LiFe batteries

Lithium Iron Phosphate (aka LiFe, LiFePo, LiFePo4) batteries are most often used in RCLand for transmitters.  They're safer than LiPo, since they don't emit oxygen during rapid breakdown leading to combustion.  Lots of chemical detail on wikipedia.

Here's the model that fits into the Turnigy 9X transmitter.  Use the servo-style connector to plug it in.  Note that there are two ways to plug it in: only one of them works; the other doesn't do anything.


Charge Levels

 1S   3S
3.3   9.9  nominal voltage
2.8   8.4  minimal discharge
3.6  10.8  maximum voltage

Charging

You need to set your charge into LiFe mode.  Don't charge in LiPo mode. Bruce has a video here that explains how to do this on a standard 4-button charger. Here's the tldr for a typical 1500 mAh 3S:

Save Data / 01 / LiFe / 9.9 / 1500 / (hold start) / 1.0 / 9.9 / (hold start)
Save Data / pgm number / LiFe / voltage / mah / (hold start) / charge current / voltage / (hold start)


Thursday, October 13, 2011

xbee causing odd servo jittering in APM?


Here's an odd thing that happens in my office.  I haven't noticed it happening in the field.
  • when powered up, the servos constantly jitter
  • jittering seems to be going through the APM... note the period of time when APM is booting and jittering stops
  • jittering associated with 900MHz xbee
  • if the xbee is disconnected, no jittering
  • if I ground the xbee by touching the antenna, jittering stops

I'm curious as to the cause of this; partly to see if there's a problem, fix, etc, but mostly to understand what's going on. The primary practical issue is that the jittering noise seemed to make people nervous as they were looking at the unit.

update:  It seems to be noise from the radio.  There are quite a few postings on this in the diydrones forum.  Applying a ferrite ring on the cable between APM and xbee seems to be the recommended fix.