Wednesday, September 28, 2011

Flight Rules

From the Champ Thread:

1. Try to stay in the middle of the air - do not go near the edges of it.
2. The edges of the air include the ground, buildings, water, trees and people.
3. It is very difficult to fly near the edges.

Wednesday, September 21, 2011

Using a LiPo in a Turnigy 9X radio

Here's how I replaced the battery pack on my Turnigy 9X radio.  Andreas did it first... I just copied what he did.

It's pretty simple: cut the connector off of the original battery pack (the one that holds 8 AA cells) and solder on your favorite connector to the just-cut wire.  I picked JST because it was small and didn't take up much room in the case.
I used an old 3S 1800 mAh battery that I wasn't using for anything else.  A 2S battery will also work.  RC Model reviews has a popular article on swapping out the battery.  It's a comprehensive solution, and involves resoldering the motherboard.

The method presented here is a lot simpler.  You don't have to touch the main board, but you lose the low voltage beeper.  That means it's possible to discharge the LiPo battery below 3V/cell.  You just have to be careful at the start of the day to have the battery charged to 10V or more.
The discharge rate is about 0.1V/hour, so if you're charged to 10V or above, you will probably be OK.

Be careful when soldering your connector not to reverse the polarity.  There's no polarity protection on the motherboard, so if you get it wrong you'll fry your unit!

That being said, it's working well for me.


Update: the old battery I was using started having problems with one of the cells.  I didn't have another conveniently sized LiPo, so I replaced it with a LiFe battery from HobbyKing.  Notes on that are here:

http://eastbay-rc.blogspot.com/2011/10/life-battery-in-turnigy-9x.html

Update: Javio left me a great comment on diydrones that goes into detail on how the LM7805 voltage regulator works:


There is a little confusion about the best 2S vs 3S better battery for the 9X. If conceptually it is true that a bigger dropout voltage between input and output leads in a bigger heat dissipation, the 7805 regulator has been designed to give the best performances with a differential voltage between input and output of about 5 to 10V. With the 7,5V (from 6V depending on the model) minimum input required voltage (2,5V of differential dropout voltage between input and output for 7805) the output peak current can not be achieved (the regulator can´t work at full dynamic range). In fact the factory testings of the LM7805 are done with a typical input voltage of 10V. Following this lines, and assuming that the input regulator is a 78xx, a 3S Lipo battery should be a better candidate than 2S to power the turnigy 9X. You can check the Peak Output Current Vs differential input-output voltage characteristic in the figure of page 21 of the attached datasheet or the Droupout voltage characteristic googleing "7805".
This explanation does not means that a 2S is a bad option, but in this case the regulator won´t work at full dynamic range of its output current. By the way, looking the datasheets a dropout of 5 to 7V between input and output (corresponding to an input voltage between 10 and 12V) doesn´t lead in a significative amount of heat increase.
Cheers from Spain.
Javio


APM Success!

What a great day!  Launched the Hawk Sky with APM and took it into both stabilized and fly-by-wire-a modes.  Flew like a dream in both.  The FBW mode is surreal... no matter how you jerk the stick around, the APM controls the plane smoothly.  I used all the default PID values.

I'm rather ecstatic... there's been a lot of work and study to get to this point and to see it go so smoothly has been very gratifying.  Thanks to all who have helped me get this far!

Here's a quickie minimally edited video.  The hatcam ran out of battery before I got to FBWA mode, so I'll add that later.  I think the FBW mode might be ideal for FPV and AP, since it looks so smooth (at least from the ground).


This video is from a couple of days later.  Winds were high, gusting to 20mph, and the plane flew so smoothly in fly-by-wire mode.  I forgot the hat-cam, but grabbed the video with my iphone.  Just the fact that the wind could be blowing so hard and I could fly one-handed while working the phone impressed me!


APM Control Surface Tests

Hooray, got all the control surface issues figured out.  Here's a video of how things should look, and a few pointers.

  • In manual mode, do any reversing necessary on the radio.  APM just passes the signal through in this mode, so reversing via the software won't do anything.
  • Be sure you're not backwards on how ailerons move. See this page for full details.
  • Test in three modes: manual, stabilized, and fly-by-wire A.
  • In stabilized and FBWA, rudder will be mixed in with the ailerons.  Be sure pushing the aileron stick left produces left rudder.
Tomorrow, prayer breakfast and then flight!


A nice diagram for prop orientation

Which side of the prop faces forward?  It can be tricky, coz you can put the prop on backwards and still get the plane to go forward.

Here's the general guidelines:

  • Most props have the size molded in.  The numbers face the front of the plane, no matter if the motor faces front ("tractor" configuration) or the back ("pusher" configuration).
  • If you cut the prop in half, it will look like an airfoil.  The concave "undercambered" side faces the rear of the plane.  Think of it as an airfoil (which it is!) pulling the plane forward [diagram from rcgroups].
  • If you feel something "wrong" with the thrust and the electronics seem fine, land and check your prop.  There's a good chance you've got it backwards.
jj604 sums it up nicely:

'Why the hell they didn't just mold a big "FRONT FACE" and "<- ROTATION DIRECTION" on the prop is beyond me.'

Monday, September 19, 2011

LiPo Battery Voltage numbers


Some handy voltage numbers.


cells                   1S      2S      3S      4S      5S      6s
nominal voltage         3.7     7.4     11.1    14.8    18.5    22.2
absolute low voltage    3.0     6.0     9.0     12.0    15.0    18.0    
low voltage warning     3.3     6.6     9.9     13.2    16.5    19.8
maximum voltage         4.2     8.4     12.6    16.8    21.0    25.2
storage voltage         3.8     7.6     11.4    15.2    19.0    22.8

Sunday, September 18, 2011

Aileron Motion


Here's the aileron controls spelled out.  Apparently my brain constantly works backwards on this.  Ironically I do all right when flying, but when setting up I consistently get the ailerons reversed.

All directions are relative to facing the front of the plane.  I should therefore probably say "port" and "starboard", but there's even less chance I'll get that right.

Stick motion:

Move stick to left, left aileron moves up, right aileron moves down, right wing moves up.
Move stick to right, right aileron moves up, left aileron moves down, left wing moves up.
When left wing is too low, give right stick. left aileron down, right aileron up, left wing moves up.
When right wing is too low, give left stick. left aileron up, right aileron down, right wing moves up.

The same information in a table:


stick    left   right  roll
motion   aile   aile   motion
------   ----   ----   ------
left     up     down   right wing moves up
right    down   up     left wing moves up


wing     stick    left   right  roll
too low  motion   aile   aile   motion
-------  ------   ----   ----   ------
right    left     up     down   right wing moves up
left     right    down   up     left wing moves up


Andreas gave me this page which I'm guessing is from when he got his pilot's license.

Saturday, September 17, 2011

First Try with APM

First try with with the APM on the Hawk Sky.  Got everything up in the air in manual mode, but had problems when switching into stabilized mode.

Posted a note to diydrones.com, got some good suggestions which I'll try out this afternoon and follow up with.

Update: I had ailerons backwards, duh!


Sunday, September 11, 2011

John Bernard's Power Distribution

Via the CrashCast, an interesting way to solder up a multi-ESC power distribution system by John Bernard.  It uses a short length of brass tubing to splice the wires together.  It looks quite tidy, and Crash Hancock liked the results when he tried it out.

It's written up in a PDF here.

Thursday, August 25, 2011

Wireless Trainer Port

Saw this linked from RCGroups, but couldn't figure out who did it or where it's written up.

Basic Idea:

  • student's Tx is bound to the Rx
  • Rx has trainer cable wired to battery port
  • PPM signals feed into the trainer port from the receiver
  • For simulator, can power from USB

Monday, August 15, 2011

Motor balancing in addition to prop balancing

Old Man Mike posts an interesting note regarding vibrations.  Not only is prop balancing critical, but blade orientation plays an important role as well.  He says:

This chart shows that even with balanced props, there is a sweet spot for mounting that will provide a minimum vibration level. Without testing, it is very unlikely that a low vibration will be achieved and most likely the number will be at least two times greater than the minimum. It could even be much worse. One of the five motor/prop combination had more than 6 times times the minimum vibration for some prop positions and more than 4 times as much even just 45 degrees away from the minimum position!

It typically takes about 10 mins per motor/prop to find the minimum so it adds a bit of time to my quad builds. Since I'm somewhat obsessed with getting low vibration performance with my quads, I think it is worth the effort.

Anti-vibration fasteners

FrozenCPU.com has a lot of grommets, etc, designed to reduce vibrations from hard drives.  Could these be useful for mounting quad controller boards?

Some tiny Futaba Connectors

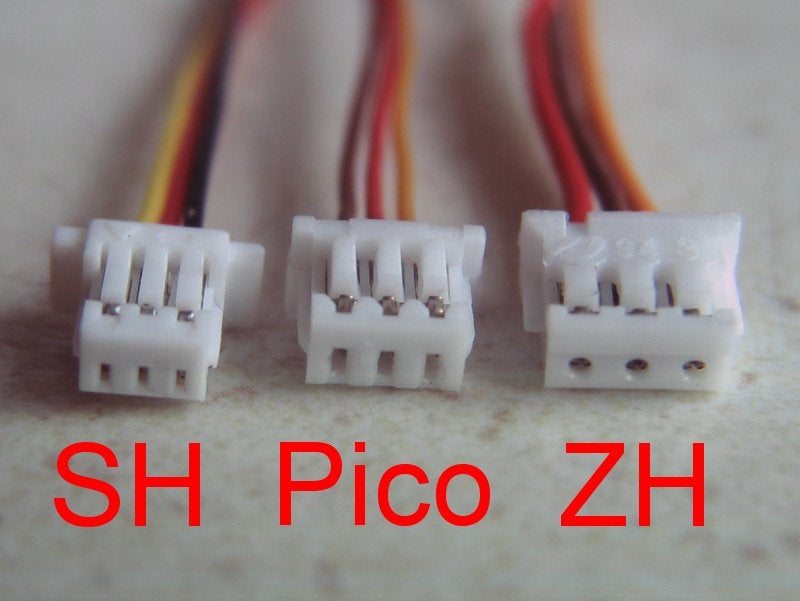
Coriolan ID's Futaba SH, Pico, and ZH connectors.

Every kind of micro connector imaginable.

rc-connectors.com has just about every small connector ever made, nicely arranged by model.  For example, here's a SMD nan-JST female 3-pin right angle piece.  Just what you need to make a green dot vapor brick AR6400 compatible!

EasyStar Brushless Outrunner

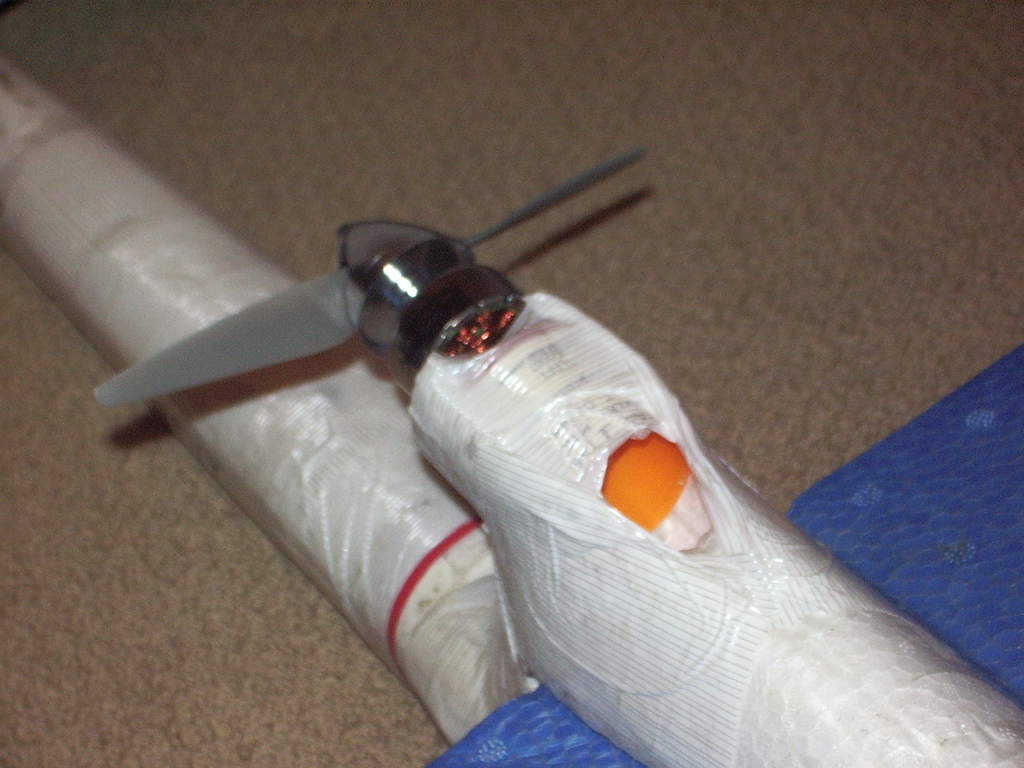
ScrtSqrl has a nifty method using a 30mm medicine bottle to mount a brushless outrunner.

Monday, July 18, 2011

Interesting battery wiring guide

Need to hook up batteries in parallel or serial configurations?  This page has a nice application that will show you just what you need to do.

All about lipo balance connectors

TJinTech has a great article on this, with lots of nice diagrams like this one.

TJinGuy's great website

Here's a website with lots of nice technical details.  Especially interesting are his articles on charging and RC / battery wiring.  Check it out!  Here's a sample of one of his wiring diagrams:

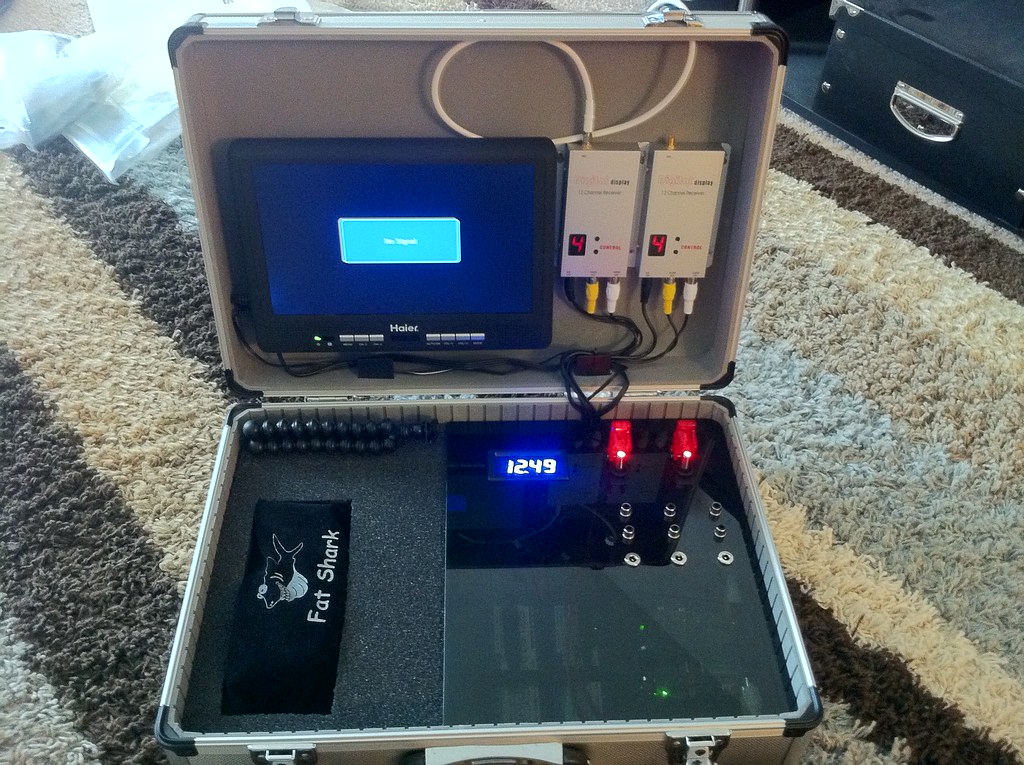
CrazyJ's new FPV all-in-one ground station box

Looks very nice! Self-contained, self-powered, includes a 10-inch monitor as well as fat shark glasses.

Details on RCGroups.

Beacon Foam-Tac Glue

Everybody says good things about this stuff... I'll give it try and see how it goes!  Purchase in at filadelfosrc.com.

They say:

Beacon Foam-Tac Glue bonds Depron, EPS, EPP, XPS, EPO, and many other kinds of foam quickly & cleanly. It does not attack/melt/dissolve foams, and when dry it remains flexible and clear. It's also great for bonding carbon fiber.
SUPER STRONG BOND - FOAM-TAC creates a super strong bond that is like welding the foam together. Make a Butt-Joint and you won't be able to find it later, stronger than the foam itself once it's cured.
LESS IS MORE - Always dries clear, simply apply a thin amount of FOAM-TAC to one side of the joint and gently press together. Pull the joint apart then press together again. That’s it. You don’t have to wait for the glue to get tacky.

My [note: this is filadelfosrc writing] own personal observations about Foam-Tac:
1. It's a thick clear goo, reminds me of shoe-goo in it's consistency, but a little thinner.
2. Even though it's thick, when you pull the bottle away, it doesn't have any stringys to deal with.
3. Once bonded, you will not see the seam line & have no idea that it was ever two separate pieces.
4. Even though it forms a strong & permanent bond, the glue remains flexible & clear. I have used it to re-attach a broken aileron, and the aileron
functions just as it did before re-attaching (I actually glued the aileron straight onto the wing, knowing that it would still flex after Foam-Tac cured).

5. The bottle instructions say it takes 10-20 minutes to form a strong bond, but in my experience it happens in as few as 10-20 SECONDS, so that may be a typo.
6. You don't need to use much glue at all, I use far less of it than if I were to use a foam-safe CA for the same task.... and there's no need for any
accelerator.

Resistor Mod, fix for Turnigy 9x trainer port

Many people have written this up, this page shows two different ways to fix, with nice photos.

Update: I modded my unit so the radio is purely module based;  This lets me just pop out the module, so I've lost interest in doing this.

Sunday, July 17, 2011

Trainer Switch mod for Turnigy 9x

Strangely, the 9x trainer switch operates differently than most radios.  By default, control is given to the student, and the instructor must pull the switch up to take control.

You can reverse the switch, but then you'll have one switch backwards for the infamous "switch error" startup mode.  (actually, I'm used to that mode now and rather like it!).

Here's a simple hardware mod using a spring and two pieces of plastic tubing to hold the switch in instructor mode.  It's from a video review by Thomas Lombardi. Trainer switch discussion starts @3:34, the solution starts @4:42.

Update: I installed er9x which allows the trainer switch to be set properly.

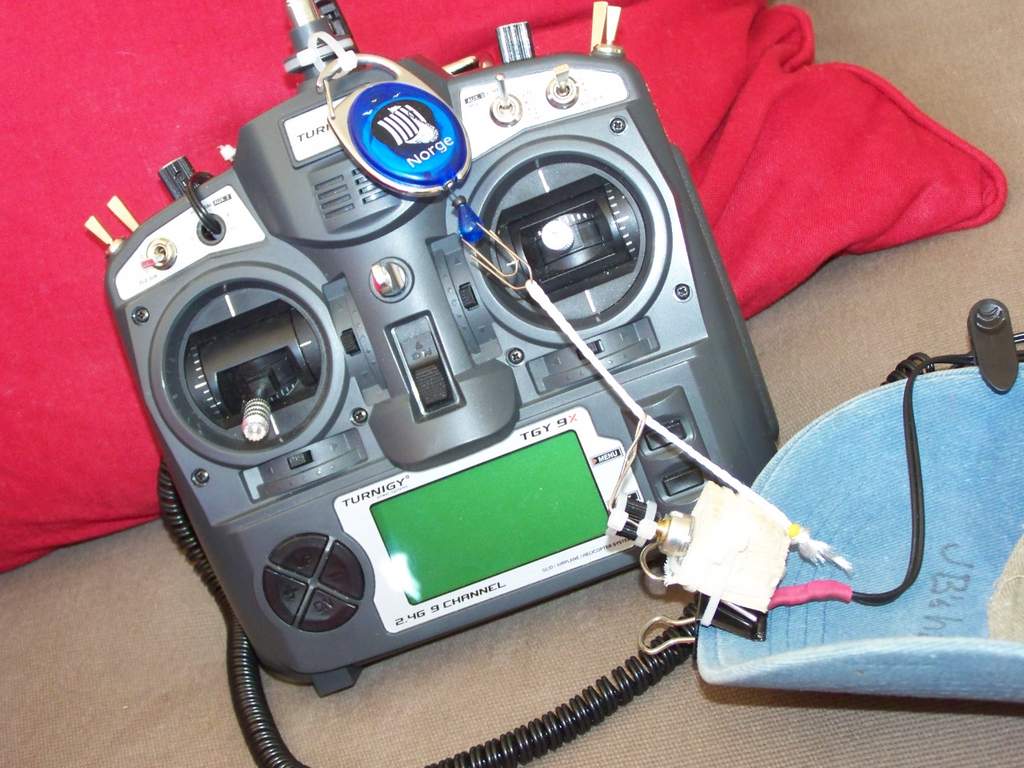
ScrtSqrl's cheap pan-only, crazy-simple, zero-drift Head Tracker

Here's the original CGroups link and an update where ScrtSqrl unveiled his nifty head tracker.  Genius!

Basic Idea:
  • take a control (e.g. flaps) pot out of your radio
  • extend the wires so it will reach your head
  • add a lever and attach it to your hat
  • add a bungee cord, attach to your radio
  • attach cam servo to appropriate channel (e.g. flaps) on radio
Now as you look at the radio, the servo will be centered, and as you move your head to the left or right the servo will follow along. Be sure and check out the update... there's a lot more information on his nicely portable FPV ground station.

Vimeo link: http://vimeo.com/925056

Sunday, July 10, 2011

A nice quad stand

Also, a pretty nice quad frame, the Dex.  It's the one that float on water.  From villagepilot on RCGroups.

Monday, June 27, 2011

ZipZepp: pro level AP platform

Need to move a camera from point A to B fast?
1)Aggressive engine thrust for quick deployment of camera systems.
2)Rapid reverse and powerful hover modes
3) High elevation operation. Designed and tested at over 8,000 feet.


Vendor: Monto RC

http://montorc.com/propellers.aspx

lots o' props, including CCW

RadicalRC Stinger Kit

I'm having a bit of trouble bending blogspot to my will regarding captioning and photos... I'll get some more words and pictures up shortly!

Here's the start of the Arcticopter 3, which will be as light and as small as we can make it.  After we get the full-size build flying reliably, I'll try trimming the arms down and see if it will still be stable in the air.