Here's a followup to my original Arcticopter III build log. I put an "experimental vehicle" label on one of the arms. In case it gets lost, I hope this makes it slightly more that somebody might return it or at least not mess with it. The frame is RadicalRC's Stinger kit with 600mm fiberglass arms. This is a great kit, cheap, flexible, light, and strong. Lots of accessory parts matched to the 10mm arms.
Motor: Hacker Style Brushless Outrunner 20-22L, 924 kV. Recommended by Davvid "dadde87" Windestål, and have been good performers both on this unit and the Arcticopter I.
Props: 10x4.5. MontoRC props have been really good so far and need minimal balancing. They're pretty stiff as well.
Battery: I've had good luck with Zippy 3S/2200/40Cs. flying sedately, 25Cs weren't too bad.
Weight: 714g without battery, 915g with.
ESC: Proton 18's from Exceed Rc. These are as far as I can tell the same pieces as the ATMEL Turnigy Plushes. I got them with the idea of reflashing them, but haven't yet done so. The power setup above maxes out at just under 10 amps on the bench, so for a while I was using a set of 10 amp ESCs, using the logic that full throttle for more than a couple of seconds would send the unit to points unknown. I felt better when I saw Warthox using 10 amp ESCs!
Here's my APM2 board. I've mounted it on an "Eastbay Standard" foam mount, which allows me to move controllers between frames easily. You can see some mounting holes in the foam, but strapping it down with velcro works well enough for testing.
Look here to see how I cover the electronics.
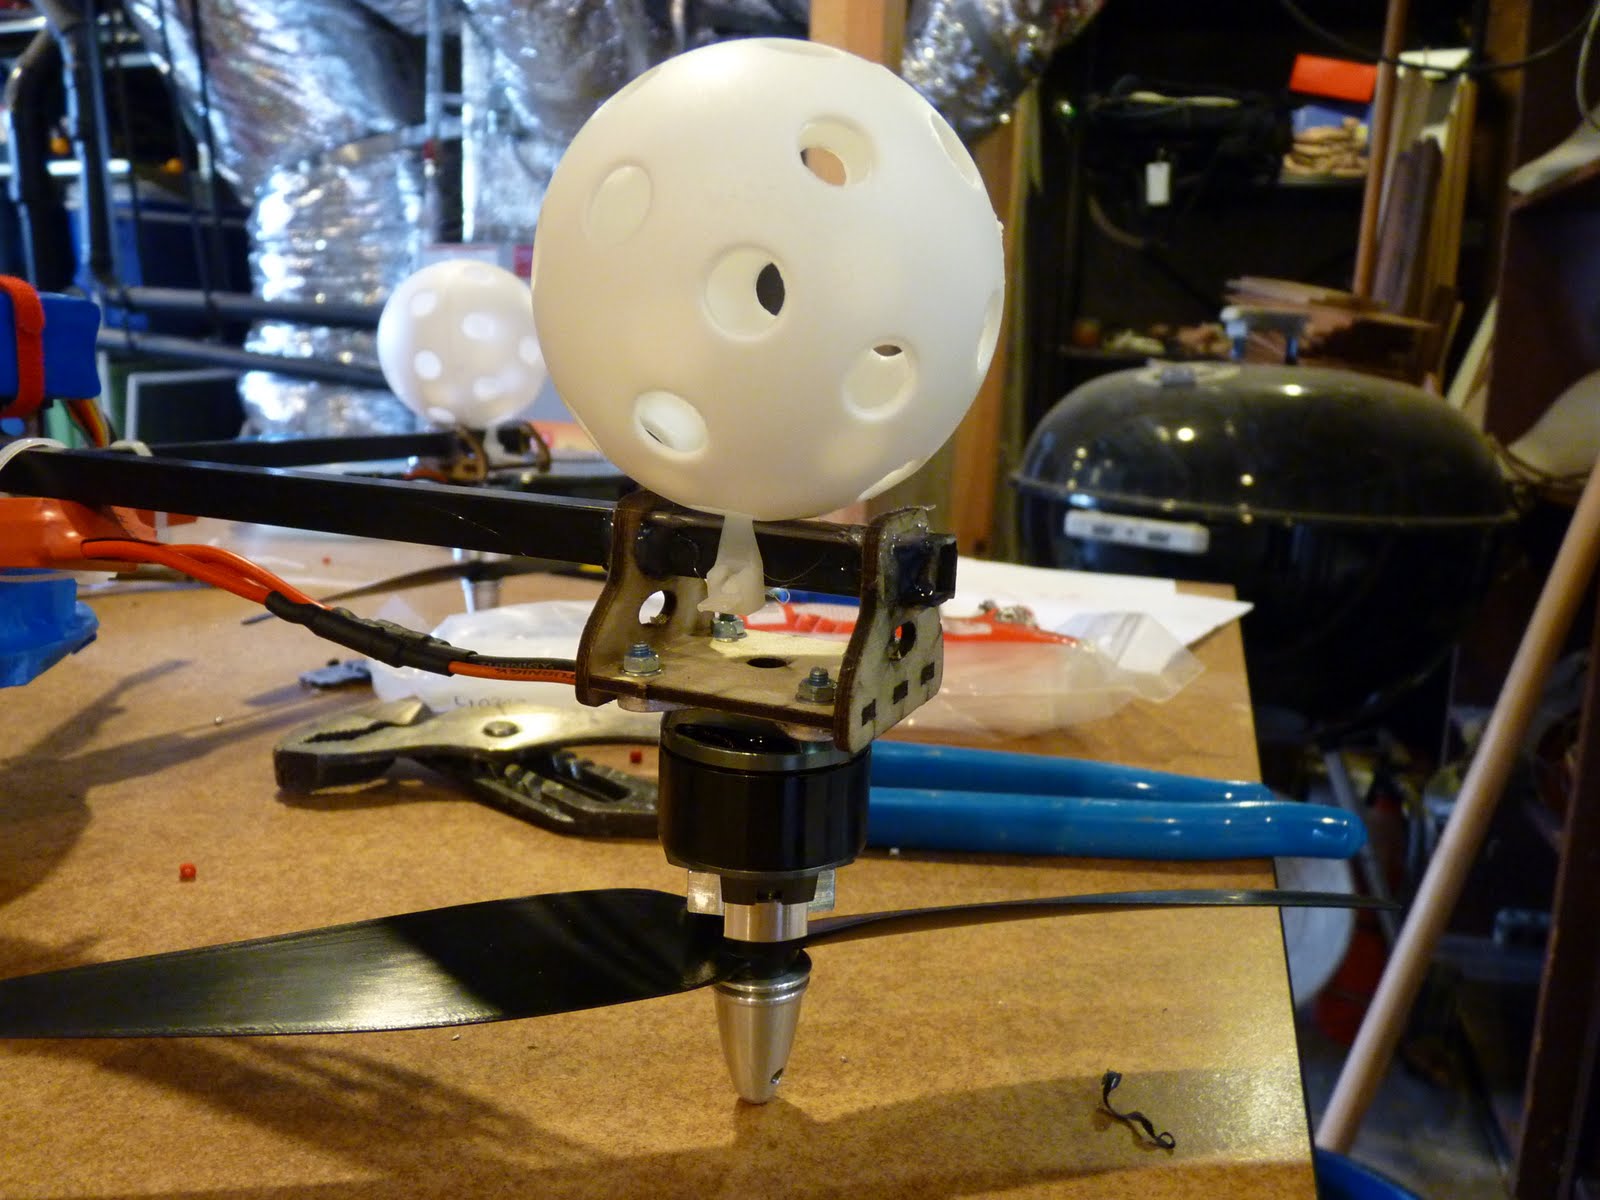
The RadicalRC kit comes with wire legs, but they didn't work well for me since I take off from grass a lot, and they would sometimes stick when taking off. I got the idea of using whiffle balls from Andreas... this is the smallest size, I think it's for practicing golf. Much merriment is made at my local flying club over this. They zip tie very nicely to the RadicalRC motor mounts.
Here's another picture of the frame. The receiver is a Turnigy 9x which I took out of the case. It lightens things up a bit, and fits nicely between the upper and lower parts of the deck. Now that everyhting's working well, I'll make some longer receiver cables and mount the unit.
Showing posts with label arcticopter. Show all posts
Sunday, January 1, 2012
Friday, November 11, 2011
Arcticopter IV power loading
battery amps watts notes
3S 2200 15c .5 6 powered on, no props
3.2 36 armed, motors at lowest speed
16.0 184 half throttle
33.3 313 full throttle (15c)
3S 2200 40c 39.3 413 full throttle (40c)
motors: hacker Style Brushless Outrunner 20-22L x 4
ESC: Turnigy Plush 18A x 4
props: 10x (3.8?? 4.7?? I will check later...)
3S 2200 15c .5 6 powered on, no props
3.2 36 armed, motors at lowest speed
16.0 184 half throttle
33.3 313 full throttle (15c)
3S 2200 40c 39.3 413 full throttle (40c)
motors: hacker Style Brushless Outrunner 20-22L x 4
ESC: Turnigy Plush 18A x 4
props: 10x (3.8?? 4.7?? I will check later...)
Thursday, November 3, 2011
Arcticopter IV indoor maiden
Got everything put together and tuned. For the video, I had my iphone sitting on its side on the landing next to me, so I had to fly in the ground effect to keep it in frame. I had stabilization on, and it handled quite nicely I think.
MultiWii with gyros and accel. About 9.5oz without batteries.
Sunday, October 30, 2011
Some MultiWii links
Got the Arcticopter IV put together with the MultiWii, but couldn't get the MultiWii Conf to talk to the board. Have to check with Andreas to see what's up with that.
Here's a few links.
Here's a few links.
- Source and Configurator. Needs a Java Runtime.
- Paris board setup. The quad section starts about half-way down.
- MultiWii FAQ.
Stick Controls
- lower-left: disarm
- lower-right: arm
- lower-left / down: gyro calibrate
- lower-left / up: accelerometer calibrate
- up / up,down,left,right: accelerometer trim
Setup Notes
- sticks should be 1095 / 1500 / 1905 low / mid / high
Monday, June 27, 2011
RadicalRC Stinger Kit
I'm having a bit of trouble bending blogspot to my will regarding captioning and photos... I'll get some more words and pictures up shortly!
Here's the start of the Arcticopter 3, which will be as light and as small as we can make it. After we get the full-size build flying reliably, I'll try trimming the arms down and see if it will still be stable in the air.
Monday, May 16, 2011
The Fleet: Arcticopter II
Filling out this page with Arcticopter II specs:
Hardware:
TODO: continue
Hardware:
- NTM Series 35-30 1100kv / 380w
- TURNIGY Plush 40amp Speed Controller
- NTM 35 Series Accessory Pack
- 10X6 Propellers (Standard and Counter Rotating) (6 pieces, 3 of each)
TODO: continue
Saturday, May 14, 2011
Arcticopter II: test videos
Hooray, the Arcticopter II looks like it's going to be a fine flyer. Powerful motors, it can probably shoot to a hundred feet in a couple of seconds.
More test results to come, but here's a couple of shots of the first test session.
Here are the original flight tests. We've substituted the wiffle ball landing gear... it's really nice if you can handle the weight. As you can see from the videos, weight is not a problem for this model... it took all the control we had not to shoot it straight up into the trees and beyond. One thing to investigate: using heli mode on the radio so as to set a throttle curve. We fiddled with that a little bit, but then couldn't take the unit off of safety because we had displaced the zero setting off the power curve.
More test results to come, but here's a couple of shots of the first test session.
Here are the original flight tests. We've substituted the wiffle ball landing gear... it's really nice if you can handle the weight. As you can see from the videos, weight is not a problem for this model... it took all the control we had not to shoot it straight up into the trees and beyond. One thing to investigate: using heli mode on the radio so as to set a throttle curve. We fiddled with that a little bit, but then couldn't take the unit off of safety because we had displaced the zero setting off the power curve.
Here was our very first test. Notice how the rightmost leg seems to stick to the ground? That's the sure sign you've got a motor running backwards! This also shows the original wire legs.
Before we did all of this of course we tested the electronics without blades. It always sounds like an assembly line of dentists to my ears.
Arcticopter II: Build part 2
Picking up the build the next day.
We used an extra platter to keep the wiring together. We used four extra standoffs (is that what these things are called?) Here's some notes about how they're attached.
The tabs have been trimmed from two of the standoffs, so that they're acting as spacers but don't need to be attached to the platter. this makes it easier to set up and remove.
Note that we cut off the tabs on two of the standoffs. Originally we did this because they were two-tab standoffs lining up with three-tab holes, but it turned out to be a very nice setup.
We'll try putting another platter on top (or below?) to cover up the stabilization board.
The standoffs are placed in the holes that are offset from the arms, allowing unobstructed access for the wiring.
We got lucky... the motor wiring, the ESC wiring, and the Wago connectors were the perfect size so that everything fit without having to add any extra wir
The KKBoard is being moved between the Arcticopters 1, 2, and (soon) 3 until some more boards arrive, so it's attached to a carrier board.
The KKBoard is sitting on a double layer of 3M doublesided foam tape, and attached to the carrier with zip ties.
For now we've got everything taped together, but we'll figure out how to attach it so that it's stable, firm, and easy to move.
HINT: don't mess up and mount your board at 90 degrees to what it should be. As soon as you apply the smallest amount of power it will attempt to correct itself by instantly flipping upside down!
We didn't have a lot of luck with the music wire legs... Since the weight should not be an issue with the motors we've got, we tried zip-tying wiffle balls under the motors. The motor mounts make a natural cradle that holds it in place. Use some pliers to pull the zip tie tight and it's very stable. This worked pretty well. I'll get some numbers on the wiffle ball weight.
I'll try the music wire legs on Arcticopter III which will be much smaller and as light as I can get it.
A KFC bowl is the perfect size for covering the platter. Thanks Colonel, this flight's for you!
Flight videos in the next post!
We used an extra platter to keep the wiring together. We used four extra standoffs (is that what these things are called?) Here's some notes about how they're attached.
The tabs have been trimmed from two of the standoffs, so that they're acting as spacers but don't need to be attached to the platter. this makes it easier to set up and remove.
Note that we cut off the tabs on two of the standoffs. Originally we did this because they were two-tab standoffs lining up with three-tab holes, but it turned out to be a very nice setup.
We'll try putting another platter on top (or below?) to cover up the stabilization board.
The standoffs are placed in the holes that are offset from the arms, allowing unobstructed access for the wiring.
We got lucky... the motor wiring, the ESC wiring, and the Wago connectors were the perfect size so that everything fit without having to add any extra wir
The KKBoard is sitting on a double layer of 3M doublesided foam tape, and attached to the carrier with zip ties.
I'll try the music wire legs on Arcticopter III which will be much smaller and as light as I can get it.
A KFC bowl is the perfect size for covering the platter. Thanks Colonel, this flight's for you!
Subscribe to:
Posts (Atom)