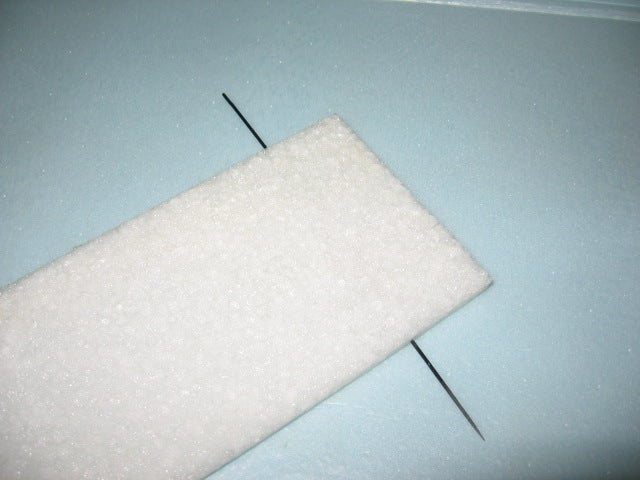
So Andreas saw the Flitetest video on the F22 and got the mood to cut out one for himself. He called me up and asked if I had any 9mm EPP foam. I did, and all the electronics and hardware necessary, courtesy of my prior thought to try to get the scouts to build some planes. I was thrilled to be able to put these to use, and Andreas said he would cut out an extra one for me. Here's the pieces cut out.
And now glued up. Very nice! That's an 8x4 prop on a 1500 kV blue wonder motor. 18A ESC, 500 mAH 3S batteries, 9g servos.
View from the bottom. Those are 3mm carbon tubes running laterally. Bamboo skewers on the leading edge and for the push rods.
Here's mine, ready to glue up. Using Beacon Foam-Tec, including the hinges.
And completed! Elevon flight controls following the new East Bay Elevon standard, coming up in another post.
Flight test upcoming! It will be fun to be flying something that only has two CPUs on board.
Here's the thread and plans by original designer dekan.
Showing posts with label building. Show all posts
Saturday, May 26, 2012
Wednesday, April 4, 2012
Flying wing CG calculator
Here's a nice CG calculator for flying wings. I haven't tried it, but people are saying nice things about it on RCG. I'm going to try it out with the Zephyr II measurements and see if it gets the same COG as Chris did.
Monday, July 18, 2011
Beacon Foam-Tac Glue
Everybody says good things about this stuff... I'll give it try and see how it goes! Purchase in at filadelfosrc.com.
They say:
They say:
Beacon Foam-Tac Glue bonds Depron, EPS, EPP, XPS, EPO, and many other kinds of foam quickly & cleanly. It does not attack/melt/dissolve foams, and when dry it remains flexible and clear. It's also great for bonding carbon fiber.
SUPER STRONG BOND - FOAM-TAC creates a super strong bond that is like welding the foam together. Make a Butt-Joint and you won't be able to find it later, stronger than the foam itself once it's cured.
LESS IS MORE - Always dries clear, simply apply a thin amount of FOAM-TAC to one side of the joint and gently press together. Pull the joint apart then press together again. That’s it. You don’t have to wait for the glue to get tacky.
My [note: this is filadelfosrc writing] own personal observations about Foam-Tac:1. It's a thick clear goo, reminds me of shoe-goo in it's consistency, but a little thinner.
2. Even though it's thick, when you pull the bottle away, it doesn't have any stringys to deal with.
3. Once bonded, you will not see the seam line & have no idea that it was ever two separate pieces.
4. Even though it forms a strong & permanent bond, the glue remains flexible & clear. I have used it to re-attach a broken aileron, and the aileron
functions just as it did before re-attaching (I actually glued the aileron straight onto the wing, knowing that it would still flex after Foam-Tac cured).
5. The bottle instructions say it takes 10-20 minutes to form a strong bond, but in my experience it happens in as few as 10-20 SECONDS, so that may be a typo.
6. You don't need to use much glue at all, I use far less of it than if I were to use a foam-safe CA for the same task.... and there's no need for any
accelerator.
Tuesday, May 24, 2011
Bidproduct has tiny parts
At Bidproduct. Everything you need that's really small. Motors, ESCs, props, gears, receivers, etc.
Monday, February 14, 2011
GoldGuy fixes flex fabulously
Method 1 -- reinforce with 1mm carbon "needle"
Method 2 -- embedding carbon crosses
More pics and description at the links. Thanks GoldGuy!
"Neatness is Lightness." -- GoldGuy at RCGroups.
- sharpen the tip of a piece of 1mm carbon rod with 80 grit sandpaper.
- force it into the foam, run it all the way through. no glue necessary.
- add one at the control horn location and any other place necessary.
- use the piece like a needle. thread it all the way through, clip the rod, and you've still got a sharp point to do the next piece.
Method 2 -- embedding carbon crosses
- Drill hole in 4mm carbon tube, make a crossbar with 1mm carbon rod. Threadwrap and CA.
- You want to make this an integral part of the wing, not just embedded into a slot.
- Make the slot with a modified soldering iron.
- Run a short bead of hot glue into the slot, press the CF into place.
- Hold flat with a steel ruler until cool.
- Open the joint, and repeat gluing until the full length of CF is attached.
- The forced-in CF tube will have caused a bend in the foam.
- Weigh the wing down on a dead flat surface.
- Run a bead of hot glue on top of the CF.
- Remelt the hot glue, making sure you glue the edges of the foam for maximum hold.
- Use a trim iron to remove any excess hot glue as you go along.
More pics and description at the links. Thanks GoldGuy!
"Neatness is Lightness." -- GoldGuy at RCGroups.
Building Light...
Superslo28" Build,Tip,Tricks thread!:
Some great tips from tallflyersd at rcgroups on building a light-weight superslow-28. I think a lot of these are generally applicable, so I'm condensing ere. Check out his youtube channel as well!
His 28" plane is 7 oz, and he's going for a 5 oz version as well.
Some great tips from tallflyersd at rcgroups on building a light-weight superslow-28. I think a lot of these are generally applicable, so I'm condensing ere. Check out his youtube channel as well!
His 28" plane is 7 oz, and he's going for a 5 oz version as well.
- Make fuse out of 9mm, rudder, wings and elevator out of 6mm EPP.
- Use light servos such as Blue Bird 306.
- Cut a little off the motor mount.
- No glue or velcro for radio - cut holes and tape in place.
- Battery pack velcro: 1/4 inch wide, 4 inches long.
- Shorten ESC wires to both battery and motor. Makes it more tidy too!
- Trim any extra parts off of servo and elevator horns.
- Use 250-350 mAh batteries.
- DONT OVERGLUE and OVERPAINT. Airbush will keep it light, keep your designs small.
- Carbon control rods don't save any weight over Dubro 0.37 micro control rods. [Me: is this true?]
- Hinges: 1"x3/4" tape on the top of each wing, tailfeathers 3/4" x 3/4", 3 pieces for rudder, 4 pieces for elevator.
Tuesday, January 25, 2011
Lots of doo-dads and containers
American Science & Surplus : Containers: "Itty Bitty Zipseal
Zipseal plastic bag of the size gnomes use to store leftovers. 1' sq, 2' sq, 2' x 3' or 3' x 4' (our each come in bags of 100 count), clear polyethylene (the 2' x 3' 27906 has a white strip across one side, 36562 does not.). Store rings, small rock samples, biology parts, and model pieces. Great for cleaning up behind your Guinea pig when you take him for a walk"
GoldGuy's hints for fixing flex
http://www.rcgroups.com/forums/showpost.php?p=17193818&postcount=1163
- make a crossbar
- sharpen 1mm CF rod with 80 grit, use it as a needle to poke through the wing. push all the way through, trim, use sharpened end for next spot. put at end of wings and horn.
Saturday, January 15, 2011
Great deal on Blenderm tape
Shop 3M: 3M Blenderm Tape 1525-1:
12 rolls for $15.75 + $4.00 shipping.
"3M™ Blenderm™ Tape 1525-1
1 inch x 5 yard (2,5cm x 4,5m) Clear, occlusive plastic, hypoallergenic medical tape"
12 rolls for $15.75 + $4.00 shipping.
"3M™ Blenderm™ Tape 1525-1
1 inch x 5 yard (2,5cm x 4,5m) Clear, occlusive plastic, hypoallergenic medical tape"
Saturday, October 30, 2010
Differential ailerons
Differential ailerons: "There is a simple way of accomplishing differential aileron throws mechanically, by positioning control horns away from the hinge of the control surface. On this page we provide simple charts that allow one to measure and position aileron control horns to get precise maximum throw angles while achieving the desired differential."
Friday, October 22, 2010
what is DEPRON
what is DEPRON: "Depron is actually polystyrene (EPS/XPS) plastic and the (EPS) means expanded while (XPS) means extruded. For our purposes, we’re only interested in the stronger, denser XPS Depron which also happens to be closed-cell foam."
Depron Foam - Technical Information
Depron Foam - Technical Information: "Below are links to the current Depron Foam technical information:"
Sunday, August 22, 2010
Improving connectivty of T Connectors (Deans clones)
From a DX discussion group:
If you push hard enough on the soldering side of the tabs, they should pop right out! I did that on mine, and the contact resistance is indeed lower.and
If you look at the original (compatible) plugs, you'll see that they mate using the flat part of the metal. (One side is flatter than the other).
These mate with the almost-flat, slightly round side of the metal parts. We modified the DX connectors by reversing the metal parts so that mating happens with the flattest possible part of the metal.
I measured the contact resistance:
Original expensive: 0.4 mOhm.
DX replacements: 5.2 mOhm.
DX replacements, modified: 0.5 mOhm.
With these values, I would recommend: Max 50A for original, Max 15A for unmodified DX connectors, and Max 45A for modified DX version.
Saturday, August 21, 2010
Subscribe to:
Posts (Atom)