Showing posts with label props. Show all posts

Sunday, October 19, 2014

Class Supplies

Here's some good things to get for your OPQ.

Batteries.  Both of these are good.  I will usually buy whichever one is (a) in stock at the USA warehouse and (b) cheaper at the time.


Battery Chargers.  These come in a couple of variations.

DC-only input.  You can make these work if you (a) buy a DC power supply or (b) have an old PC power supply sitting around and are willing to do a bit of connector soldering.  If that's the case, buy some 4mm banana connectors and I'll show you how to do it.

Both of these are similar.  The IMAX brand has a better brand reputation than the Turnigy  brand. I can't quite make out which cables come with the IMAX, but it may be that some extra cables will be necessary from the (tiny) picture.
I've got one of these.  It's basically four of the Accucel-6 chargers in one case.  You need to buy extra power leads, I think it only comes with one set.

AC/DC Input.  These will work with AC wall power as well.

Here's the IMAX with AC input:
Note for the above Hobby King links:
  • these are all links to the USA warehouse.  If you order from the international warehouse shipping is a lot longer.  Make sure you're ordering "USA Warehouse" items if this is important to you.
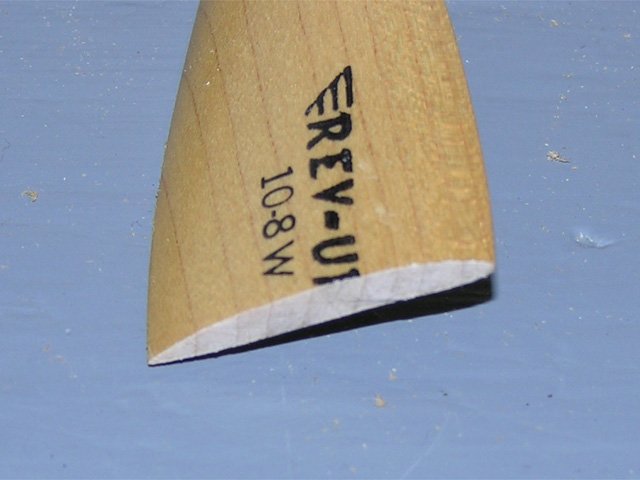
APC Props

These are good props, but more expensive and only come in a single color. APC props are proudly made in California!  The "P" props are the reverse orientation prop.  The price is per prop, so be sure and order two (at least) of the "SF" ("slow fly") and "SFP" ("slow fly pusher") models.
  • 8x3.8SF
  • 8x3.8SFP
  • I think the 9x4.7SF and 9x4.7SFP sizes will also work but haven't checked them out.

HobbyKing Props

These are similar to the GemFan props.  Lots of colors. 8038, 8045, and 9047 are good sizes.


GemFan Props

Super-popular, these are sometimes hard to find.  A lot of people like them because they're lighter and (the theory goes) will break and protect the motor shaft.

blogodex = {"idx" : ["parts", "opq", "class"]};


Friday, November 16, 2012

3D-printed blade guards

I recently attended a conference where one of the conferees had a makerbot and was offering to 3d-print items for people.  I was pretty excited about this -- in addition to being my first real-life experience with a 3d-printer, I had just seen the ladybird prop guards that had been uploaded to thingiverse and really wanted a set.
So, just as has been described, we downloaded the STL file and brought it into the CAD package.  We flipped the blade guard over so the arm attachment part would be on the bottom, and duplicated it so that we would print 4 in one go.  All of that would pretty straightforward.  We then fiddled with some parameters regarding plastic thickness, print speed, etc.
You can drive the makerbot directly from USB, or you can generate and download (via memory card) the "tool paths" which are in "G code" (not sure about the details here, we were going pretty quickly).  The advantage of downloading (as it was explained to me) is that you're free to use the software to continue working, and that sometimes the printer will stall waiting for data.  Here you can see the print started by laying down a lattice that will make it easy to remove the pieces from the tape.
I'm not sure why we had the pieces of tape.  I'm assuming it made it easier to pop completed items off cleanly.

Here you can see the prop guards starting to take shape.  As you can see in the video below, the unit runs quietly, and it's rather hypnotic watching it  work.
This is a couple of minutes into the printing. The entire print took about 22 minutes.  Always put your product logo in a  prominent spot!
Here's what came out, after trimming off the substrate.
But there was a problem... one of the parameters was a bit off (I didn't hear which one), so the rings printed with a hollow void between the two sides.  I think if you glued the rings together with thin CA it would be strong enough to work pretty well.
But not necessary... because we have a 3D printer!  We bumped up whatever parameter and printed a new set with fully formed rings.

The ladybird is sadly waiting for a new motherboard, but as soon as I get it I'll put the rings on and follow up as to how well it works.

But for now, I have to say my first sip of the 3D printer koolade was pretty tasty and I'm looking forward to trying some more!


Monday, January 2, 2012

New Quad Prop Source

GemFan Props at Innov8tive Designs, look pretty nice.

Lucien says:

They are available in the following sizes: 8x4.5, 9x4.7, 10x4.5, 11x4.7 and 12x4.5. There are two different plactic formulations used for these props. The standard ones are made with a fiberglass filled ABS plastic, and are about the same stiffness as an APC Slow-Fly type prop. These are available in Black, Bright Green and Bright Orange in both normal and reverse rotation. 
The Hi-Strength versions are made from a carbon fiber filled nylon, and are about 10 times stiffer than the standard props so they really maintain their shape and airfoil under load. These props are only available in black, and have a satin finish to them.
Prices on the props are as follows, normal or reverse pitch is the same price:
 
Standard Series, Black, Green or Orange:
8x4.5 - $1.50 each
9x4.7 - $1.75 each
10x4.5 - $2.00 each
 
Carbon Reinforced Series, Black:
8x4.5 - $2.00 each
9x4.7 - $2.25 each
10x4.5 - $2.50 each
11x4.7 - $3.00 each
12x4.5 - $3.50 each

Wednesday, October 12, 2011

Xoar Props -- big and wooden

Xoar International has really nice big wooden props.  They've got a placeholder on their site for multirotor props.  The OMStudios MikroKopter is using them.

Wednesday, September 21, 2011

A nice diagram for prop orientation

Which side of the prop faces forward?  It can be tricky, coz you can put the prop on backwards and still get the plane to go forward.

Here's the general guidelines:

  • Most props have the size molded in.  The numbers face the front of the plane, no matter if the motor faces front ("tractor" configuration) or the back ("pusher" configuration).
  • If you cut the prop in half, it will look like an airfoil.  The concave "undercambered" side faces the rear of the plane.  Think of it as an airfoil (which it is!) pulling the plane forward [diagram from rcgroups].
  • If you feel something "wrong" with the thrust and the electronics seem fine, land and check your prop.  There's a good chance you've got it backwards.
jj604 sums it up nicely:

'Why the hell they didn't just mold a big "FRONT FACE" and "<- ROTATION DIRECTION" on the prop is beyond me.'

Sunday, June 5, 2011

Motor Math and Propeller Basics

A couple of nice articles which were pointed out by Superfly maven Tram.  It looks like there's a lot more interesting things there as well.

Monday, July 5, 2010

By The Numbers: Props

Propellers have two numbers:
  • length.
  • the pitch. How far the prop would spiral forward in one rotation.
This illustration is from hobby king. X and Y are length and pitch.