Friday, February 28, 2014

East Bay Guide to Understanding PID Loops, Part 2

Building on the intuitive model presented in part 1, we take a look at the mathematical model and write a PID control loop based on that model.  Hang in there if you're unfamiliar with the math... it turns out to be pretty straight-forward code in the end!

Like part 1, this is a first take.  I was going to make a second take, but I discovered I had scribbled all over my only nice-looking copy of the PID math.  Your comments are welcome!

The printed formula is from wikipedia.  I tried doing this Khan Academy style with a tablet... wow that's hard to write with, that man is a genius if for no other reason being able to use one of those things!


blogodex = {"toc" : "PID Loops", "idx" : ["tutorials"]};

Things to Try: OSW the OneSheetWing

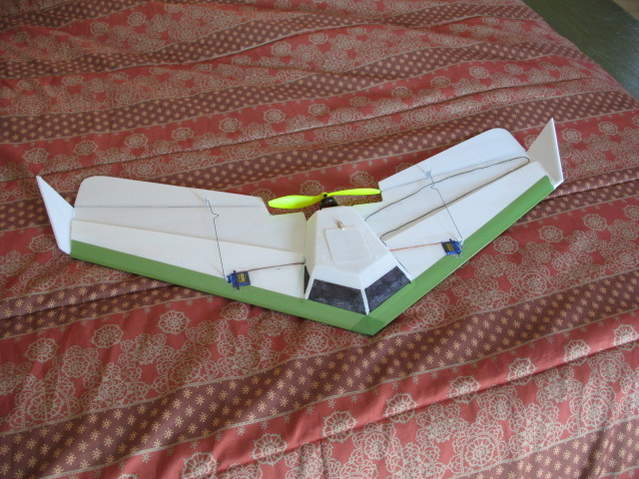
The ever-awesome Springer made the OSW a while back.

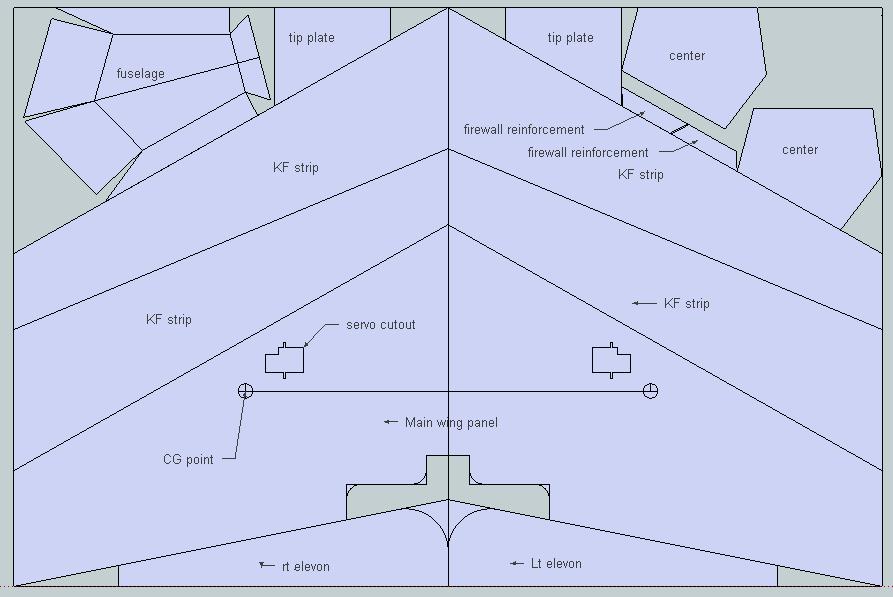
"It's not like we don't have a plethora of wings on the scratchbuilt foamies forum, but, hey, I'm working my way through all the genres in this onesheet madness. For those who may not have seen the OSG or OSB thread, the premise is to make a plane that uses as much of a 20"x30" sheet of dollar store foamboard as possible. So, Here she is the OneSheetWing"


The fuse is just a penthouse to hold the firewall/motor mount and gear out of sight. The pattern on plans is cut out, then the inside v cut and then grooved with top of xacto knife to get it to fold. Glue and tape together. first picture is V1 fuse (was gonna do one on top and one on bottom, but stopped at only the top), but V2 goes together the same.


blogodex = {"index":["Things to Try","OSW","One Sheet Wing"]}

Thursday, February 20, 2014

East Bay Guide to Understanding PID Loops

So here's my take on explaining this topic.  Light on the math, and heavy on the intuitive (I hope!) understanding.

I expect to take another stab at explaining the topic again, and I'm working on plugging in a physics engine to do some real-time simulation.  It's kind of like a game, can you tune the PID loop to lock the copter into position?  (update: it seems that enough people are liking this version that it will stay around for a while.  Sometime or the other I want to learn processing.js, and I'll try an online pid program as my learning project.)

I mention Khan Academy as my inspiration for this, not to imply that it will be anywhere near as good. Anyways, let me know if if this is useful at all or where I've gotten things wrong!


blogodex = {"toc" : "PID Loops", "idx" : ["tutorials"]};

Wednesday, February 19, 2014

Lemon-RX Stabilizer Notes

Lemon-RX has released their DSMX 7 channel stabilizer, and user reports are coming in.  Backwards compatible with DSM2 it's 4.8 grams and $16.30.

Initial reports are good, and I think I'll get one to try out.  Here's some RC Groups notes by jj604:

1) The receiver binds very quickly in DXMX 22mS mode on my DX8.

2) Lemon have screwed up on their Aux2, 7 channel implementation. This is supposed to give you a 7 channel non-stabilised receiver using the bind connector for Aux2 and it does BUT if you have a servo plugged into Aux 2 when you power up the receiver always goes into bind mode! 
I tried it with couple of different servos. It may depend on the servos since the receiver is looking for a connection between signal and ground on the connector and it will be resistance dependent. In practice this is going to be pretty useless.

3) We now know how Aux 1 works. It DOES function as a normal output but also as a switch to turn the stabiliser ON and OFF. Kind of odd. In practice if you use Aux 1 to switch the stabiliser you really only have 5 control channels.

Overall it looks nice. I personally like the separation of stabilisation direction using 3x DIP switches and gain using the 0-100% pots over the Guardian bidirectional pot system. Very logical and easy to sort out. 

On the bench it seemed fairly sensitive but I have not had a chance to flight test it. I would regard this as a 5 channel stabilised receiver with remote On/Off and remote Gain. Very nice combo for many models. 6 control channels is going to require some thinking about in order to use Aux 1 for two separate functions.

I can't see the non-stabilised 7 channel option as being any use at all given the need to connect/disconnect a servo every time you use it.

Lemon-RX officer fmak notes:

I am sorry but we have to use AUX1 so that DX6i owner can use the stabilizer as well. During the stabilizer development it is required to test with DX6i, DX8, DX9 and DX18 so AUX1 is the only option for turning on or off the Gyro. Please let us know for any suggestions or comments. Thanks!

and

The currently stabilizer will work with DX6i since AUX3 is really an optional "variable gain" control. AUX1 will switch the stabilizer on / off and DX6i will work perfectly OK.

We cannot reserve Aux1 for dual servo aileron (use Y-connector please) because we have to design a stabilizer that also works for DX6i user. I hope this is sufficient as being the entry level, basic stabilizer.

However we are seeing more and more people requesting for flaperon. We will for sure look further into this. Thanks!

There's a good discussion of these points later in the thread.

Johnnymeg reports "It was very simple to get things situated and dialed in. It was very stable and held its heading and altitude very well. The pass through with my inputs was smooth and I didn't have to fight the Rx for control." and provides this video.

http://www.youtube.com/watch?v=ugn7_pp8rro


Monday, February 17, 2014

Andreas flies his new Skipper up at Tahoe

So Andreas got a HobbyKing Skipper, and has been looking for a chance to fly it off the water.  And what better water to fly off of than the deep blue waters of Lake Tahoe!


Saturday, February 15, 2014

Mobius Action Cam Notes

Here's some notes on the Mobius Action Cam.


LED Status
  • Green: charging
  • Yellow: video mode 1.  solid = standby, blink = recording.
  • Blue: video mode 2.  solid = standby, blink = recording.
  • Red: photo mode or playback mode.  Blink = picture taken.
Notes
  • Dump sysconfig.txt by holding mode while powering up.  LED will blink yellow twice when finished.


Good Video Reviews

By RCModelReviews:
By TechMoan


SD Card Formatter

"SD Formatter4.0 is official SD memory card format software.
It formats SD memory cards, SDHC memory cards and SDXC memory cards. Trendy provided the SD Formatter by request from SDA. Number of downloads from SDA web surpasses 2 millions in 2013."

Mac and Windows downloads available.
http://www.trendy.co.jp/sd/en/p_formatter.html

Thursday, February 13, 2014

Monday, February 10, 2014

Two Flying Boxes!

Ran across these on RCG.  They look like an easy and fun thing to try, and might be an interesting testbed for a stabilization system.


Wednesday, January 29, 2014

FrSky Products: Which to Get?

FrSky products are great, but the names make it easy to jumble them together.  Here's a breakdown of the three main families of products.

Simple Purchase Advice:

  • Buy a Taranis if you need a radio and if you can find one.
  • Buy an XJT module if you've got a 9x, 9xr, or other JR-module compatible radio
  • X8R if you want S.Port compatible telemetry or SBUS servos.
  • D4R-II if your need a small Rx that supports CPPM.  Perfect for multirotors.

X Series
  • module: XJT (JR)
  • Smart Port, Telemetry
  • receivers: X8R, X6R
  • Taranis has XJT internally
  • uses "smart port" sensors

D Series

  • modules:  DFT (Futaba), DJT (JR)
  • telemetry
  • receivers: D8R-XP, D8R-II Plus, D4R-II
  • uses "hub based" sensors

V8 Series
  • oldest series
  • no telemetry
  • receivers: V8R7SP, VD5M, V8R4-II, V8R7-II, V8FR-II
file: {"toc":["FrSky"]}

CP210x Drivers for Flip Boards

So it turns out that the Flip boards use a SiLabs CP2102 for its serial/USB interface, and I didn't have the drivers on either my Mac (quelle horreur!) or Windows boxes.  The symptom is that you bring up the Arduino IDE or the MultiWii GUI and don't see the device in the list.

Thankfully, Pololu has drivers (and instructions, if you need them) for both of these and Linux as well.  The page mentions MacOS 1.7 but it seems to work fine on my MacOS 1.8 box as well.

On the Mac it installs as /dev/tty.SLAB_USBtoUART.

Monday, January 27, 2014

Noodle Copter Update

If you're coming here for NoodleCopter information, Welcome!  Here's most of the NoodleCopter things pulled together for your convenience:


NoodleCopter Posts


Sunday, January 26, 2014

Making a Continuous Rotation Servo

NOTE!  There are a couple of different designs of these servos, even from the same vendor.
  • The written notes below are for a through-hole style board
  • The video covers the non-through-hole syle
  • One kind of Potentiometer has rotation stoppers which must be broken off.
  • One kind of Potentiometer rotates freely and doesn't need to be modified.
  • If you don't need to modify the pot, you don't have to remove the stack of gears.


Continuous rotation servers are popular for cheap robotics projects because a pair of them give you a complete drive train (motor, controller, and gears).  A pair of 9 gram servos (such as the popular HXT900 from hobbyking) should be less than $7 or so.


Start by testing your servo, either with a servo tester or with an arduino sketch that drives the servo back and forth.  There's nothing more discouraging than having bad results, only to find out that it's not your fault because you started with a bad unit!  Likewise, be sure and test your battery voltage.

Tuesday, January 21, 2014

Using the Spektrum DM9 module with Taranis and Turnigy 9xr

Daedelus66 notes that these settings work when using a DM9 in a Taranis (and presumably other {er,open}{9x,tx} radios):

  • polarity set to +, rather than the default - (which works with the Orange module).
  • preferable but not required to set PPM to 400u instead of the default 300u. ensures neutral remains at 1.5ms -- if left on 300u it will be significantly shifted and require recentering servos.
  • DM9 uses only the three basic pins: signal #1, positive #3, and ground #4. Pins 2 and 5 are unused, so no problem there.
  • model match not supported.
  • rebind by holding the module button while powering up.


Monday, January 20, 2014

Red Rover Notes

Here's my take on the Red Rover. Original article and hackaday.  Kudos to Rick Winscott for such a cute and ingenious design!!


Sunday, January 19, 2014

Taranis Module Pin-Out


Courtesy of RCG user smoothvirus, here's two shots showing the pinout for JR-style modules.  The first is an actual JR radio, the second is the motherboard on the Taranis.

This should be the same for 9x and 9xr as well.

It was suggested that it would be useful to measure the voltage under load from the module connectors when calibrating the voltage.


Thursday, January 16, 2014

Concord Model Engineers Minutes, January 14, 2014

Concord Model Engineers Monthly Meeting
Tuesday, January 14, 2015

CALL TO ORDER: 7:30 pm
ATTENDEES: 24
GUESTS: 2


A Tale of Two Robots

Getting ready to put together another electronics class.  This one will be themed around robots, so I'm looking for likely candidates.

Here's Popular Mechanic's Build Your First Robot project. Points to more details here.  They're estimating about $100, but I think it can be pulled off for less.


And via Hackaday, the Red Rover.  It's tiny, 3D-printed, and uses rubber bracelets for treads.  May be a pretty cheap way to go!

I've got parts coming in for both, so I'll make a page for each of these and put collected information there.

Thursday, December 26, 2013

What's the wind look like?

Check out this amazing animated wind map.  You can drag the globe to look at different places.  You can see the air mass flow off of continents at low places... check out the Sea of Cortez by Baja California, for example.

Tuesday, December 24, 2013

Taranis Battery Notes

Bruce has a great video on using different types of batteries in a Taranis. Here's a few notes that I've put together.


  • The illustration is from the Taranis manual, which also notes that the operating voltage range is from 6 to 15 volts.  You should read the manual.
  • Don't charge anything but the stock batteries with the internal charger.  Specifically, don't charge LiPo or LiFe with the internal charger.
  • The Taranis originally came with 800 mAh battery pack.  Currently ships with 2000 mAh battery pack.  This battery pack is also available at FrSky dealers.
  • On older models, charge light was solid.  On newer models (the ones that came with 2000 mAh battery), charge light blinks.
  • Internal charger shuts off automatically when battery is full.
  • If you change battery types, update the voltage range and warning values on menu 1 of the radio setup screen.

battery        high  low  warn  notes
NiMH 800 mAh    8.0  6.5   6.5  stock battery on older models
NiMH 2000 mAh   8.0  6.5   6.5  stock battery on newer models
2S lipo         8.4  6.6   6.9  can plug into balance plug
3S LiPo        12.6  9.9  10.2  need to make plug/adapter
3S LiFe        10.8  8.4   9.9  need to make plug/adapter

Superfly Tuning

Tram has some great advice on tuning a Superfly.  Since RCG posts tend to get buried and lost, I'm copying it here.

tl;dr:  1/8 inch up trim for level flight.

I would definitely go with a CG that suits you. Any time a kit has a recommended CG, that's all it is - a recommendation. Some folks will fly a little more nose heavy, some folks will fly a little tail heavy.

If the plane is laying flat on a table, and the elevons don't have a little up at neutral stick, it's not going to fly as it should, as the nose is being pushed over due to aerodynamic forces.

All flying wings need a little reflex. Essentially "up trim" at level flight. Superfly's need about 1/8th inch.

I'm no Bernoulli, but as a wing develops lift, it naturally wants to pitch forward. What most aircraft use to counteract this force is the tail. Flying wings are missing this. So, a little up elevon (reflex) at the rear of the plane helps to counteract the force and thus, push the nose back up to attain level flight. 

You said previously that your having to use half stick up to keep it level. Try adding some reflex and then adjust from there.. Lay the plane flat on the table and give it 1/8" to start. You may have to add more. Once this is accomplished, the aircraft can be subjected to the "dive test" to find true CG state and adjust accordingly.

Dive test:
From level flight at typical cruise trim, enter into ~30* dive.
Let the airspeed build a bit and let go of the sticks.

If the plane pulls up sharply you're nose heavy.
If the plane pulls up nice and slow, the CG is pretty much spot on.
If it stays where it was or increases the dive angle you're tail heavy.

Sunday, December 15, 2013

My Favorite RC Pilot

Her Dad is a pretty decent pilot, but this young lady is going to be a champ.
She's flying the Bixler 2 (zoom the pic and you can see it), using APM's Fly-by-Wire mode.  She did a great job staying in the square and keeping the plane out of the sun.

HobbyKing PUMQ Notes

Got the PUMQ (Pocket Ultra Micro Quad) put together and flashed.  Here's some notes.

  • Using the Cesco PUMQ V4 build.  Build as Leonardo, ran and connected to MultiWiiConf with no problems.
  • Micro prop balancer here.
  • Easy way to remove micro props using side cutters.
  • Attach micro props with white glue or clear contact cement after roughing up the shaft.  Don't use super glue.
  • Interested to try BradWii and see how the autotuning works.
  • The battery connector is placed pretty inconveniently, with the battery cable hard to hold.  It would be nice if the connector were on the edge.

Results of first indoor flights.
  • PIDs seem OK, but it's super sensitive on pitch and roll.  Added about 60% expo which smoothed it out a little, but I'm hoping to get something close to Ladybird stability.
  • Climb was super hard to control, couldn't keep it level very easily.  That could be because I was flying it indoors and didn't have a lot of space to get used to it.
  • Bound the Rx using an OrangeRx 6 channel Rx, using the OrangeRx module.
  • Popped a prop.  Will attach as per above.
  • Calibration reminder: ACC right stick down, left stick upper left, GYRO left stick lower left.

Nice Looking Paint Finish on Foamies

 Here's a couple of really nice foamy paint jobs over on RCG.

747pilot covered his EPP Skywalker with Krylon Shortcut.  He mentions "Dries fast. Full set up in a few hours. Just don't use any type of tape on it afterwards. Tape control surfaces or whatever prior.  You can find it mostly at Michaels crafts store."

 snoshoe62 covered this Bixler 2 with Minwax Polycrylic Gloss to get this finish.  I couldn't figure out what was underneath.

Neither posting has any mention of the weight of the paint.


Saturday, December 14, 2013

RCG User Granted shows a foam carving tool with interchangeable tips and suggests a good power supply. The tips are made from .023" mig wire and xt60 plugs.

Royal Aeronautical Society Library Catalogue

"The National Aerospace Library houses one of the world's most extensive collections devoted to the development of aeronautics, aviation and aerospace technology.

This catalogue lists over 100,000 items held in the library, including books, journals, technical reports, regulatory material, images, letters and manuscripts. Please click the button above to start browsing, and do not hesitate to contact our expert librarians if you require assistance. Contact details and library opening times can easily be found within the catalogue."

http://aerosociety.cirqahosting.com

Sunday, December 8, 2013

Jason's Homebrew APM Transmitter

I was visiting with APM Developer Jason Short, and he showed me a project he had been working on... His own radio, integrated for use with DroidPlanner running on a Nexus 7.

I hope Jason will say some more about it later (note to Jason: no more prestigious venue than EastBay RC!); I was really impressed.  Custom electronics and code, a nice 3D printed case which felt nice in my hands, a really nice job.

He didn't know it, but it's the same glorious yellow color as the old Kraft radios!


CME Minutes, Nov 12, 2013

 Concord Model Engineers
MONTHLY MEETING MINUTES
Nov 12, 2013

CALL TO ORDER: 7:30 pm
ATTENDEES: 24 GUESTS: 0


Wednesday, October 16, 2013

HobbyKing 9XR Pro Notes

And it's here!!

Product link
Videos


Interesting Notes

You may have noticed a quick preview on a HobbyKing video a while back about a 9xr that seemed to talk.  It turns out that this is going to be based on the widely admired Sky9x project!


I've set up this page to collect information about this great development.

(update 31-Jan-2014)
Some more details from Brent:
  • Haptic buzzer
  • Firmware and models updated through the SD card, so no USB driver problems.
  • The Frsky DJT telemetry plugs into the Futaba connector ,and all the Data is displayed on the LCD screen , as well as spoken voice alerts.
  • 0.7 watts of Audio output 
  • Extra connections for user add-ons like Bluetooth and a rotary encoder.
(update 21-Jan-2014)
Brent provides some notes on the board and enhancements.  It will be pretty neat if the unit can be connected to the computer via bluetooth instead of USB!  Brent also mentioned that he's encouraging Hobby King to sell higher end gimbals as an upgrade option.
It has "real" keyboard switches and even a gold plated pcb... looks real nice.
Connectors for adding a Rotary encoder , Bluetooth module and a external telemetry COM port connection. Just plug and play.

(update 11-Nov-2013)
Brent provides some notes on power and physical packaging:

It uses a 5V ,1.5A switching main regulator, which supplies power to the 3.3V 1A Linear regulator.
There is no co-processor , it was replaced with a dedicated RTC chip.
There is also a switched battery connection on the Futaba port , for powering external accessories , the port can also be easily hacked to provide a telemetry connection for older FRsky RF modules.
The Pro is a Sky9x re-designed to fit in the 9XR, There are spots for a I2C connection , rotary encoder , Haptic , Bluetooth Com port , 1 wire Com port, and a couple of spare control inputs.
The biggest problem was shoehorning it all to fit in the limited space inside the 9XR , and have spots and room for the connections.

Preliminary information:

  • Cortex M3S8 based, audio processor, designed for hacking.
  • will be in 9xr case, with same gimbals.
  • entire radio expected to be priced less than what the Sky9x board sold for, sub-$100.
  • Sky9x designer Brent Nelson ("SkyNorth") is doing this in cooperation with HobbyKing.
  • Expected by "Christmas" (LOL if you remember the 9xr Christmas craziness!).
  • Won't be compatible with the 9x form factor.
SkyNorth summarizes:

  • It uses real Tact switches , and has support for a Rotary encoder , and a Haptic buzzer
  • Built in USB socket and micro SD card slot , full sound / voice output , RTC + battery backup , 5V - 1.5A Switching power supply,
  • Battery capacity monitoring, Hardware support for telemetry connections. (RS232 or logic level) through 5 pin RF connector. There is also a spare switch input , and spare A/D channel and a second PPM output and spare serial ports for future hacking , such as the addition of a Blue Tooth module. 
  • It will definitely raise the bar on the entree level radios , and allow a lot more people access to the Advanced (ARM) versions of the Open Source firmwares (er9x and OpenTX)
  • It will also provide a great working platform for the DIY'ers wanting to build their own radios.

Here's some details on the original Sky9x.  Note that this was an add-in board for the 9x, so some of the features will change.  This should still be a good start for understanding some of the capabilities of the 9XR Pro.


  • Atmel SAM3S Arm Cortex M3 32 bit Microprocessor (256K EPROM , 48K RAM , 64Mhz)
  • Built-in USB port for loading new firmware and to access the SD card as a Mass storage device.
  • Connector for LED Backlight , with software dimming control
  • 1/2 Watt  audio amplifier with 8 Ohm Speaker Output  and support for a headphone jack 
  • 4Mb EEPROM provides on board storage for 20 - 40 models depends on software used.
  • Support for Koycera  64x128 LED backlight LCD  
  • Two , internal RS232 Serial communication ports  with support for external 2.5mm jacks.. 
  • FrSky Telemetry can hook directly up to board (no convertors needed) 
  • Micro SD Card Socket for Sound , Model and Telemetry logging / storage.
  • One , TTL Serial Port , for hookup to a Bluetooth Module , Like RN-42
  • Hardware PPM , PXX output   .
  •  Haptic Output connector 
  • AVR Co-Processor , ATtiny167 AVR  , provides 12 more I/O channels and  provides  RTC (Real Time Clock) functions , with on board 3V Lithium Battery
  • On Board CR2032 Lithium Battery Holder  
  • On Board Current Sensor monitors the current being drawn from the battery , and stores the amount of mAH used up.
  • 5V Linear Pre - Regulator  supplies the Main LDO 3.3V Linear Regulator. For better heat       management , and a 5V Switching Regulator Upgrade is available for using  3S Lipo batteries

Tuesday, October 8, 2013

Minutes, Concord Model Engineers, October 8, 2013

Concord Model Engineers, 
MONTHLY MEETING MINUTES 
October 8, 2013

CALL TO ORDER:  7:30 pm
ATTENDEES:  18  GUESTS:   1


Sunday, September 22, 2013

Taranis OpenTX Elevon Mixing

Here's how to mix elevons on Taranis using OpenTX.

It's a pretty straightfoward procedure:

  • mix the elevator stick on both channels.  The value will be either 50% or -50%, depending on how your servos are set up.  If the control surfaces move in the wrong direction, swap the sign.
  • mix the aileron stick on both channels.  The multiplex parameter will be "add", and the values will also be 50% or -50%.  Proper motion:  when the stick moves left, the left control surface should raise and the right control surface should lower.  Vice versa for moving the stick right.

Here's some notes on how elevon mixing works:

http://eastbay-rc.blogspot.com/2011/05/v-tail-mixing.html
http://eastbay-rc.blogspot.com/2011/05/elevon-v-tail-mixing-calculations.html

Here's my mix.  Yours should be the same, possibly swapping out the positive/negative values.

Ch 2  Ele    50%
  +=  Ail   -50%
Ch 3  Ele   -50%
  +=  Ail   -50%


Tuesday, September 10, 2013

Concord Model Engineers, September 10, 2013

CONCORD MODEL ENGINEERS

MONTHLY MEETING MINUTES 

Tuesday, Sept. 10, 2013
CALL TO ORDER:  7:30 pm   ATTENDEES:  21  GUESTS:   2

MEETINGS

Monthly meeting, Second Tuesday, 7:30 at Concord Airport Terminal.

Friday Fun Fly, Third Friday, 7:00 - 9:00 pm.
Gym at the Church of the Nazarene, 1650 Ashby Dr., Concord

This month's Fun Fly is on Friday, Sept. 20. Chuck won't be there with the collection bucket, so it's Free Fly Friday!

Thursday, September 5, 2013

Some Hovercraft Notes

There's a couple of hovercraft over in the Instructable Remote Control contest.  Here's one and another that I might give a try at sometime.


And it turns out there's a Magnum Opus of hovercraft literature.  700+ pages, 450 illustrations, and a Royal foreword!  Here's the book's website and amazon link.  It seems like a pretty interesting story.


There's even a hovercraft folk song.  Who knew!


Tuesday, September 3, 2013

Small JST Connectors

Courtesy of RCG user jj604, here's a nice thread that clears up some of the confusion around small JST connectors.  Here's an extract, but lots of interesting details at the link so check it out!


  • JST-XH is 2.5mm pin spacing (same as 0.1inch for all practical purposes)
    Not micro size but very common. Used in most balance plugs on LiPos and is the "standard" header spacing in many electronic components including PCs. The standard Futaba/JR style servo plugs are this spacing.
  • JST- ZH is 1.5mm pin spacing
    Used in the Spektrum AR 6300 system and a compatible DSM2 Rx from DelTang (DelTangs are available with all 3 connectors).
  • Molex PicoBlade is 1.25mm pin spacing.
    Used in Futaba, FlyDream, Walkera and the new Hobby King Micro (DSM2) 2.4G systems. The HobbyKing 1.7 and 2.2g Servos have this connector. The 2 pin version is used on the PZ bricks as a battery connector.
  • JST-SH is 1.0mm pin spacing.
    Used for servo connection in Spektrum AR6400 "Brick" and the HobbyKing SuperMicro (not DSM2) systems. Most linear servos have this connector.


Monday, August 19, 2013

Report from the Walt Muciano Fly-In

CME Membrer Warren Delane reports:

"Walt's designs were simple to build and flew well. Ideal for kids in the 1950s  and 1960s to enter C/L flying for less than $10.  Still great fun for us Old Guys in their senior years! But nowadays, more like $70.
"At the other end of the display table were my StuntMaster, Me-109, Little Bipe. Wendell-Eillisms, and Curtiss F11-C2 'Goshawk'. All Musciano designs. I love building them but spread myself too thin and never get to finish them!


"Just a few of the 1/2A models at today's contest at Osborne Field. The rest were flying in perfect weather for C/L. Tons of adrenalin-pumping fun!"

Those are some nice looking planes!

Here's a pretty slick deal... make a quadcopter out of a bixler and fly it around as a VTOL craft.  I'm going to give it a try!


Wednesday, August 14, 2013

Night Ops Success!


Fitted the NoodleCopter with lights... pretty easy, just ran LED strips down each hollow pool noodle.  Worked pretty well!  For quickness, I used four batteries, one for each strip and just taped them to the arms.
It looks really nice up in the air, with the colors of the pool noodles nicely standing out.  This picture is a bit shot out, but you get the idea.  I'm going to try to balance the brightness of the red and green arms with the yellow arms.

Update: Don't cut battery slots in the noodles!  An unmodified noodle has some pretty reasonable torsion strength, but with slots cut into it it developed a lot of twist.  I put two CF struts across the top to compensate.


Happy Test Pilots!  It was our first night testing, so there was a bit of stress involved.  But not to worry, everything worked out well.  Hooray!

Sunday, August 11, 2013

DIY Handheld Hot Wire Cutter

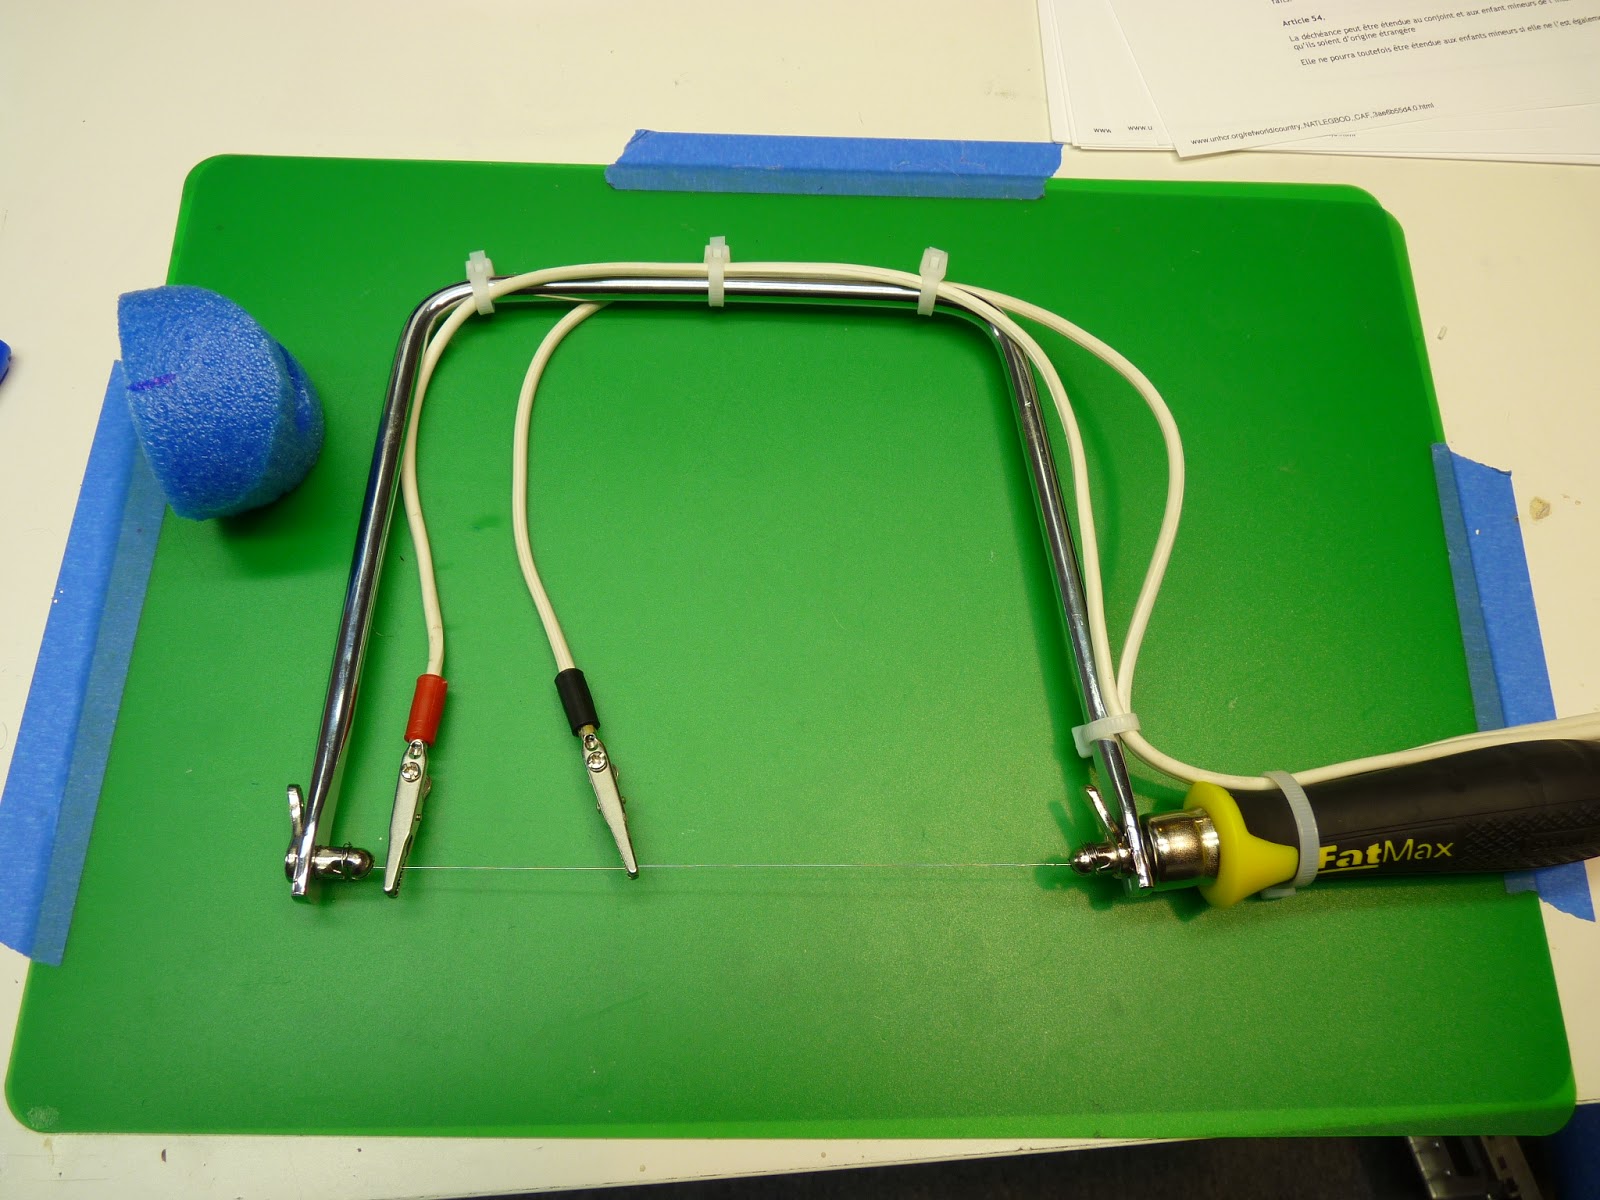
Here's how I put together a quick-and-easy handheld hot wire cutter.  I started with a coping saw, removing the sawblade.  I ordered some 28 gauge nichrome wire from ebay.
I loosened the handle, and wrapped the nichrome wire around both ends of the sawblade mounts, pulling it tight.  Screwing the handle tight brings the wire tension to the perfect amount.
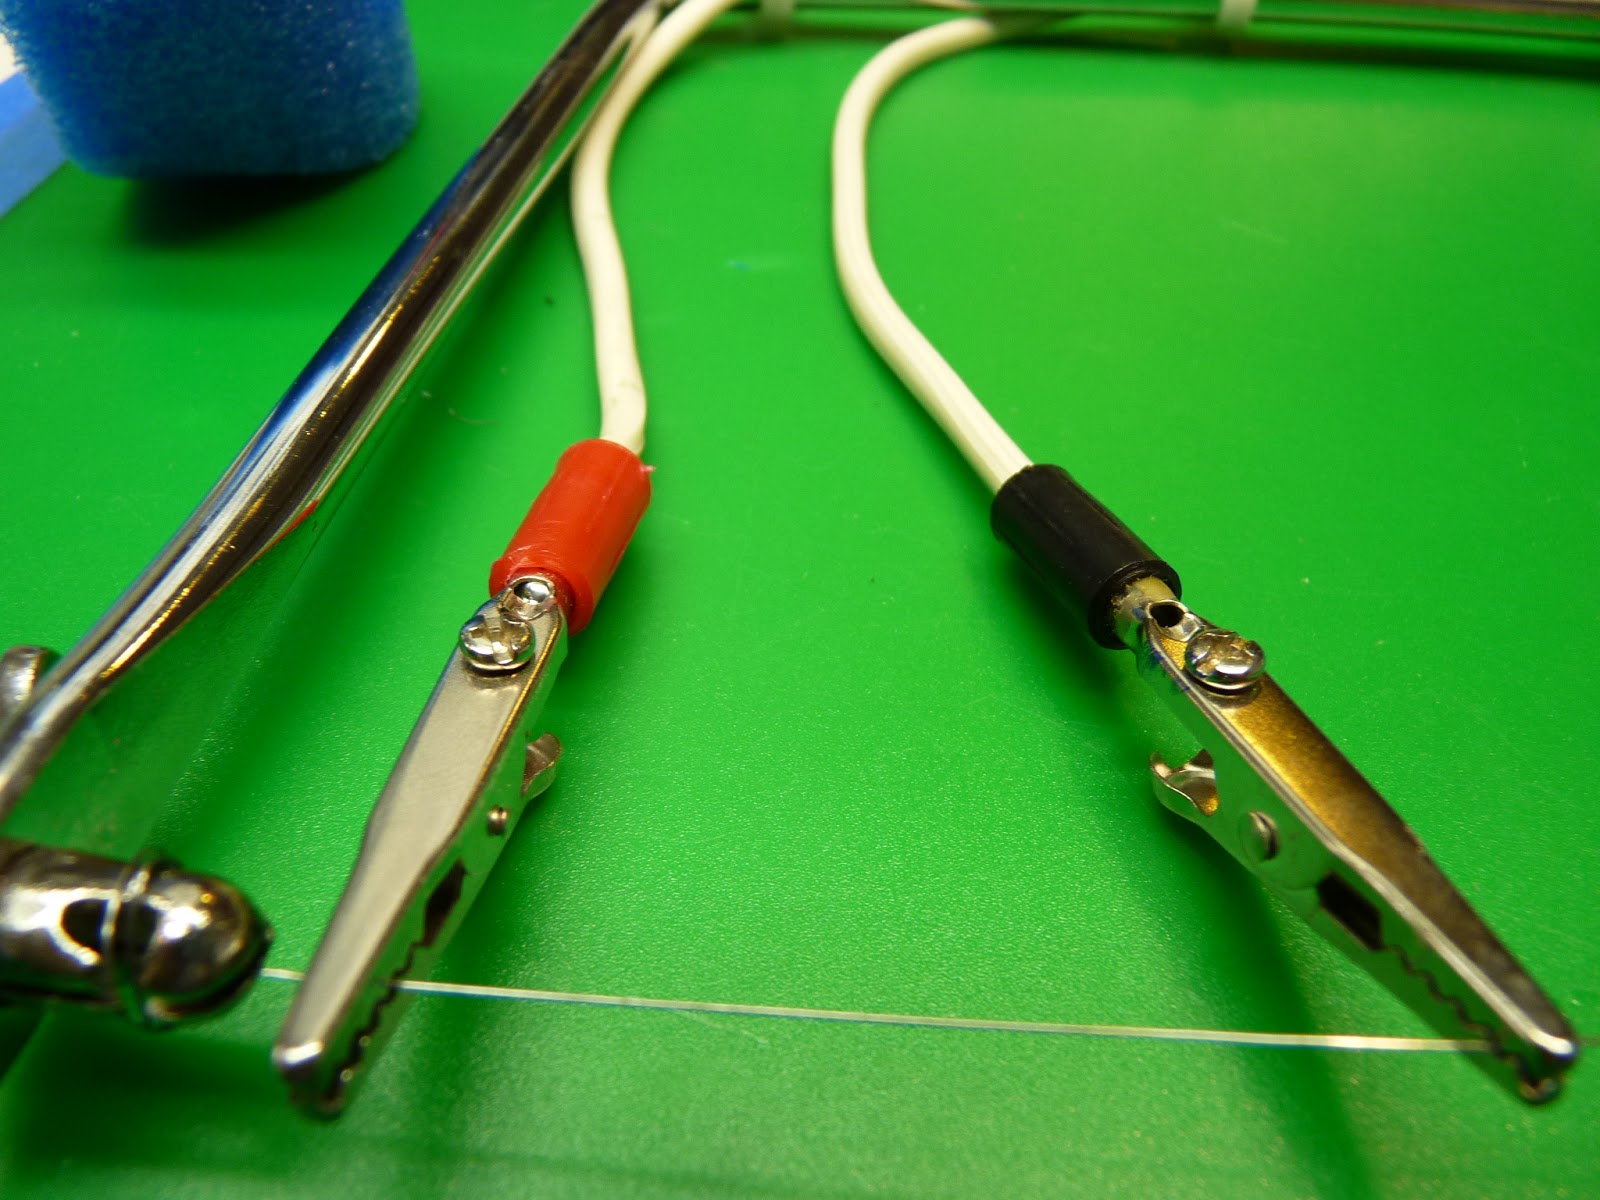
I split an old extension cord and crimped an alligator clamp to each half.
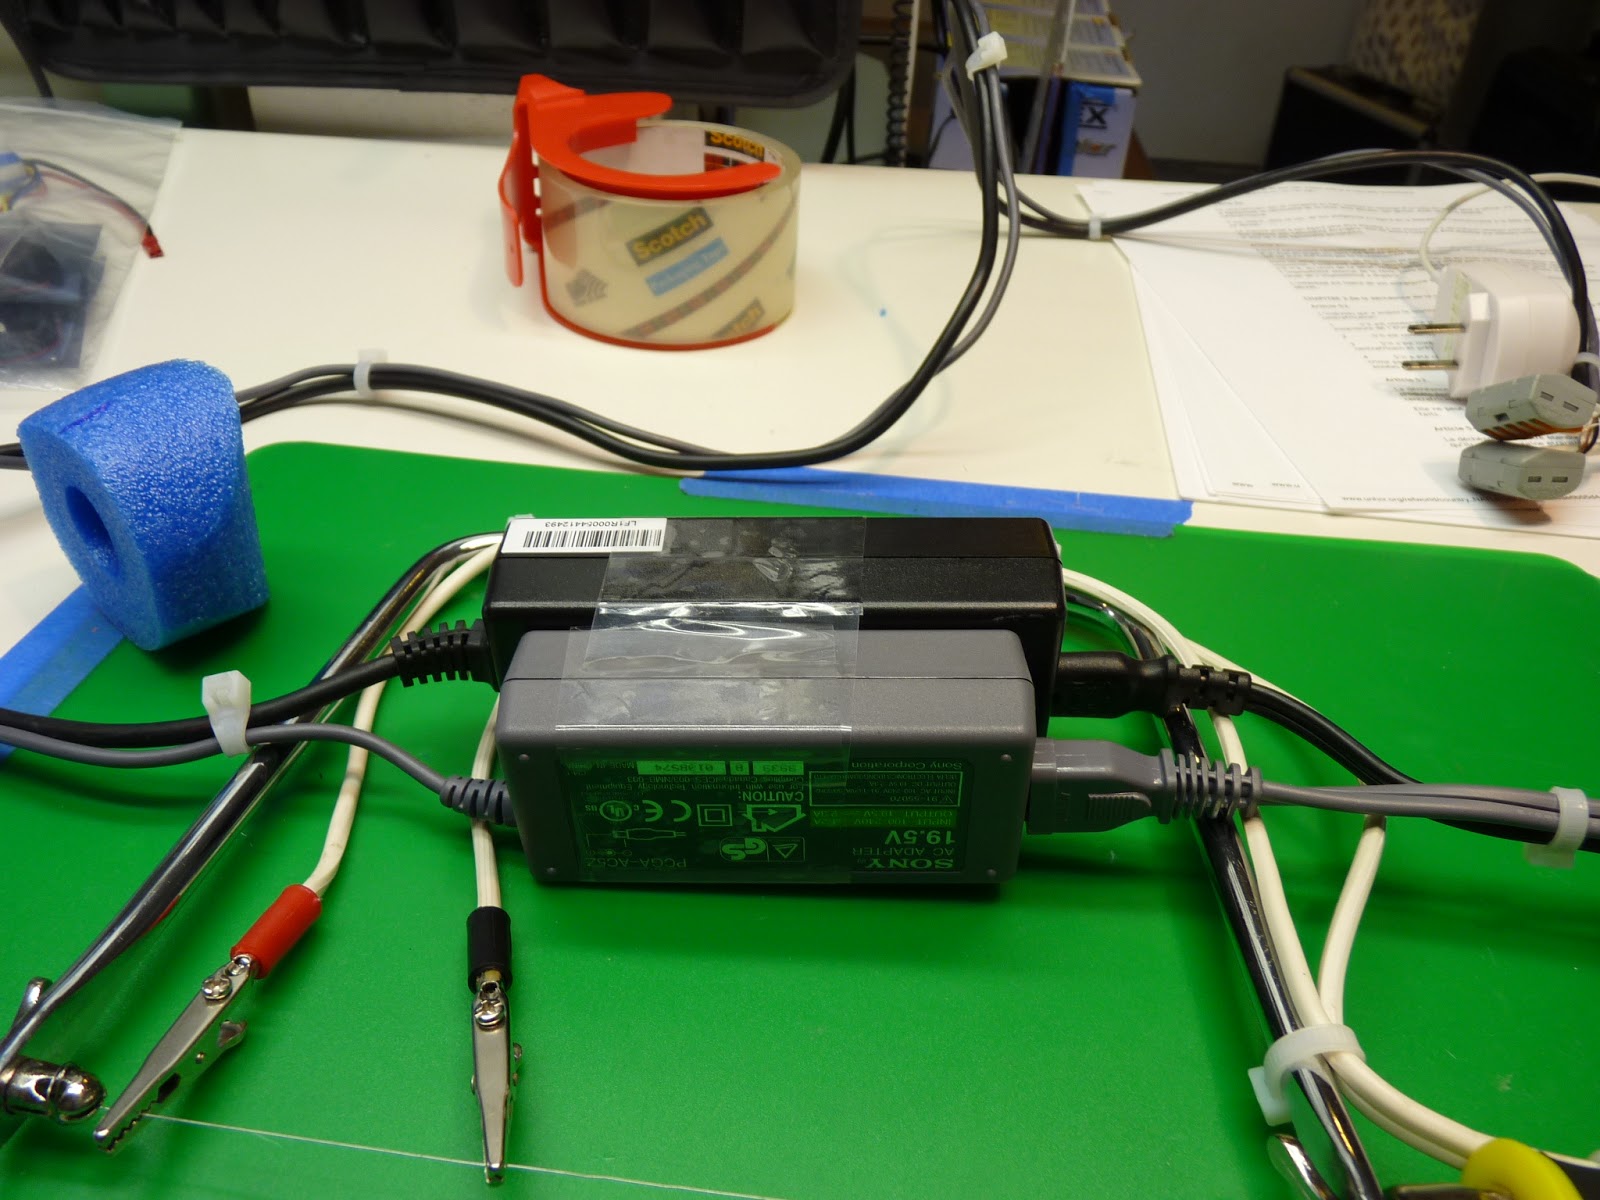
Attaching the wires to the power supply.
I had a couple of scrounged old power supplies sitting around.  I had hoped to find an old printer power supply that was about 30V, but I only had a 12V and 9V.  I put these together  in parallel.  It was just enough power for the small cuts I needed to do.
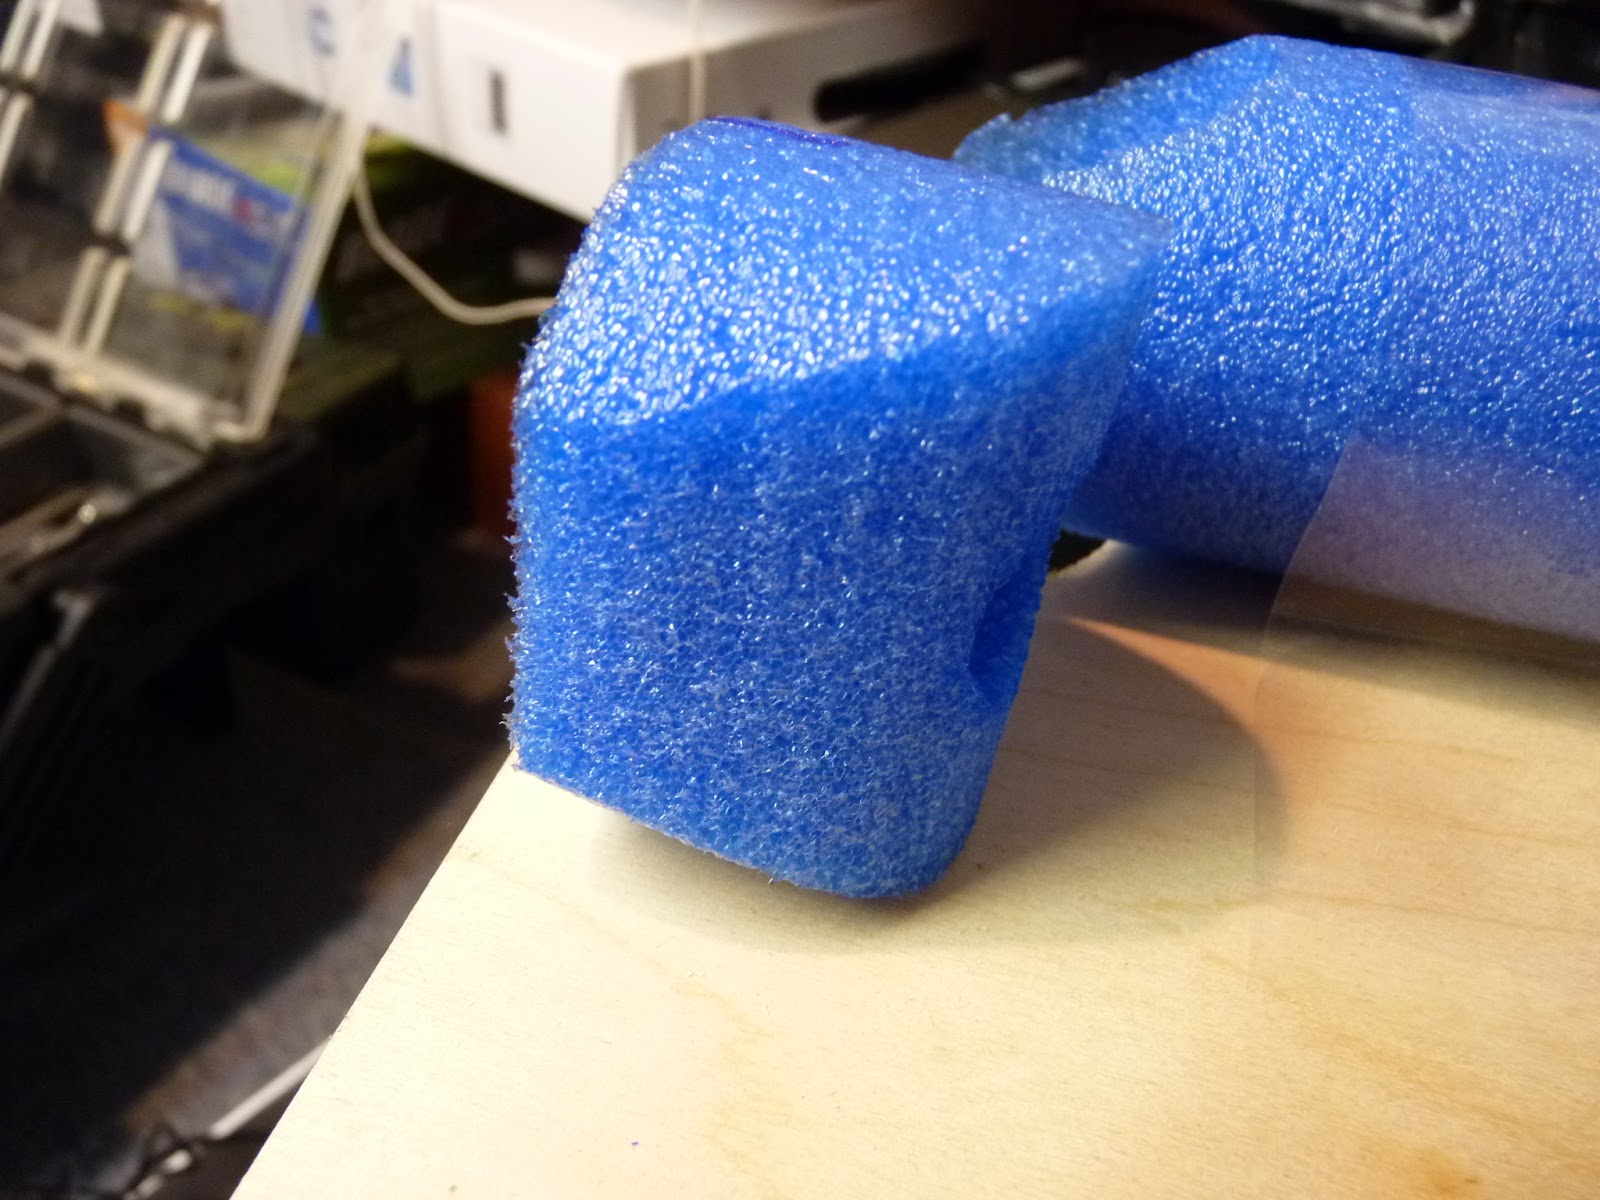
This was in service of the noodle copter, and I needed to cut some circular fittings on the end of the foam pool noodles.  I used a 2 inch hole saw to cut a template in some 1/8'' ply.  It was just about perfect.
Here's a cut off end.  The wire was just hot enough for a clean cut.
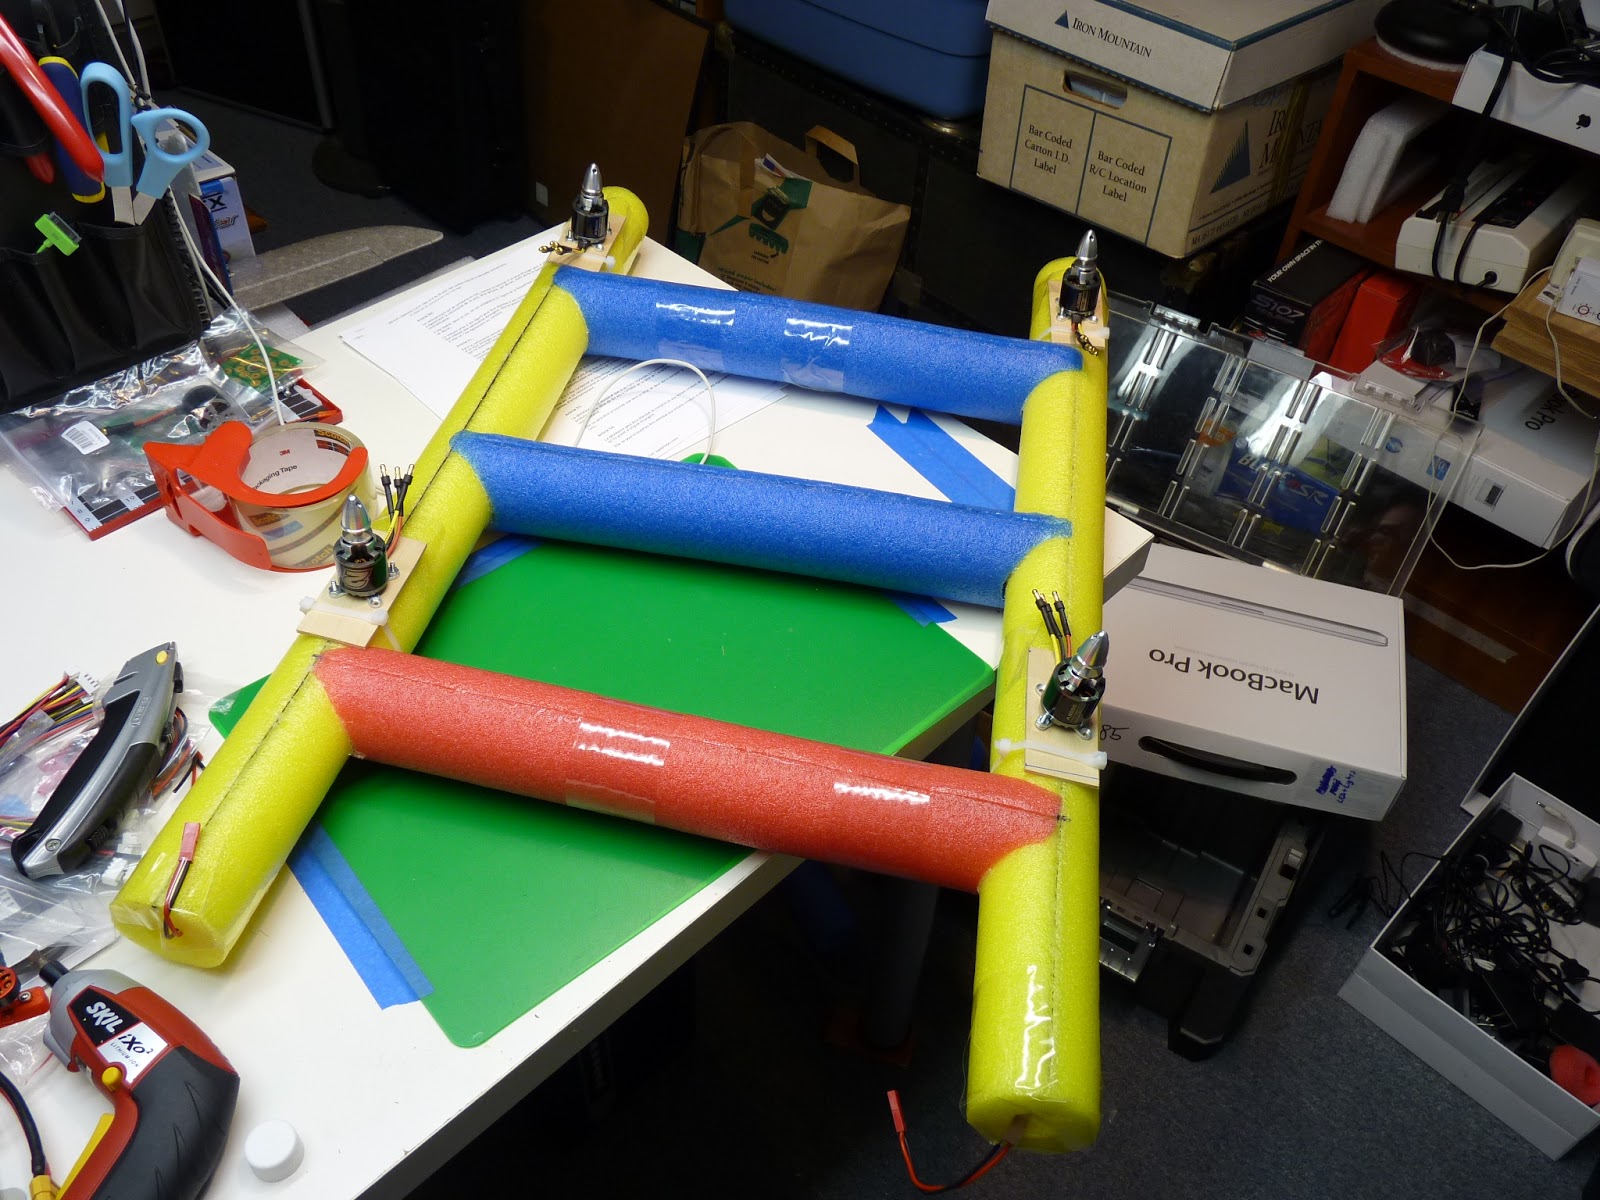
Here's the prototype body, with the pool noodle arms glued together with Beacon Foam-Tac.

I'm still hunting around for a better power supply.

I'm going to try cutting out some flat wing surfaces by clamping the coping saw in the jaws of a Black and Decker Workmate.