OpenRCForums user Myckey has a nice pair of posts on upgrading the 9xr Pro with Taranis gimbals.
I'm preparing to try it. I'll make a video and take some pictures. Prepping for that, here's the steps as I understand them.
Wiring
The goal of this step is to modify the wiring so that the gimbal has two sets of three wires going into each 3-pin plug. One set of wires is for the X axis and one set of wires is for the Y axis.
release the six gimbal wires from the multipin plug.
release the wires to both pairs of the 3-pin plugs.
attach each set of 3 wires from the gimbal to the 3-pin plugs.
When this step is completed, you have a 3-wire set for the X axis and a 3-wire set for the Y axis.
Hardware
We need to modify each gimbal to fit in the 9xr gimbal hole. Each of the four corners of the gimbal has an "ear" with two holes. A bit of trimming will allow the Taranis gimbals to fit securely into the 9xr gimbal mounting plate.
sand or dremel the outside of the ear, removing the outside hole. leave some material around the inside hole, as we will enlarge that.
open the case and remove the old gimbals. note that you will disconnect two wire harnesses for each gimbal. leave the gimbal faceplace attached.
push the new gimbals to the faceplate so that the gimbal holes line up with the 9xr gimbal posts. It's a friction fit.
check the alignment of the holes. each gimbal hole should be about 1mm offset from the 9xr post.
turn the 9xr over and see if there's a gap between the gimbal and the faceplate.
if there's a gap, sand or dremel the gimbal around the mounting hole so that the gimbal will sit flush to the faceplate.
Enlarge the holes in the faceplate only using a 3mm or 1/8'' drill bit. Drill from the top of the 9xr.
Attach the gimbal to the faceplate using a slightly longer screw (TBD: length?) of the same diameter (TBD: diameter?).
The gimbal should fit flush against the faceplate.
Reassembly
Inspect the fitting, attach the wires, test the harness connections, and close up the case!
connect the shorter wire harness to the inner 9xr gimbal connection.
connect the longer wire harness to the outer 9xr gimbal connection.
attach a battery and test the gimbals as described in the next step.
close up the case.
Testing
Two things can go wrong with the wiring. The X and Y axis can be swapped (i.e. moving the stick up and down shows motion in the horizontal direction), and the X and Y axes can be reversed (i.e. left stick motion show right motion in the radio).
go to the calibration menu.
if the X and Y axes are swapped, swap the two connectors.
if either the X or Y coordinates are reversed, swap the two outer wires of that connector.
Myckey's instructions are here. A lot of people have wanted better 9xr gimbals, so a big shoutout to him for figuring this out in such a superb way!
Here's what you need for Taranis D-Series telemetry setup. This is the lightning version, focuses on battery voltage and skips what you don't need to know.
Hardware Setup
FBVS-01 is the voltage monitoring unit.
The documentation is confusing. You don't need to modify the default power options.
FBVS-01 is supplied without connectors. Attach your own connectors as necessary.
One end attaches to the D-Series Rx telemetry port. The other end attaches to your battery.
D4R-II
Comes with a cable, attach it to the Rx.
Only need to worry about the two left connectors, ground and positive.
You can get rid of the other wires.
Final connection: Battery -- FBVS-01 -- Rx
Telemetry Setup
Go the the Telemetry screen of your model setup menu.
Set A1 Range to 13.30V. This monitors Rx voltage. You probably don't care about this if you're flying electric.
Set A2 Range to 19.8V. We'll cover why this is the right value later.
Set the low and critical alarm values. For 3S, 10.5V and 10V are good.
Audio Voltage
In the Special Function menu, set SF1: SB Down, Play Val, A2, 30
When you flip switch B down, the current voltage will be announced every 30 seconds.
When the voltage drops below the low and critical levels, you will get repeating announcements appropriately.
Here's how I did my Taranis speaker upgrade. I got this speaker ("2W 2 Watt 8 Ohm 36mm Dia Aluminum Shell Internal Magnet Speaker") from ebay vendor digitalzone02 and used this 3D printed speaker mount. 30mm pill bottles have been reported as working well.
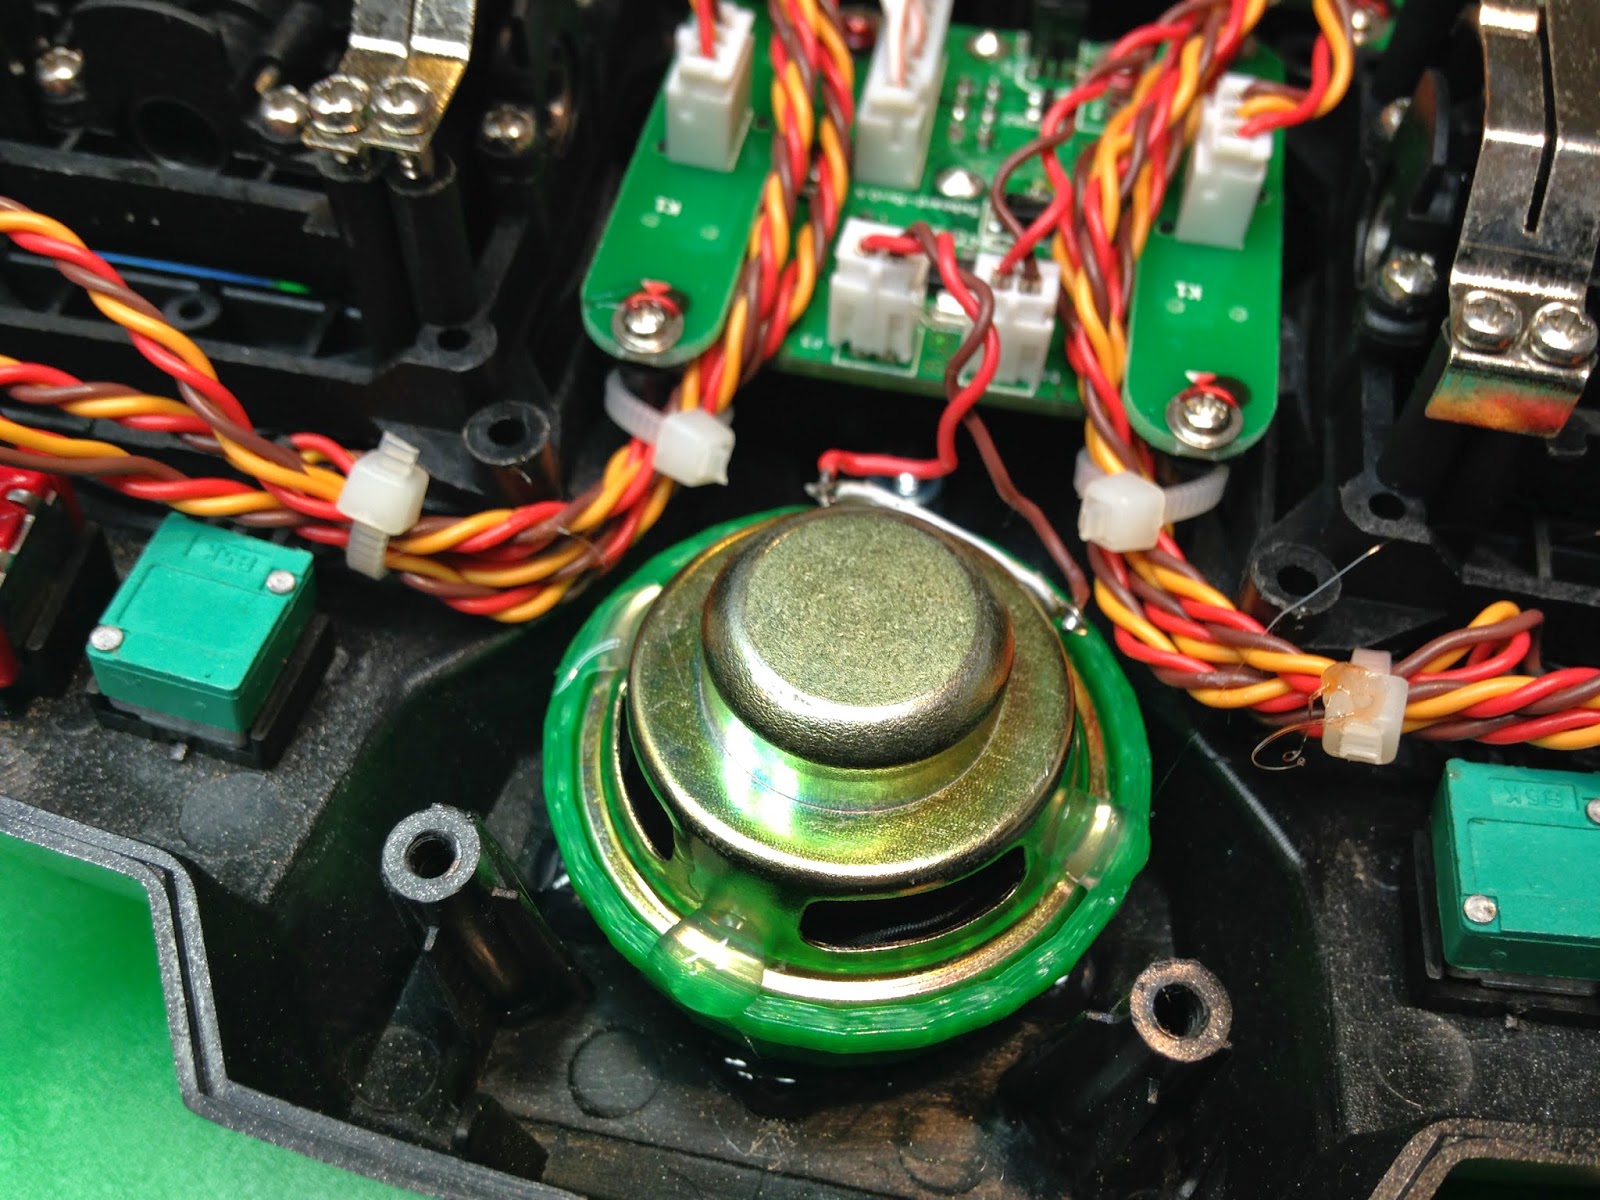
Here's the original speaker. It's held in by hot glue. Note that the speaker wire is connected to the daughterboard with a connector. I had planned on soldering everything "in place" but with that connector it's easier to pull everything out first.
Popping the original speaker off reveals the back of the cover. Some people have dremeled out a hole in the case and fitted a mesh enclosure. I didn't do that.
Here's the speaker mount dry-fitted.
And with the speaker mounted on top.
Here's a comparison between the two speakers. Wonder why the replacement sounds a bit more beefy?
Unsolder the cable from the original speaker and solder it onto the new speaker. Polarity doesn't matter, since it's a mono system, but I preserved it anyways. The speaker wire has a connector that snaps onto the daughter board.
The connector fits on the pins on the left side.
I had originally planned to solder the speaker wires while attached to the board, but since they were on such a convenient connector I took it out to solder.
A couple of dabs of hot glue at the low temperarture setting holds everything together nicely.
And some hot glue to hold the mount in place. Notice that I hadn't attached the wire to the pins properly, resulting in a silent speaker. The connector will snap all the way down.
The increase in volume is pretty nice, as you can hear below. Now I usually keep the volume control at about 50% rather than at 100%. If you're in an environment with varying background noise levels, use one of the pots or sliders to control the volume.
Mix the elevator stick on both channels. The value will be either 50% or -50%, depending on how your servos are set up. If the control surfaces move in the wrong direction, swap the sign.
Mix the aileron stick on both channels. The multiplex parameter will be "add", and the values will also be 50% or -50%. Proper motion: when the stick moves left, the left control surface should raise and the right control surface should lower. Vice versa for moving the stick right.
Example Mix
Ch 2 Ele 50% += Ail -50% Ch 3 Ele -50% += Ail -50%
blogodex = {"toc":"Welcome to Taranis","index":"Taranis"};
Here's a series of videos I did in conjunction with Aloft Hobbies an FrSky RC. It's is designed to get you up and running on Taranis as quickly as possible.
I've got some more in the works. What topics would you like to see? Where have I got something wrong? Let me know what you think!
Bruce has a great video on using different types of batteries in a Taranis. Here's a few notes that I've put together.
The illustration is from the Taranis manual, which also notes that the operating voltage range is from 6 to 15 volts. You should read the manual.
Don't charge anything but the stock batteries with the internal charger. Specifically, don't charge LiPo or LiFe with the internal charger.
The Taranis originally came with 800 mAh battery pack. Currently ships with 2000 mAh battery pack. This battery pack is also available at FrSky dealers.
On older models, charge light was solid. On newer models (the ones that came with 2000 mAh battery), charge light blinks.
Internal charger shuts off automatically when battery is full.
If you change battery types, update the voltage range and warning values on menu 1 of the radio setup screen.
battery high low warn notes
NiMH 800 mAh 8.0 6.5 6.5 stock battery on older models
NiMH 2000 mAh 8.0 6.5 6.5 stock battery on newer models
For older receivers (e.g. D family), use the older failsafe method of pressing the button on the Rx.
Taranis and X family receivers have three failsafe options:
hold last input. Don't ever use this one, it's almost always the wrong thing to do.
no pulse. Some autopilots can be configured to handle this as a signal to start processing their own failsafe logic.
custom. This allows you to set the value of each servo channel. When the Rx loses contact, those values are set for each channel. When contact is resumed, control is turned back to the Tx.
While Binding or doing anything with your Rx/Tx, be sure and disable your props.
To set Taranis/X family Rx Failsafe
bind the Tx/Rx if not already bound.
on model menu 2, select Failsafe mode: custom
click [SET] to proceed to the failsafe menu.
For each channel, set the appropriate failsafe value.
save the failsafe value which Long-Enter.
To set Non-X family failsafe
bind the Tx/Rx if not already bound.
move the sticks into position.
push the failsafe button on the Rx. You will see a double-blink of the LED.
you can repeat this operation. each time sets the failsafe anew.
To clear failsafe on any FrSky Rx
rebind the Rx.
Verify your Failsafe
do all configuration with props off.
bench test several times.
test in the air under controlled conditions.
do these enough times to build up confidence in the failsafe operation.
Here's how to bind using an external module.
tl;dr: activate the module using the model configuration screen.
power off Tx.
pop off module cover on back.
insert module, be careful that the pins line up.
snap the module into place.
power on Tx.
go to model configuration menu 2
set Internal RF Mode to OFF.
Set External RF Module to PPM, CH1-8, 22.5ms, 300u, - (minus sign)
Now you're set for normal DSM2-style binding. I've got a LemonRX receiver ready to go.
power off Tx, Rx
insert bind plug on Rx bind port.
power up Rx
You should see a fast blink.
press and hold the module bind button.
while continuing to hold the module bind button, power on Tx
wait a few seconds
the module will beep, and the radio will slow blink, indicating successful bind.
remove bind plug.
Sometimes the Tx and Rx won't bind if the Tx and Rx are too close together. If you suspect this is the case, move the Tx away from the Rx about 5-6 feet and try again.
Here's the settings to make a 6-position switch for autopilots.
tl;dr: Create two 3-point curves with the specified points. Mix onto channel 5 switches C and D using those curves.