I was looking around NAPA autoparts and saw this. The 16-14 gauge fits the RCTimer 30A controller and it has a center hole to solder the battery lead. Two per package - and it is riveted so no screw to loosen. I'm not sure if I will solder or crimp.
Saturday, November 26, 2011
NAPA autoparts power distribution
Vito on RCGroups noted this item for use as a power distribution connector:
Ardweeny -- tiny little Arduino
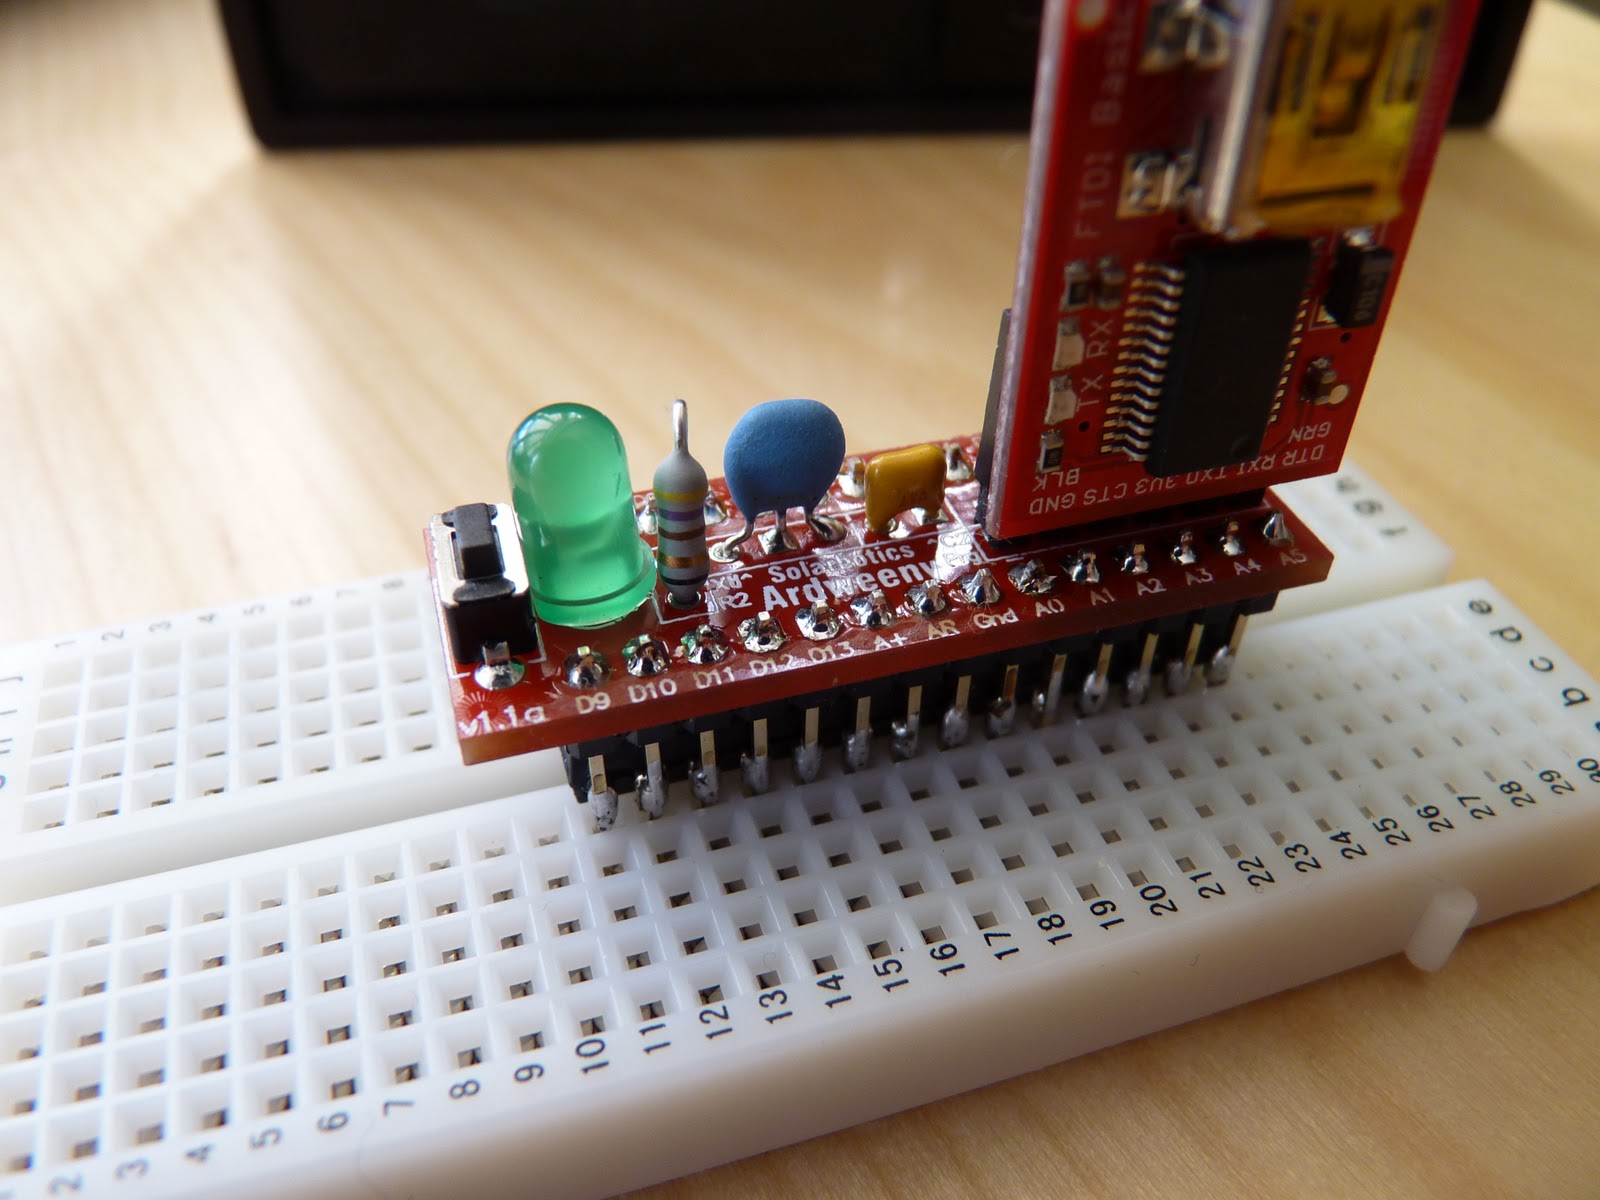
Here's the Ardweeny from Solarbotics. It's an Arduino system based on Kimio Kosaka's One Chip Arduino. I got it partly to have a small, cheap Arduino for breadboarding, and partly to practice soldering on a real project. I'm going to use it to write some code to understand the AT interrupt driven timer. It will conveniently hang off my laptop nicely without the size and weight of the Uno board, and provide a second processor type to force dealing with the hardware differences.
Friday, November 25, 2011
Vibration Isolators, Industrial Strength
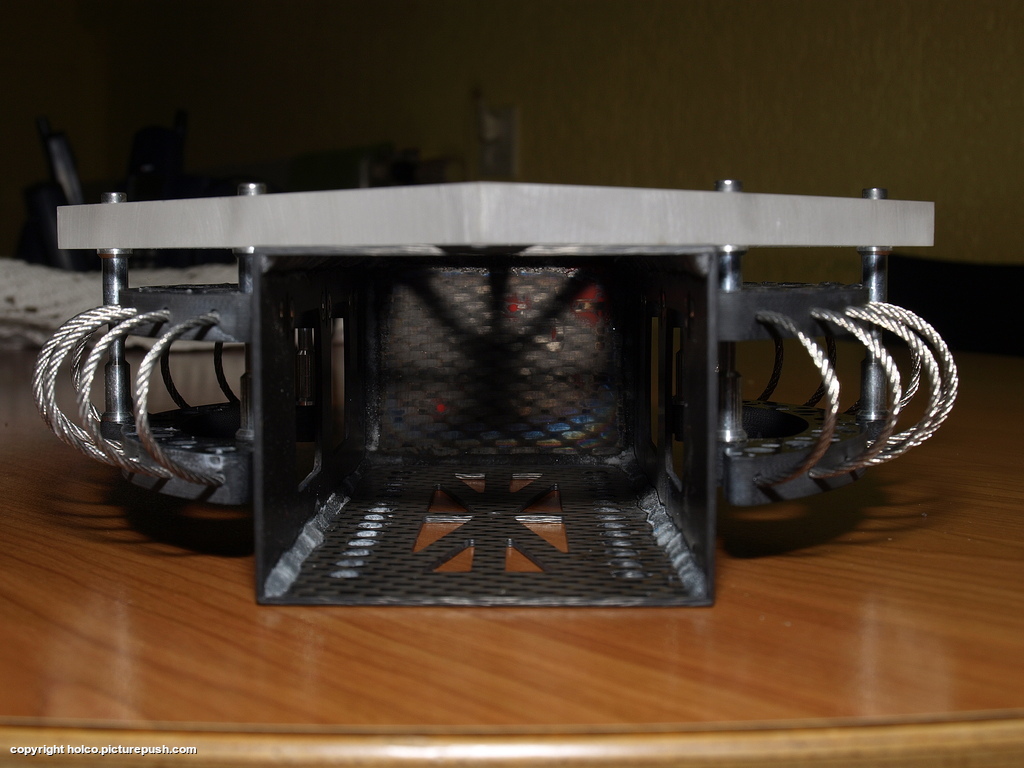
Helical Isolators.
"John Evans' helical isolators are made of aircraft quality stainless steel cable, wound into metal retaining bars prepared for surface mounting. The wire rope (ranging in diameter from 1/16" to 1"+) and its helix configuration provide the specific resilience required to cushion fragile loads as small as a few pounds or substantial loads of many thousands of pounds, and absorb vibration through a wide frequency spectrum. The isolator is essentially insensitive to position: it operates well in any attitude; in compression, extension, shear and roll, and provides protection in all axes simultaneously."
This is the method being used for the Flexacopter.
"John Evans' helical isolators are made of aircraft quality stainless steel cable, wound into metal retaining bars prepared for surface mounting. The wire rope (ranging in diameter from 1/16" to 1"+) and its helix configuration provide the specific resilience required to cushion fragile loads as small as a few pounds or substantial loads of many thousands of pounds, and absorb vibration through a wide frequency spectrum. The isolator is essentially insensitive to position: it operates well in any attitude; in compression, extension, shear and roll, and provides protection in all axes simultaneously."
This is the method being used for the Flexacopter.
Thursday, November 24, 2011
KapteinKUK's flying VTOL bottle
The Kaptein says, "A single propeller VTOL thingy." Includes source for KKBoard controls.
"It is a quick hack of wood spatulas, zip ties, tape, CD control horns, hot glue, depron and one 1.5l plastic bottle."
- Servos: HXT900
- Motor: DT-750
- prop: GWS 12x6 slowflyer
- batteries: 2 x 1.8Ah 3S
- weight without batteries: 495g
"It is a quick hack of wood spatulas, zip ties, tape, CD control horns, hot glue, depron and one 1.5l plastic bottle."
Saturday, November 19, 2011
an Arduino sketch for transmitter tuning
From the Arduino environment, click the Terminal button and you'll see this output. Nothing fancy, but it allows accurate fiddling with transmitter controls.
This version of the code uses pulseIn(), which nicely does the right thing but suckily does it very slowly. It's fine if you're just printing out the values, but if you were wanting to do some real control work in between reading the signals, it wouldn't work very well.
#include "WProgram.h"
#define NCHAN (sizeof(chan)/sizeof(chan[0]))
int chan[]={2,3,4,5,6};
int val[NCHAN];
void setup()
{
int i;
for (i = 0; i < NCHAN; ++i)
pinMode(chan[i], INPUT);
Serial.begin(115200);
}
void loop()
{
int i;
for (i = 0; i < NCHAN; ++i)
val[i] = pulseIn(chan[i], HIGH);
Serial.println();
for (i = 0; i < NCHAN; ++i) {
Serial.print(i+1);
Serial.print(": ");
Serial.print(val[i]);
Serial.print(" ");
}
//delay(20);
}
Here's some code that uses interrupts to get the timings. This would be useful on an Arduino Mega, which supports interrupts on six pins. If you don't have a Mega, you've only got two pins so you're better off with the code above. There are two other problems with this code:
- micros() returns a value which is rounded to a multiple of 4 microseconds, totally unacceptable for tuning radio PWM signals.
- digitalRead() is very slow and can be made much faster.
I'm going to keep working on this approach, and I'll update later when I've got something to show. I'm also thinking of making a GUI using Processing.
// reading a PWM signal using interrupts
int pin = 2; // arduino pin number
int intrnum = 0; // interrupt number, 0-5 for mega, 0-1 for others
volatile int width; // width of most recent signal
volatile unsigned long start; // start time of rising signal
// myisr -- interrupt handler
void myisr()
{
unsigned long now = micros();
int val = digitalRead(2); // are we high (meaning pulse just started)
// or low (meaning pulse just finished) ?
if(val == HIGH) // ascending edge, just save off start time
start = now;
else // val == LOW, descending edge, compute pulse width
width= now - start;
}
void setup()
{
Serial.begin(115200);
pinMode(pin,INPUT);
attachInterrupt(intrnum, myisr, CHANGE);
}
void loop()
{
Serial.println(width);
delay(10);
}
Thursday, November 17, 2011
Attaching an FTDI connector to an Arduino
Here's how to hook up an FDTI connector to an Aduino card. You need one of these when you're programming an Aduino that doesn't have a USB connector. In this case, it's an Aduino Mini mounted on a MultiWii Paris board.
The FTDI connector plugs into the six pins on the top of the card. You don't need to care about the pin names, but note the BLK and GRN labels.
Plug a mini USB cable (technically a "USB 2.0 Mini Type B 5 position") onto the FTDI card and attach it to your computer. Your computer should load the correct driver.
The FTDI connector is not keyed, so it's easy to attach it backwards. Nothing bad will happen, but it won't work. There are BLK and GRN labels here as well. Line up the labels with the Arduino and make the six pins are going into the six sockets.
Your software will have some menu for picking the serial port and baud rate. On my windows box it's COM6, and on my Mac it's some odd name with "USB" in the middle.
BTW, I don't know what BLK and GRN stand for. I'm assuming it's "black" and "green", and that some ancient connector used wires of those colors. In any case, all modern FTDI connectors are cards, and they're all labelled with BLK and GRN.
The FTDI connector plugs into the six pins on the top of the card. You don't need to care about the pin names, but note the BLK and GRN labels.
Plug a mini USB cable (technically a "USB 2.0 Mini Type B 5 position") onto the FTDI card and attach it to your computer. Your computer should load the correct driver.
The FTDI connector is not keyed, so it's easy to attach it backwards. Nothing bad will happen, but it won't work. There are BLK and GRN labels here as well. Line up the labels with the Arduino and make the six pins are going into the six sockets.
Your software will have some menu for picking the serial port and baud rate. On my windows box it's COM6, and on my Mac it's some odd name with "USB" in the middle.
BTW, I don't know what BLK and GRN stand for. I'm assuming it's "black" and "green", and that some ancient connector used wires of those colors. In any case, all modern FTDI connectors are cards, and they're all labelled with BLK and GRN.
A Handy Sticker for my Charger
Here's a handy sticker showing all the important charge values for 1-4 cells: low (absolute and recommended), nominal, and high. I should add a row for LiFeP04 batteries.
Sunday, November 13, 2011
Thera-Band Prop Saver bands
I was looking for better prop saver bands and heard someone mention "Thera-Band" exercise bands as an option. I bought a couple of feet of "Blue extra heavy Theraband" on ebay from vendor drdcsupplies. It cost $1.45/ft postpaid (not $1.80 as I mentioned in the video) and arrived quickly.
I cut some 1/8 inch lengths with a side cutter. I tried using regular scissors but had a problem with the tubing deforming and not quite cutting straight.
They fit nicely on the prop saver, held tightly and smoothly, and showed no signs of distress when stretched.
Here's the rubber bands from summer. They worked fine when I first put them on, but rapidly developed cracks.
Here's a video:
I cut some 1/8 inch lengths with a side cutter. I tried using regular scissors but had a problem with the tubing deforming and not quite cutting straight.
They fit nicely on the prop saver, held tightly and smoothly, and showed no signs of distress when stretched.
Here's the rubber bands from summer. They worked fine when I first put them on, but rapidly developed cracks.
Here's a video:
Friday, November 11, 2011
Arcticopter IV power loading
battery amps watts notes
3S 2200 15c .5 6 powered on, no props
3.2 36 armed, motors at lowest speed
16.0 184 half throttle
33.3 313 full throttle (15c)
3S 2200 40c 39.3 413 full throttle (40c)
motors: hacker Style Brushless Outrunner 20-22L x 4
ESC: Turnigy Plush 18A x 4
props: 10x (3.8?? 4.7?? I will check later...)
3S 2200 15c .5 6 powered on, no props
3.2 36 armed, motors at lowest speed
16.0 184 half throttle
33.3 313 full throttle (15c)
3S 2200 40c 39.3 413 full throttle (40c)
motors: hacker Style Brushless Outrunner 20-22L x 4
ESC: Turnigy Plush 18A x 4
props: 10x (3.8?? 4.7?? I will check later...)
Wednesday, November 9, 2011
HobbyKing KKBoard Notes
For $25, I couldn't resist getting one of the Hobby King V2 KKBoards. The minimalist elegance of 3 gyros, 3 pots, and 4K of AVR Assembler speaks to me! KapteinKuk is one of my favorite RC people!
Programming Instructions
Dadde87 has everything here. Note that his programmer connection diagram is mirrored from how a lot of people think about the connectors. I've written down my connector interface below.
Programmer
Using this USBASP AVR Programmer purchased from EBay seller egochina8848 designed by fischl.de. It's usbasp in KKFlashTool.
(BUMP on top)
MOSI NC RST SCK MISO <-- looking at pins
VCC GND GND GND GND
Programming Instructions
Dadde87 has everything here. Note that his programmer connection diagram is mirrored from how a lot of people think about the connectors. I've written down my connector interface below.
Programmer
Using this USBASP AVR Programmer purchased from EBay seller egochina8848 designed by fischl.de. It's usbasp in KKFlashTool.
(BUMP on top)
MOSI NC RST SCK MISO <-- looking at pins
VCC GND GND GND GND
KKFlashTool
Flash Tool is here. Be sure and flash the "1 Sec Clock Test" and see if the LED blinks once per second to ensure you're AVR programmer is working properly.
I took two servo wires and cut one end off, leaving the female plugs. I attached male servo pins to each of the wires on the other end and covered them with 1.5mm shrink tube. You can do the same thing with a servo extension wire. I attached the servo plugs to the six pins of the board (white wires towards the motor pins, and with the right plug labelled), and inserted the individual pins into the programmer as per the notes above. Once I tested the unit I put a piece of 7mm shrink wrap around the wires near the single male connectors to help keep them in the holes.


Monday, November 7, 2011
MultiWii Camera Test
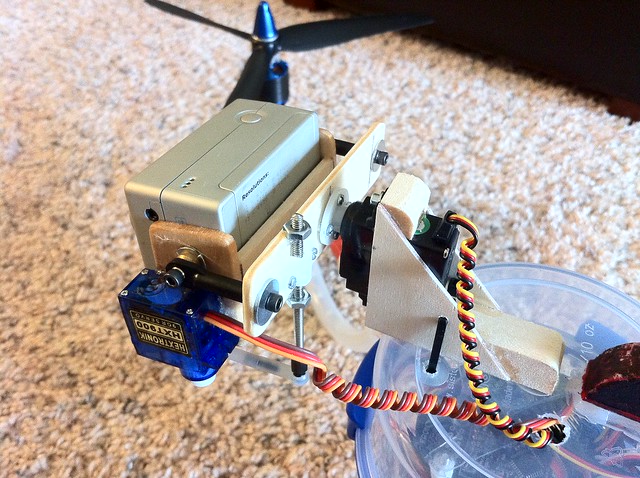
So, I've been wanting to try out the camera stabilzation features on the MultiWii controller, and prompted by an interesting camera stabilization link from my friend Craig I went ahead and put a quick prototype together. I had been waiting to put together something like this nice gimbal; I'll get to that soon, but in the mean time here's what I did with hot glue and spare parts sitting around. There will be lots of jitter with this design, but we'll see if the roll and pitch adjustments are close.
I started by configuring the MultiWii software (notes below) and enabling stabilization in MultiWiiConf. To hold the camera, I noticed that the Radical RC quad motor mount was the perfect size to hold a GoPro. By using a clamp while CA'ing the joints (careful not to drip!) I was able to get enough of an angle so that the camera fit snugly enough so that for testing I didn't have to use any other mechanism to hold the camera.
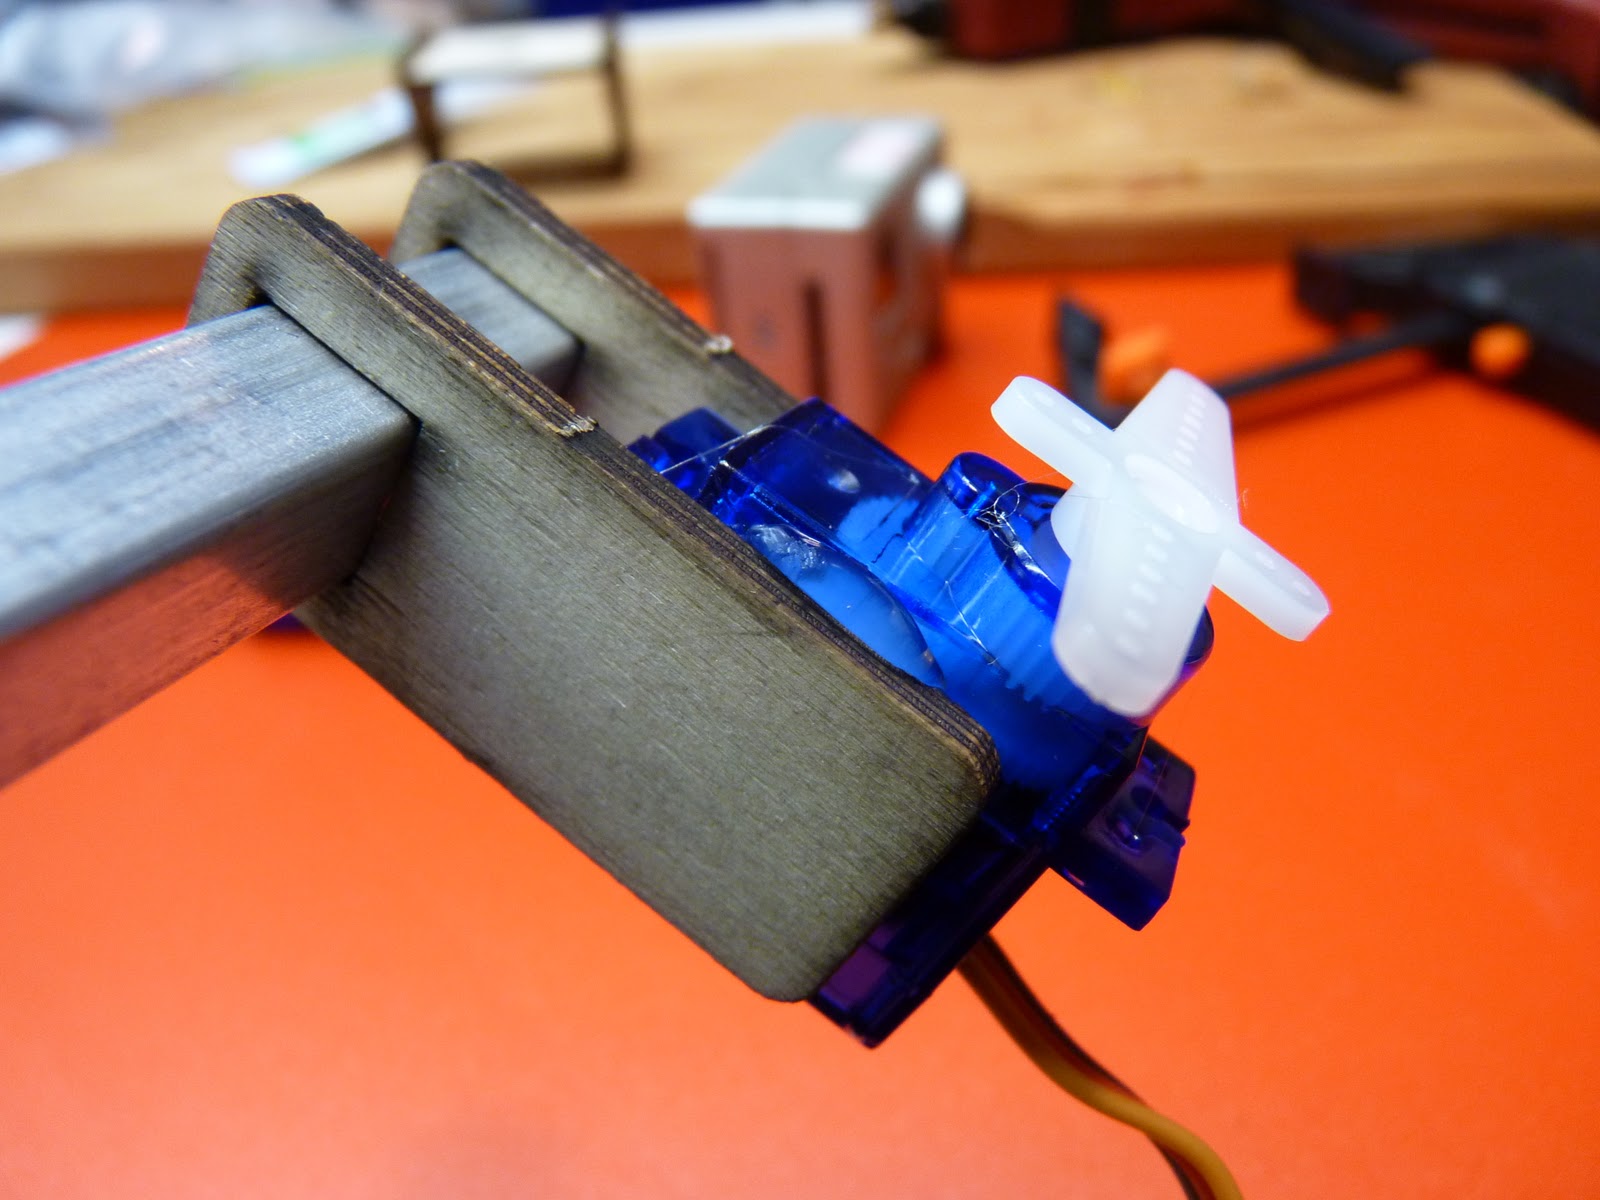
I used two 9 gram servos to make a two-axis gimbal. Note that this isn't the final plan, but for quick prototyping it's hard to beat, taking about 15 minutes to assemble everything after 30 minutes of fiddling with various parts trying to figure out what fit best where.
I sandwiched one servo between two Radical RC boom mounts and fixed it into position with hot glue. Put the mounts on the boom and it will be easy to align. Be sure and use the high temperature setting on your glue gun or the plastic servo body won't stick very well. Attach the cross-shaped servo arm for maximum surface area to attach the second servo. Don't forget the screw!
Remove any labels and then hot-glue the second servo onto the servo arm. It should be perpendicular. If you get it wrong, you can clean up the glue joint with rubbing alcohol and try again.
Finally, attach a cross-shaped servo arm to the second servo and hot glue it to the camera mount. Be sure and check your alignment; my first attempt was very crooked and I had to redo it.
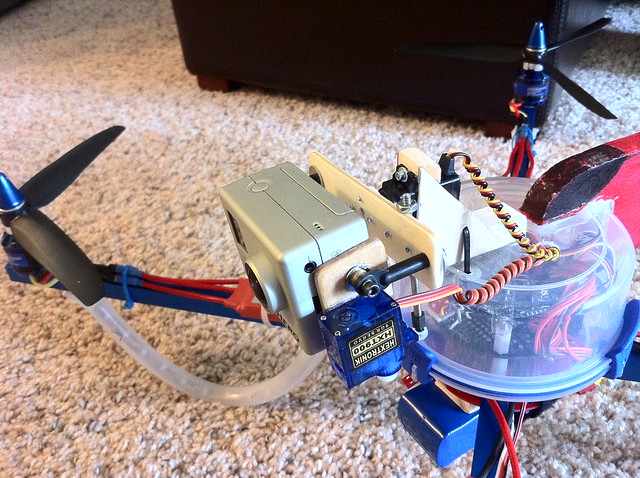
Here's what the mount looks like when it's attached to the rear mounting arm of Arcticopter IV. I put it in the back so that the Arcticopter arms would appear in any test videos to show the real motion of the unit.
Here's a couple of videos showing the result. The first one is an overview. The second is from the GoPro pointing at my iPhone, and the third is from my iPhone pointing back at the GoPro.
Overall I'm pretty pleased with the results. Ignoring the jitter resulting from the horizontal extension, the camera stays remarkably still. I need to adjust the rates a little in the software, but it's pretty close as it is. I had expected the most jitter when pitching down (resulting in the camera moving up); I was a bit surprised that the major jitter was the opposite... the servo would attempt to move the camera downward, gravity would pull the camera down, causing the servo to push back up. Repeating this through the pitch movement set up an oscillation that really forced the jitter.
Although I must say that if the Arcticopter were moving around like this in flight and if I were the pilot, the last thing to be concerned about would be camera jitter!
Overview video:
Making sure the gimbal motion would clear the mechanism:
Stabilized view from the GoPro, with appropriate jitter disclaimers:
Another view, from the workbench:
Configuration Notes. If one of the servos is going backwards to how it should be, make the TILT parameter negative.
MultiWii_1_8_patch2 $ diff config.h-orig config.h
66c66
< //#define SERVO_TILT
---
> #define SERVO_TILT
74c74
< #define TILT_ROLL_PROP 10
---
> #define TILT_ROLL_PROP -10
103c103
< //#define BMA180
---
> #define BMA180
In MultiWiiConf, enable camera stabilization in all modes.
I started by configuring the MultiWii software (notes below) and enabling stabilization in MultiWiiConf. To hold the camera, I noticed that the Radical RC quad motor mount was the perfect size to hold a GoPro. By using a clamp while CA'ing the joints (careful not to drip!) I was able to get enough of an angle so that the camera fit snugly enough so that for testing I didn't have to use any other mechanism to hold the camera.
I used two 9 gram servos to make a two-axis gimbal. Note that this isn't the final plan, but for quick prototyping it's hard to beat, taking about 15 minutes to assemble everything after 30 minutes of fiddling with various parts trying to figure out what fit best where.
I sandwiched one servo between two Radical RC boom mounts and fixed it into position with hot glue. Put the mounts on the boom and it will be easy to align. Be sure and use the high temperature setting on your glue gun or the plastic servo body won't stick very well. Attach the cross-shaped servo arm for maximum surface area to attach the second servo. Don't forget the screw!
Remove any labels and then hot-glue the second servo onto the servo arm. It should be perpendicular. If you get it wrong, you can clean up the glue joint with rubbing alcohol and try again.
Finally, attach a cross-shaped servo arm to the second servo and hot glue it to the camera mount. Be sure and check your alignment; my first attempt was very crooked and I had to redo it.
Here's what the mount looks like when it's attached to the rear mounting arm of Arcticopter IV. I put it in the back so that the Arcticopter arms would appear in any test videos to show the real motion of the unit.
Here's a couple of videos showing the result. The first one is an overview. The second is from the GoPro pointing at my iPhone, and the third is from my iPhone pointing back at the GoPro.
Overall I'm pretty pleased with the results. Ignoring the jitter resulting from the horizontal extension, the camera stays remarkably still. I need to adjust the rates a little in the software, but it's pretty close as it is. I had expected the most jitter when pitching down (resulting in the camera moving up); I was a bit surprised that the major jitter was the opposite... the servo would attempt to move the camera downward, gravity would pull the camera down, causing the servo to push back up. Repeating this through the pitch movement set up an oscillation that really forced the jitter.
Although I must say that if the Arcticopter were moving around like this in flight and if I were the pilot, the last thing to be concerned about would be camera jitter!
Overview video:
Making sure the gimbal motion would clear the mechanism:
Stabilized view from the GoPro, with appropriate jitter disclaimers:
Another view, from the workbench:
Configuration Notes. If one of the servos is going backwards to how it should be, make the TILT parameter negative.
MultiWii_1_8_patch2 $ diff config.h-orig config.h
66c66
< //#define SERVO_TILT
---
> #define SERVO_TILT
74c74
< #define TILT_ROLL_PROP 10
---
> #define TILT_ROLL_PROP -10
103c103
< //#define BMA180
---
> #define BMA180
In MultiWiiConf, enable camera stabilization in all modes.
Crazy-J's rather nifty GoPro gimbal
This gimbal is what I'd like to make. Like everything he does, it reeks of awesomeness!
http://www.bayrc.com/boards/viewtopic.php?f=50&t=8380
"It is using a HXT 9gram servo for pitch, and a HS85MG for roll. Essentially, I built a basswood cradle that fits the GoPro snug and then created a pivoting system around it. The cradle is reinforced with .5oz fiberglass cloth and thin CA. There are two Dubro 4-40 ball links that screw into 4-40 blind nuts installed in the cradle. The 4-40 ball links are the pivoting point for the pitch axis. I don't get a whole lot of pitch movement, but that can be changed easily if I want to. The whole system without the camera weights less than 3oz (just a guess, it might be less!)."
Update: here's the new gimbal from diydrones.
Night Vapor Improvements
Some nice Night Vapor improvements mentioned on RCG:
- prop twisting -- if you're not getting good thrust, twist the 5x3 prop to restore the pitch.
- upgrade to this beautiful 5x3 CF prop from bsdmicrorc.com.
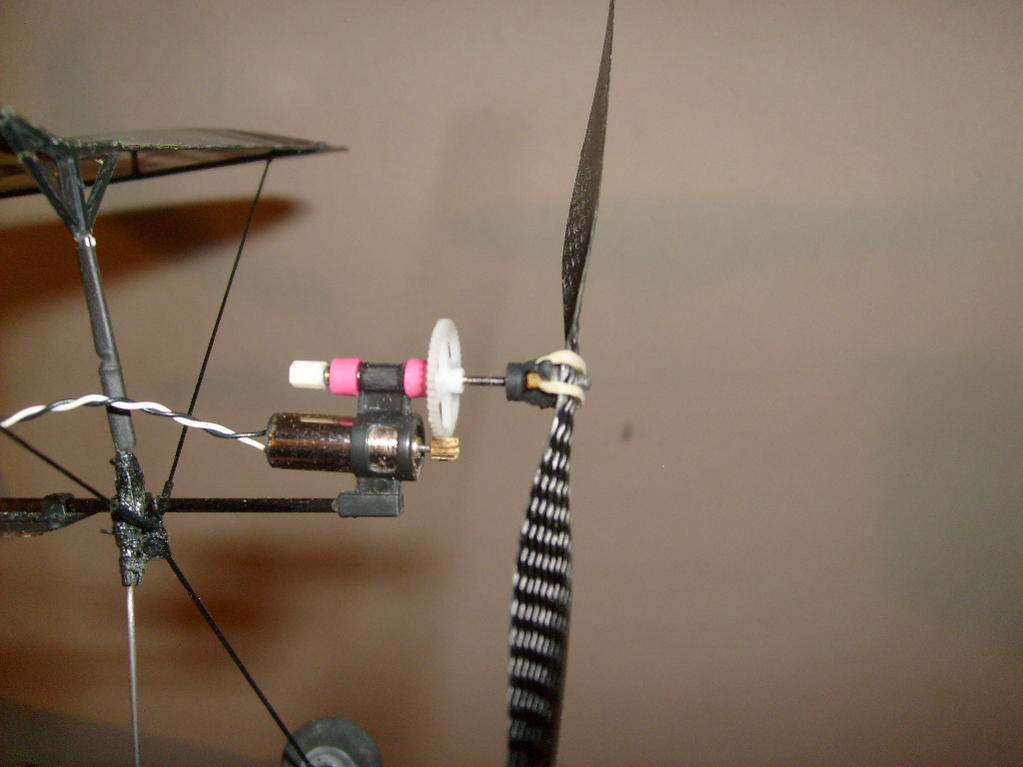
- upgrade to an Ultra Micro J-3 Cub motor. You will need to extend the wires but otherwise it's a direct swap. You will be able to hover and pull out.
- add .5mm CF supports to front rod and elevator.
Thursday, November 3, 2011
Arcticopter IV indoor maiden
Got everything put together and tuned. For the video, I had my iphone sitting on its side on the landing next to me, so I had to fly in the ground effect to keep it in frame. I had stabilization on, and it handled quite nicely I think.
MultiWii with gyros and accel. About 9.5oz without batteries.
Wednesday, November 2, 2011
Encyclopedia of RC Foam
Some Vendors
Types of Foam
Here's a summary of various types of foam used in RC modeling. I'm no expert in this area, so let me know of any inaccuracies. Thanks to TP16 and RogueTitan on rcgroups for some of the material below. This is a work in progress. If you have more information or more types of foam leave a comment below!
First, a few definitions:
Expanded foam is melted and injected into a mold.
Extruded foam is cast as large blocks and cut into sheets. In real life this foam is often used as building insulation.
Polystyrene, Polypropylene, etc, are different types of materials with different characteristics regarding weight, strength, flexibility, etc. Wikipedia discusses them at a level of detail far beyond my freshman chemistry class.
And the foams:
EPP a.k.a. Expanded Polypropylene.very durable sheet material, bounces well, holds up to rough treatment. Very floppy, so needs to be reinforced. comes in densities of 1.3 and 1.9 pounds per cubic foot. Typically sold in sheets up to 24x36 inches, in 3mm, 6mm, and 9mm thicknesses.
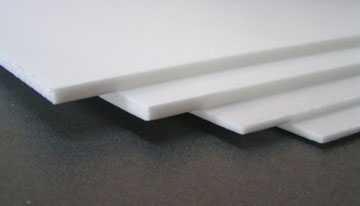
Depron. Sheet foam, very stiff but much easier to break than EPP. Easy to cut and sand, comes in white, gray, and black. Used in Europe as flooring base.
Depron Aero. even lighter than depron. Popular in competition indoor pattern flyers.
Elapor. Trade name for Multiplex's EPP foam. The Easy Star is made from this and is renowned for being a durable model.
Z Foam. From Horizon Hobby, this is a proprietary reinforced foam construction method.
Blue Core, Pink Core, etc. Extruded Polystyrene. Sold in home improvement stores in sheets of various thicknesses. The color depends on the manufacturer. Lacks beads and is generally sandable and shape-able.
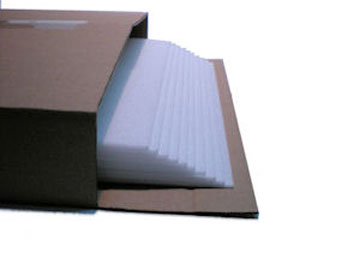
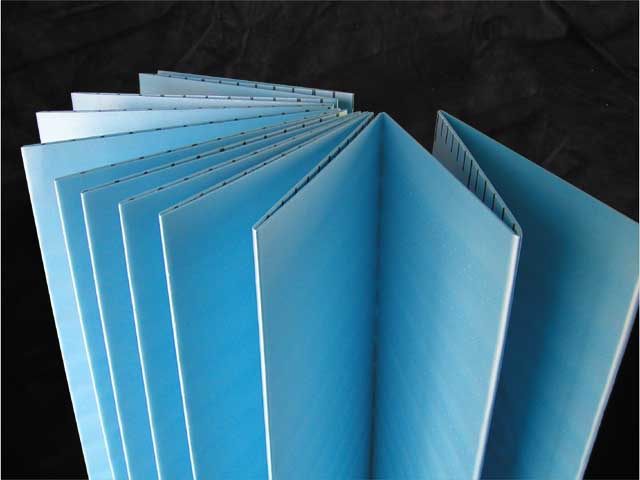
Fan Fold Foam, aka FFF. The same material as Blue Cor, but in 1/4'' thick 2 feet x 50 feet sheets, fan-folded every two feet. Cheap and popular for scratch-built models. Between EPP and Depron in terms of strength and flexibility. You can see here that it's labelled as being Extruded Polystyrene.
Dollar Tree Foam Board, a.k.a. Rediboard. 3/16'' thick, 20x30 inch. Sold at Dollar Tree stores for $1 each. Official product name is ReadiBoard. Flimiser than FFF, but easier to get in warmer places where FFF is not stocked. Reinforced paper backing on both sides, people usually remove it to reduce weight. Spray with water or window cleaner, let dry, and the paper will peel off in one piece. Elmers foam board is similar but heavier.
EPP, a.k.a. Expanded PolyPropylene. This is another sort of bead foam. Generally held to be some of the most durable stuff out there, it can be flexed and twisted without snapping. Because of this, it's got very low structural integrity so airframes have to be strengthened by other means such as CF or fiberglass. Comes in a couple different densities.
EPO a.k.a. Expanded PolyOlefin. Similar to EPS but different as well. It's reportedly stronger and has a smoother, more finishable surface. Used by manufacturers such as FMS.
EPS a.k.a. Expanded PolyStyrene. This is your basic beer-cooler foam. Little white beads, various densities. Note that "EPS" is also occasionally used for Extruded PolyStyrene, which is a different material entirely. Still foam, but made by -you guessed it- extruding rather than expanding.
Daemon on RCGroups notes:
EPS is easiest to do injection molding. EPO is trickier (and varies from manufacturer to manufacturer). EPP is a real pain (requires a lot more vents in the mold, which create all those little dimples on the finished product). EPS can be the most rigid, but it's also the most brittle and hard to repair as regular CA and any solvent based glue totally dissolves it, and foam safe CA has various limitations. It's the worst around heat, so can't use iron on covering and if you crush it or bend it, it stays crushed and bent.
EPP is the least rigid per weight, but is totally bounceable, does not dent or scratch and not all that hard to stiffen up with some added stiffeners (carbon ribbons and tape). EPP is the most resistant to heat so can take any covering.
EPO is a mix of the two, so it has more rigidity per weight than EPP, and it can bend more like EPP, but still will dent or scratch. If it's a "good" EPO (Skywalker EPO, or Multiplex Elapor), it can be repaired with regular CA (creates a nice chemical bond that's stronger than the foam itself), and you can take the dents and scratches out and straighten bent or crushed foam with proper application of heat (165-170 degree water or steam). Have to be careful when applying iron on coverings (Monokote,
Ultracote, Laminating film) to not overheat the foam and puff it up.
blogodex = {"toc" : "foam", "idx" = {["suppliers", "EPS", "EPO", "Depron"]};
- rcfoam -- EPP 1.3#, EPP 1.9#, Deppron, XPS, carbon and other materials.
- Dollar Tree -- 36x24 6mm sheets from Adams, with paper.
- Model Plane Foam -- top quality Adams foam, without paper.
Types of Foam
Here's a summary of various types of foam used in RC modeling. I'm no expert in this area, so let me know of any inaccuracies. Thanks to TP16 and RogueTitan on rcgroups for some of the material below. This is a work in progress. If you have more information or more types of foam leave a comment below!
First, a few definitions:
Expanded foam is melted and injected into a mold.
Extruded foam is cast as large blocks and cut into sheets. In real life this foam is often used as building insulation.
Polystyrene, Polypropylene, etc, are different types of materials with different characteristics regarding weight, strength, flexibility, etc. Wikipedia discusses them at a level of detail far beyond my freshman chemistry class.
And the foams:
EPP a.k.a. Expanded Polypropylene.very durable sheet material, bounces well, holds up to rough treatment. Very floppy, so needs to be reinforced. comes in densities of 1.3 and 1.9 pounds per cubic foot. Typically sold in sheets up to 24x36 inches, in 3mm, 6mm, and 9mm thicknesses.
Depron. Sheet foam, very stiff but much easier to break than EPP. Easy to cut and sand, comes in white, gray, and black. Used in Europe as flooring base.
Depron Aero. even lighter than depron. Popular in competition indoor pattern flyers.
Elapor. Trade name for Multiplex's EPP foam. The Easy Star is made from this and is renowned for being a durable model.
Z Foam. From Horizon Hobby, this is a proprietary reinforced foam construction method.
Blue Core, Pink Core, etc. Extruded Polystyrene. Sold in home improvement stores in sheets of various thicknesses. The color depends on the manufacturer. Lacks beads and is generally sandable and shape-able.
Fan Fold Foam, aka FFF. The same material as Blue Cor, but in 1/4'' thick 2 feet x 50 feet sheets, fan-folded every two feet. Cheap and popular for scratch-built models. Between EPP and Depron in terms of strength and flexibility. You can see here that it's labelled as being Extruded Polystyrene.

Dollar Tree Foam Board, a.k.a. Rediboard. 3/16'' thick, 20x30 inch. Sold at Dollar Tree stores for $1 each. Official product name is ReadiBoard. Flimiser than FFF, but easier to get in warmer places where FFF is not stocked. Reinforced paper backing on both sides, people usually remove it to reduce weight. Spray with water or window cleaner, let dry, and the paper will peel off in one piece. Elmers foam board is similar but heavier.
EPP, a.k.a. Expanded PolyPropylene. This is another sort of bead foam. Generally held to be some of the most durable stuff out there, it can be flexed and twisted without snapping. Because of this, it's got very low structural integrity so airframes have to be strengthened by other means such as CF or fiberglass. Comes in a couple different densities.
EPO a.k.a. Expanded PolyOlefin. Similar to EPS but different as well. It's reportedly stronger and has a smoother, more finishable surface. Used by manufacturers such as FMS.
EPS a.k.a. Expanded PolyStyrene. This is your basic beer-cooler foam. Little white beads, various densities. Note that "EPS" is also occasionally used for Extruded PolyStyrene, which is a different material entirely. Still foam, but made by -you guessed it- extruding rather than expanding.
Daemon on RCGroups notes:
EPS is easiest to do injection molding. EPO is trickier (and varies from manufacturer to manufacturer). EPP is a real pain (requires a lot more vents in the mold, which create all those little dimples on the finished product). EPS can be the most rigid, but it's also the most brittle and hard to repair as regular CA and any solvent based glue totally dissolves it, and foam safe CA has various limitations. It's the worst around heat, so can't use iron on covering and if you crush it or bend it, it stays crushed and bent.
EPP is the least rigid per weight, but is totally bounceable, does not dent or scratch and not all that hard to stiffen up with some added stiffeners (carbon ribbons and tape). EPP is the most resistant to heat so can take any covering.
EPO is a mix of the two, so it has more rigidity per weight than EPP, and it can bend more like EPP, but still will dent or scratch. If it's a "good" EPO (Skywalker EPO, or Multiplex Elapor), it can be repaired with regular CA (creates a nice chemical bond that's stronger than the foam itself), and you can take the dents and scratches out and straighten bent or crushed foam with proper application of heat (165-170 degree water or steam). Have to be careful when applying iron on coverings (Monokote,
Ultracote, Laminating film) to not overheat the foam and puff it up.
blogodex = {"toc" : "foam", "idx" = {["suppliers", "EPS", "EPO", "Depron"]};
Tuesday, November 1, 2011
Theraband Data
Here's a thread on RCGroups where jackerbes goes into great detail about using 1/8'' slices of blue Theraband to make high quality prop savers.
Sparklet follows up and shows how they make good vibration dampers for quad photography. He uses it to attach two bolts together
It seems that ebay vendor drdcsupplies is the goto guy for retail quantites of Theraband. At the time of writing it's $1.50/foot postpaid for yellow (thin), red (medium), green (heavy), and blue (extra heavy).
Full specs and info are on the manufacturer's page. Here are the physical dimensions of each kind of tubing:
Color Dimensions Part Numbers
Tan .062 ID x .031 wall (.125 O.D.) #21010 #21110
Yellow .200 ID x .045 wall (.290 O.D.) #21020 #21120
Red .200 ID x .057 wall (.314 O.D.) #21030 #21130
Green .200 ID x .069 wall (.338 O.D.) #21040 #21140
Blue .200 ID x .085 wall (.370 O.D.) #21050 #21150
Black .200 ID x .098 wall (.396 O.D.) #21060 #21160
Silver .200 ID x .125 wall (.450 O.D.) #21070 #21170
Sparklet follows up and shows how they make good vibration dampers for quad photography. He uses it to attach two bolts together
It seems that ebay vendor drdcsupplies is the goto guy for retail quantites of Theraband. At the time of writing it's $1.50/foot postpaid for yellow (thin), red (medium), green (heavy), and blue (extra heavy).
Full specs and info are on the manufacturer's page. Here are the physical dimensions of each kind of tubing:
Color Dimensions Part Numbers
Tan .062 ID x .031 wall (.125 O.D.) #21010 #21110
Yellow .200 ID x .045 wall (.290 O.D.) #21020 #21120
Red .200 ID x .057 wall (.314 O.D.) #21030 #21130
Green .200 ID x .069 wall (.338 O.D.) #21040 #21140
Blue .200 ID x .085 wall (.370 O.D.) #21050 #21150
Black .200 ID x .098 wall (.396 O.D.) #21060 #21160
Silver .200 ID x .125 wall (.450 O.D.) #21070 #21170
Subscribe to:
Posts (Atom)


.jpg)