Here's how to make a telemetry cable for the 3DR Radio. It's slightly different than the one 3DR sells. The 3DR cable has a 5-pin connector on the radio side. I like the 6-pin connector with an empty pin because it reduces the number of ways the connector can be incorrectly hooked up to the radio.
If you do much of this kind of stuff, you owe it to yourself to get the most excellent crimping set from Hansen Hobbies. Here's some notes on cable making in case you're interested:
http://www.hansenhobbies.com/products/connectors/connectorkits/ck_drcck1/
http://eastbay-rc.blogspot.com/2012/05/miles-of-free-servo-wire.html
http://eastbay-rc.blogspot.com/2011/02/crimping-connectors.html
(TODO picture of radio end)
(TODOpicture of APM end)
Cable (4 wires)
Radio APM Color
----- --- -----
1. GND (BLK) 1. GND Black
2. CTS empty
3. 5V 2. 5V Red
4. RX 3. Tx White
5. TX 4. Rx White
6. RTS empty
Showing posts with label todo. Show all posts
Showing posts with label todo. Show all posts
Monday, September 10, 2012


Thursday, May 26, 2011
Spektrum Dx6i $5 backlight mod

colors available: blue green white
It's a bit more complicated than modifying the 9x, because you can't use the supplied wire harness. Instead you clip the wire harness off, and solder the leads to the board. Reports indicate it's about a 30 minute job. I'll allocate an evening to it.
I've got this on my todo list... in the meantime, here's a link to the original article.
Follow to at least page 3, where there's revised instructions.
http://www.hobbyking.com/hobbyking/forum/forum_posts.asp?TID=18137
Monday, May 16, 2011
The Fleet: Arcticopter II
Filling out this page with Arcticopter II specs:
Hardware:
TODO: continue
Hardware:
- NTM Series 35-30 1100kv / 380w
- TURNIGY Plush 40amp Speed Controller
- NTM 35 Series Accessory Pack
- 10X6 Propellers (Standard and Counter Rotating) (6 pieces, 3 of each)
TODO: continue
Monday, May 2, 2011
Gyro in Plane Notes
RCGroups Threads
Videos
Articles
TODO:
fill out some more information, try it out sometime
Videos
- RC airplane with 3 gyroscopes -- nice 3D demo flight
- Gyro Stabilized Ailerons -- on a glider
- Hovering RC plane with 3 gyros -- hands free operation!
Articles
- Gyros 101: Make your model fly better -- good intro article, including fixed wing. Ancient technology from 2001.
TODO:
fill out some more information, try it out sometime
Sunday, February 20, 2011
Free Flight at Concord Model Engineers Fun Fly
Apropos of the Float movie, here are a couple of quick videos I took at the Concord Model Engineers fun fly.
Wednesday, February 16, 2011
Let There Be Light (Emitting Diodes)!
Here's how we attached LED lights to Arcticopter 1.
 LED strip lights are pretty amazing things. They're thin, have LEDs mounted on flexible strips with which carry the current, and have sticky backing. We bought four colors: red and green for left and right (as per standard aviation habit), white for front, and blue for the rear. They come in 1 meter strips, and can be cut every 5 cm (every third LED) to make the length you need.
 Here's the shopping list:
 There are two different kinds of light strips -- waterproof and non-waterproof. For aeronautical purposes, get the non-waterproof, they are a lot lighter... 12 grams vs 36 grams per meter. Unless of course, you're making an amphibious flying vehicle!

 The current draw for four 1-meter strips is 0.1, 0.4, and 1.1 amps at 11.4 volts at min, half, and full power (unscientifically measured by my turning the knob on my servo tester -- more on hooking things up below). I haven't measured with smaller strips, but I think the current draw will be smaller in proportion to the number of LEDs being driven.
 Here are the two kinds of strips. Note that every 5cm there's a "cut here" spot. The waterproof strip has a nice scissors marking to leave no doubt.
 On the far left of this photo, we can see there's a built-in resistor; we don't have to worry that we'll burn out the LEDs. In the middle we see the cut line. On either side of the line, we see the solder pads.

 Here are side views of each of the normal and waterproof strips. You can see there's lots of plastic encasing the waterproof strip. Both have 3M sticky backing.
Wiring the Strips -- First Try
Here are side views of each of the normal and waterproof strips. You can see there's lots of plastic encasing the waterproof strip. Both have 3M sticky backing.
Wiring the Strips -- First Try
Here's my first try at wiring the strips. I used some JST-RCY connectors (with leads: male and female) that I had laying around. It works, but I think it can be better -- lighter, smaller connectors, and with less wire clutter. See below for a second try.
 The arms are about a foot long -- a 15-light, 25cm strip will fit perfectly.
 I cut 2 each 25cm strips of the four colors: red, green, white, and blue. Some of the strips had the original wires attached; Since we want all the strips to be consistent in the wire length, we'll desolder those.
Soldering the Strips
[placeholder for LHS pic] I'll add some pictures later of the soldering. For now, I'll just note that I had some JST-RCY connectors attached to leads, and soldered those to the strips. The small circles next to the cut lines are solder pads.
Strip your wires to about 2mm, tin them, tin the solder pads with a blob of solder, and then "mash" the tinned wire into the solder blob. It will melt almost immediately and make a nice looking connection with your wire in the middle. When you tin the solder pads, there will be a thin covering film that will evaporate off and expose the pad. If you don't get a nice circular blob, try again.
If you're working with the waterproof strips, use an Exacto blade and push it straight down through the plastic. You can then lift the plastic off of the strip. Get as much of the plastic off as you can... you can melt through it with the soldering iron, but it's probably made of stuff you don't want to be inhaling a lot of.
Note that LEDs have polarity, and the strips do as well. Before you desolder the supplied wires, note which sides are attached to the hot and neutral wires. After you solder each pair of wires, stick them onto a convenient 2S or 3S battery -- if the strip doesn't light up, you've got the wires backwards -- desolder them and try again.
 Here's the power harness I wired up... Eight female (note discrepancy of terminology) JST-RCY leads for each of the strips, and a male JST lead to plug into the wired ESC output (or to a battery, if you're skipping the ESC). It's heavy, and bulky when stuck into the frame, but it works. I soldered a female JST-RCY onto the ESC output leads.
 Here's everything connected together and attached to a 3S battery. You can use a 2S battery if you want it dimmer, but it seems most people like the brightness from the 3S. I've got the ESC attached to a servo tester. If you don't have one you can connect to a receiver and control with your transmitter, but you really should consider getting one -- it's cheap and saves you a lot of time at the workbench.
 I used 8mm shrinkwrap to wrap the end of the strip. It doesn't seal up tight on the wire end, but it does do a good job of strain relief. If you know of a better way (funnel-shaped shrinkwrap?) please drop me a line!
Wiring the ESC
Wiring the ESC is pretty simple. Put your favorite battery connector on the battery end. If you don't have a favorite, the JST-RCY is small. That's what I will be using. On the other end, put whatever connector you've used to wire up your lighting harness. For my first try, that was a JST-RCY. For the second attempt, I'll try using a universal servo connector if the current isn't too much -- I don't think it will be.
Another option is powering the strips directly. It will work (because of the built-in resistors), but may give you much brighter lights than you want. This is especially important if it's dark, since they may clobber your night vision. Perhaps this could be controlled with resistors?
Wiring the Strips -- Second Try
coming...
Attaching the LED strips
 Attaching the strips was pretty straightforward. I used blue tape to position everything temporarily to make sure everything fit.
 I wrapped the inside wire for strain relief. You can see the big clump of wires below, and why I want to rewire this.
 Here's everything attached and turned on. I'm hoping that it will be plenty bright for daytime use. It's sure bright sitting on my dining room table!


 Here's the shopping list:
- - LED strips (non-waterproof): Red, Green, White, Blue
- - Brushed ESC
- - Connectors
- - Wago Connectors -- these are great for temporary wiring, since it can hold five wires together and the snaps allow wires to be added and removed individually.
 There are two different kinds of light strips -- waterproof and non-waterproof. For aeronautical purposes, get the non-waterproof, they are a lot lighter... 12 grams vs 36 grams per meter. Unless of course, you're making an amphibious flying vehicle!
 The current draw for four 1-meter strips is 0.1, 0.4, and 1.1 amps at 11.4 volts at min, half, and full power (unscientifically measured by my turning the knob on my servo tester -- more on hooking things up below). I haven't measured with smaller strips, but I think the current draw will be smaller in proportion to the number of LEDs being driven.
 Here are the two kinds of strips. Note that every 5cm there's a "cut here" spot. The waterproof strip has a nice scissors marking to leave no doubt.
 On the far left of this photo, we can see there's a built-in resistor; we don't have to worry that we'll burn out the LEDs. In the middle we see the cut line. On either side of the line, we see the solder pads.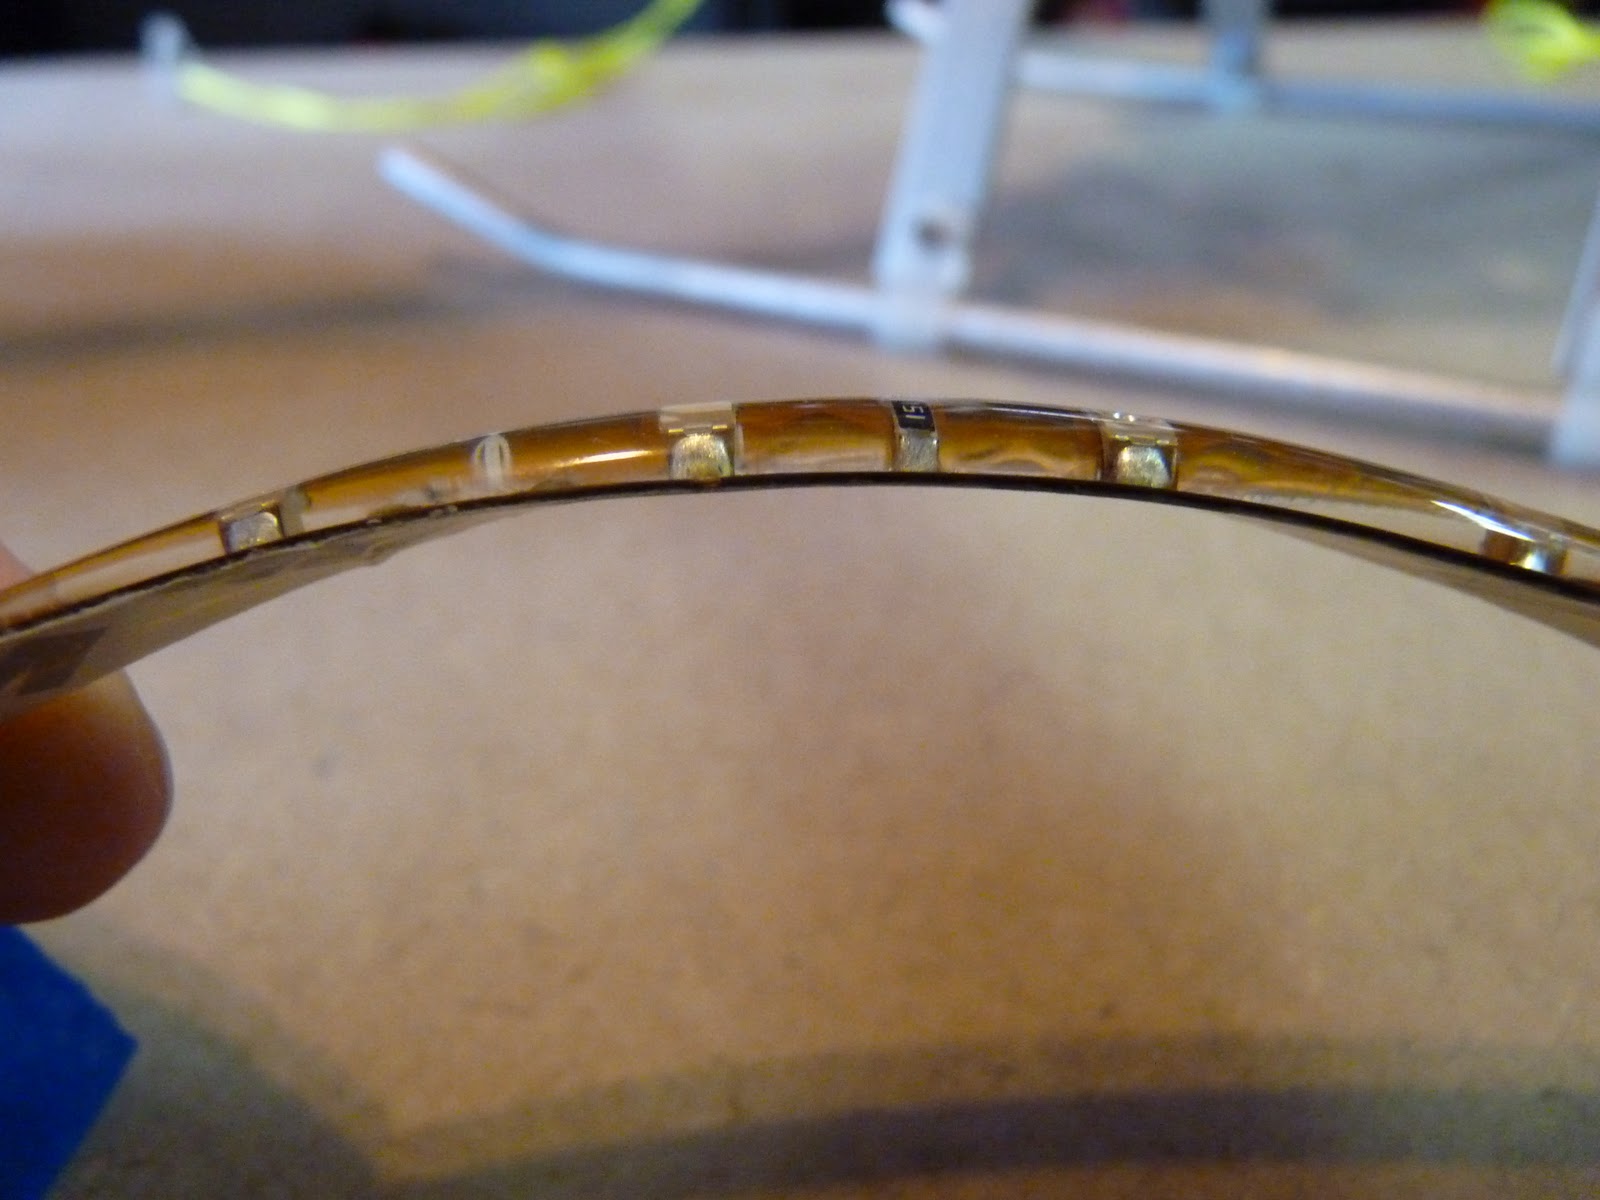
 Here are side views of each of the normal and waterproof strips. You can see there's lots of plastic encasing the waterproof strip. Both have 3M sticky backing.
Here's my first try at wiring the strips. I used some JST-RCY connectors (with leads: male and female) that I had laying around. It works, but I think it can be better -- lighter, smaller connectors, and with less wire clutter. See below for a second try.

 I cut 2 each 25cm strips of the four colors: red, green, white, and blue. Some of the strips had the original wires attached; Since we want all the strips to be consistent in the wire length, we'll desolder those.
Soldering the Strips
[placeholder for LHS pic] I'll add some pictures later of the soldering. For now, I'll just note that I had some JST-RCY connectors attached to leads, and soldered those to the strips. The small circles next to the cut lines are solder pads.
Strip your wires to about 2mm, tin them, tin the solder pads with a blob of solder, and then "mash" the tinned wire into the solder blob. It will melt almost immediately and make a nice looking connection with your wire in the middle. When you tin the solder pads, there will be a thin covering film that will evaporate off and expose the pad. If you don't get a nice circular blob, try again.
If you're working with the waterproof strips, use an Exacto blade and push it straight down through the plastic. You can then lift the plastic off of the strip. Get as much of the plastic off as you can... you can melt through it with the soldering iron, but it's probably made of stuff you don't want to be inhaling a lot of.
Note that LEDs have polarity, and the strips do as well. Before you desolder the supplied wires, note which sides are attached to the hot and neutral wires. After you solder each pair of wires, stick them onto a convenient 2S or 3S battery -- if the strip doesn't light up, you've got the wires backwards -- desolder them and try again.
 Here's the power harness I wired up... Eight female (note discrepancy of terminology) JST-RCY leads for each of the strips, and a male JST lead to plug into the wired ESC output (or to a battery, if you're skipping the ESC). It's heavy, and bulky when stuck into the frame, but it works. I soldered a female JST-RCY onto the ESC output leads.
 Here's everything connected together and attached to a 3S battery. You can use a 2S battery if you want it dimmer, but it seems most people like the brightness from the 3S. I've got the ESC attached to a servo tester. If you don't have one you can connect to a receiver and control with your transmitter, but you really should consider getting one -- it's cheap and saves you a lot of time at the workbench.
 I used 8mm shrinkwrap to wrap the end of the strip. It doesn't seal up tight on the wire end, but it does do a good job of strain relief. If you know of a better way (funnel-shaped shrinkwrap?) please drop me a line!
Wiring the ESC
Wiring the ESC is pretty simple. Put your favorite battery connector on the battery end. If you don't have a favorite, the JST-RCY is small. That's what I will be using. On the other end, put whatever connector you've used to wire up your lighting harness. For my first try, that was a JST-RCY. For the second attempt, I'll try using a universal servo connector if the current isn't too much -- I don't think it will be.
Another option is powering the strips directly. It will work (because of the built-in resistors), but may give you much brighter lights than you want. This is especially important if it's dark, since they may clobber your night vision. Perhaps this could be controlled with resistors?
Wiring the Strips -- Second Try
coming...
Attaching the LED strips
 Attaching the strips was pretty straightforward. I used blue tape to position everything temporarily to make sure everything fit.
 I wrapped the inside wire for strain relief. You can see the big clump of wires below, and why I want to rewire this.
 Here's everything attached and turned on. I'm hoping that it will be plenty bright for daytime use. It's sure bright sitting on my dining room table!
Monday, February 14, 2011
Thursday, February 10, 2011
Assembling the AeroFPV frame

We didn't bother printing the build guide. Instead, we opened it in two side-by-side browser windows, so we could read the instructions in one and look at the parts illustrations in the other.
We're building this with a KK controller, so we'll deviate a tiny bit from the instructions to make a mount that handles the smaller size board. The AeroFPV frame guys have requested the dimensions of that board, and are going to make a mount of the appropriate size.
We're going to try running the motor wires through the arms.
Links
Build Notes
I'm not wanting to replicate the most excellent build guide (linked above), so instead of repeating all the text from each step, I'll just put our photos and add whatever commentary seems useful.

 unboxing and miscellaneous notes.
- Use a 1/4 inch nut driver to hold all the hex nuts. It's a lot faster and easier than using a crescent wrench (although that works with no problem).
- All the fasteners come in numbered baggies, making assembly really easy. It also makes it trivial to verify you've got all the pieces you need.
- We lined up everything for the picture... it turned out to be handy when we were assembling as well.
- If you've got two people working on this thing, it's nice to have an extra set of hex wrenches so you can both be working on attaching the legs, etc, at the same time.
- The fasteners are stainless steel, very nice.


motor mount prep.
- The larger piece goes on top.
- All nuts go on the bottom.

 frame plates.
- The smaller cross-shaped piece goes on the bottom. In these pictures the pieces are upside down.

 motor mount attachment.
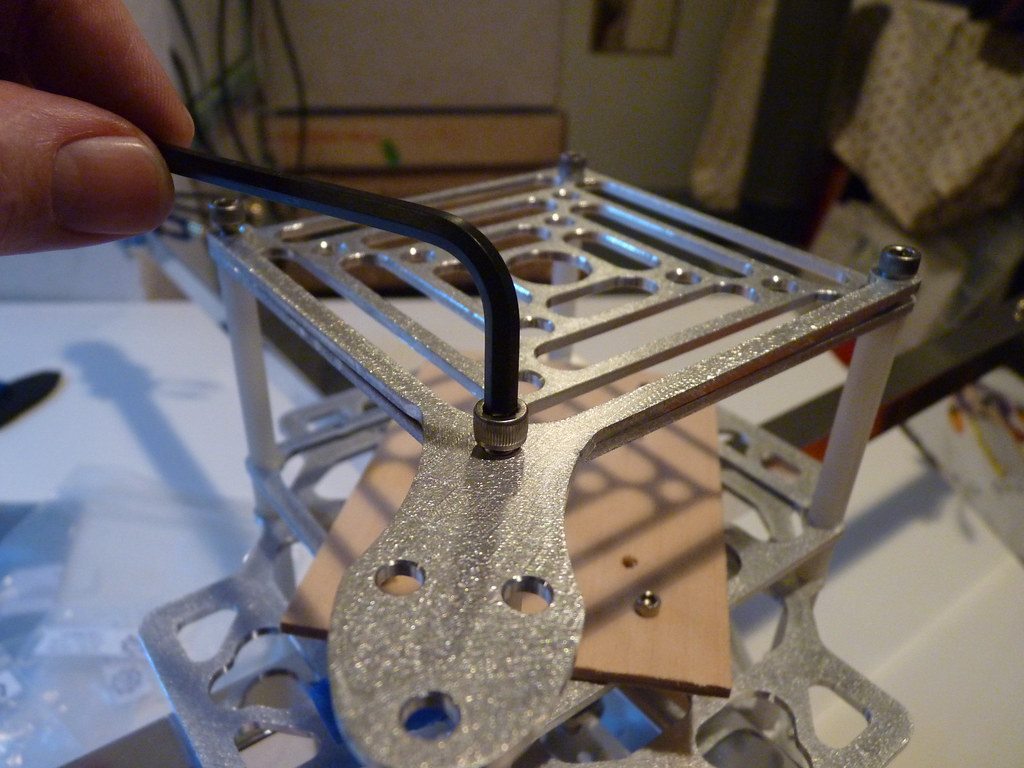
- Notice how nicely the arms fit in the channel. It's a precise fit, so if the mounts aren't perfectly lined up you just need to jiggle things a bit to get it all lined up.
- Here's where a 1/4 inch nut driver comes in handy.
- The motor goes on top of the bar, prop side up.
 arm attachment.
- Make sure the arm registers against the inside stop and that the big piece is on top.

 speed control tray.
- The drilled-out part of the speed control tray goes on the bottom. The top part of the tray is flat, and the blue vibration dampeners will stick up.
- The flat side of the spacer will butt right up to the hex screw on the top frame plate.
 motor attachment.
- Use the screws that came with the kit to attach your motors. The screws go on the bottom. This picture shows the motors upside down.
- We had one motor with a misaligned screw hole. If you're not getting high-end motors, it doesn't hurt to order a spare.

 landing gear
- The bumps face the outside. Put it together loosely. Later you will attach this piece to the main frame, at which time you can get everything nicely lined up and tightened down.
- Oops! a bit of a mistake. The build guide shows both halves of the nylon connector on the inside of the frame. Thanks to nanobug in the aeroquad forum for the catch!
 controller board attachment
- The controller board attaches "square" to the frame for a + model, and at a 45 degree angle for an x configuration.
- The KK controller is a lot smaller than the arducopter board. We broke off for the evening to think about this, and decided to mount the kkboard on a piece of 1/8 inch wood the same size as the arduboard (3x4 inches).
- We'll use double-sided thick sticky tape to attach the kkboard.
- Update: he AeroFPV guys are going to make a kkboard-sized mount and send it to us... hooray and thanks!

- Because the Arcticopter 1 will be an x configuration, the board is mounted at a 45 degee angle.

 battery tray.
- Attaches to the bottom using the 2 inch nylon standoffs.
- We had a problem that the battery didn't quite fit in the gap. We're ordered some 1/2 inch standoffs from Amazon and will attach those for the time being to give us some space.
- Our 3000 mAh battery doesn't quite fit between the standoff in x mode. We'll figure out how to balance the battery and attach it securely later.
 accessory tray.
 - Attaches to the top of everything.
- You can screw the camera mount on if you like at this time, since they use the same screws.

 skid attachment. z
 - attaches to the battery mount.
- once you've attached it, straighten the legs and tighten the holders.

camera mount.
- The camera mount screws onto the top accessory tray. I haven't received my gopro yet, but there was a question on one of the forums about how to attach the gopro. It turns out there's a "gopro grab bag of mounts" that has a mount with the right holes, but the wrong size. I'll probably just make one of my own. Future post with details once I get to it.
 final view.
 The stack looks like this, from the bottom up:
- landing gear
- battery tray
- 2 inch spacer
- frame plate (bottom)
- arms
- frame plate (top)
- ESC tray
- half inch spacer
- controller board tray
- 2 inch spacer
- accessory tray
modified stack. zAs mentioned, we were a bit squeezed, so we ordered some half-inch standoffs to add some space in the ESC tray and battery tray. Until then, we just rearranged some of the layers so we could keep going with the power system. The pieces are quick to shuffle around, so this isn't a headache.
 power distribution.z
- We needed the extra space on the ESC tray because we're using a WAGO connector to distribute power. We'll experiment with this and see how it goes, but for now I think they're pretty great. More details in another post regarding power.
 A Thing of Beauty is a Joy Forever!
- It's a nice frame, easy to work with, sturdy, and a good feel.
- Final steps: mount kkboard, attach electronics nicely, add receiver.
- Will it fly as nicely as it looks? We'll know this weekend!
Tuesday, February 8, 2011
Ardupilot for Beginners
In addition to making an arducopter based Arcticopter, I'm going to build an ardupilot plane.
This is just a place-holder to get started... Once I've got a plan, I'll start filling this in.
All related posts will be here:
http://eastbay-rc.blogspot.com/search/label/by-the-numbers
 Airplane:
TODO: flesh this out as first step in build guide.
This is just a place-holder to get started... Once I've got a plan, I'll start filling this in.
All related posts will be here:
http://eastbay-rc.blogspot.com/search/label/by-the-numbers
- Multiplex Easy Star
- Easy Star Lipo conversion
TODO: flesh this out as first step in build guide.
Subscribe to:
Posts (Atom)