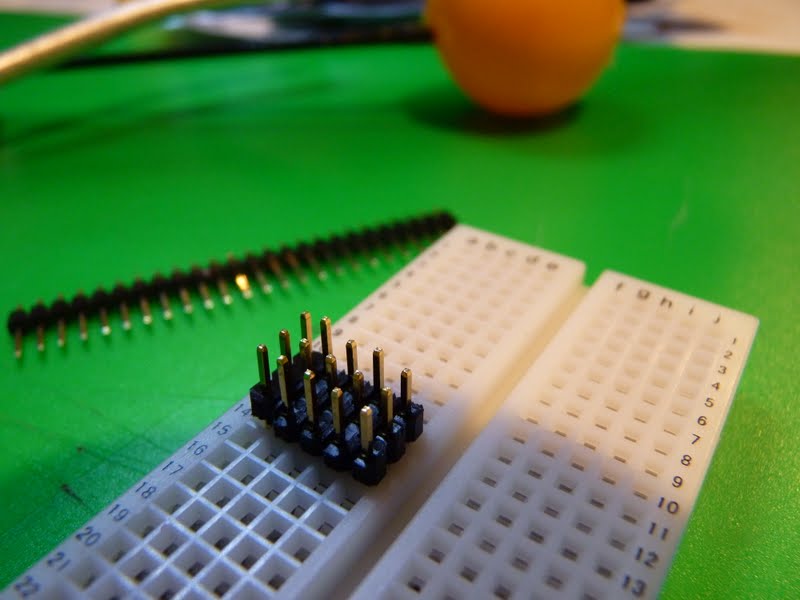
My conclusion was that there is only one hand crimper made that works for the 1.25mm and 1.5mm connectors. It can also do the 1mm JST-SH but it's a a bit more of a struggle. They specify it as 1.25-2.5mm but show JST-SH as a typical terminal it can be used for. On anything above 1.25mm it works a treat. It's not cheap (as in Chinese HobbyKing cheap) but don't let the stamped steel look fool you. This is a precision Japanese made crimper with a adjustable hinge pin for alignment. It is called the Engineer PA-09.
Woo Hoo, it's sweet. After I saw Chuck's I had to have one. It arrived, and I took it out for a spin at Caldecott Field. No wind on the ground, but gusts up higher where we weren't sheltered in the valley.
Not a whole lot to say about setting up... take it out of the box, attach the wing, attach the velcro (I do it opposite of what they recommend -- soft velcro on the battery), charge up the battery, bind it, and go! You do need to let it sit still for a couple of seconds for the gyro to initialize. There's no accelerometer, so it doesn't have be be laying flat. The little batteries are great. I flew for 30-40 minutes on two, with lots of smooth gliding.
Here's some clips of the maiden flight. I'm temporarily without a video editor, so I just cut them together with quicktime. The second version has some music from the YouTube library (the artistry of EastBay RC never ends!), but for some reason that drops the video down from 1080p to 720p. Anyways, they both show the basic sweetness.
Found on the AMA blog, the FAA is issuing an update of the "Special Rule for Model Aircraft". More details to follow, and I'll be filling in links as appropriate.
CME President Chuck Hill picked up one of the new UMX Radians
and brought it in to our monthly indoor fun fly. It's a sweet plane! Lots of details at the link, but the tldr: three channel, ASX stabilization, flies nicely, just fits into a single basketball court. I'm going to get one!
Kauaiguy@RCG has posted pictures and notes for his wind resistant quad. I guess that's necessary if you live in Kauai! I'll be following along on his build, and I'm collecting some of his notes here.
I was flying fpv in 20/30 mph winds and not having any control issues,also its easy to fly some distance as its fast!Next version I make ,the frame and motor mounts will come out to about 100g.This frame is a 450 mm frame size and takes 8/9/10 inch props.
Build list
Carbon tubes 320mm (4) 14 mm Talon v2
Motor mounts (4) Hal
Aluminum boom mount (4) Talon V2
Flat base plates (2) Hal
All frame parts available from Hobbyking USA
Same foot print as the Flip fpv frame ( large frame 450) but 200 g lighter.Next frame is going to be mostly epoxied together and just over 100g with mounts.Cost will be 4 ,14 mm ,320mm long carbon booms($16.40 for 4)from Hobbyking
Drilled holes with a drill press after it was glued together.Probably doesn't need the screws .
Colleague and friend Jeremy Vickery put this video together. Sadly I wasn't able to go to the Mount Diablo fly-in, but it looks like they had a great time. Jeremy was one of the first people I knew that got a quad primarily for video and photo use, and I've always admired his eye and use of aerial perspective.
[??] mm ply for the bottom of the body 345mm Long x 125mm wide
3mm light ply for the top cover 310mm long x 125mm wide. (the cover is cut in
two sections at 155mm from the rear edge to allow partial access to the inside)
Arms are 450mm long
Body box is 120x595mm between the arms
the two 15x12mm strips for the box sides are 295mm long, they are glued to the bottom plate in an upright manner, (the 12mm side), the arms are placed resting on their 15mm side, this leaves a gap for cooling the ESC inside the box.
Bottom cover is glued permanently, the top cover and tower are secured with self taping screws
The arms are secured by two bolts each for easy replacement or dismantling/storage.
After many years of faithful service, the old downshooter is being retired. New downshooter is set up and (as you can see!) being tested. In this picture the old downshooter is on the left and the new downshooter is on the right.
Todo: figure out minimum iphone focusing distance, any way to lock white balance.
So I'm teaching a robotics class, and hit a big problem. Most cheapie robot projects don't include a remote controller, so they only do boring things like follow lines or bump into things. I added an RC model style remote control to the project, and whoosh... up jumped the equipment price like crazy!! Thankfully, I have the awesome good fortune to work with Alonso Martinez, of Gertie the Hopping Robot fame. He had just the thing for me! I'm noting the parts list here, and when the parts come in I'll add a build guide. All up price range, for controller and receiving radio: $8 (tiny joystick) to $17 (wii nunchuck controller). Add anywhere from $2 to $10 for your favorite flavor of battery, and it's quite a deal. Thanks Alonso, you saved my neck on this one!! Radio: $2 for two (transmitter and receiver) http://www.ebay.com/itm/360826829811
If you're not set up to conveniently handle RC lipo batteries, you could use a 9v battery, $1.44 each: http://amzn.com/B002UGVWA4
blogodex = {"toc": "Alonso Robot Controller","idx":["ARC", "Robotics Class"]};
In conjunction with Hobby King and the 9XR Pro development team, EastBay RC has developed an introductory set of videos that will step you through the basics of getting started with the radio and its excellent open source software.
(here's a note I posted on RCG, talking about the Taranis. I think it applies generally to a lot of things. I had forgotten I wrote it... Thanks to Scott Page for reminding me!)
If you're on this thread, you're probably enthusiastic about a product that most of world hasn't heard of. You are, in fact, an early adopter! Here's a few tips that will make your early adopterhood a much more pleasant experience, both for yourselves and others. This is based on my own experience in being an Open Source early adopter (since 1981!). Share and enjoy!
You are going to be frustrated.
If you've used a Taranis (or, reaching out, OpenTX on a Turnigy), you've experienced the joy. You're going to be surprised when other people don't automatically share your bliss.
People will not have heard of the thing you love.
To many people, FrSky is either nothing, or some no-name Chinese manufacturer. For some odd reason, they don't watch Bruce, but instead get most of their information in bits of chopped up tree material delivered monthly to their home. To the extent they've heard of ordering stuff off the Internet it's a bad idea, a perilous way of purchasing items of dubious quality.
People will be skeptical of the thing you love.
Again, if you're in the know, you realize that FrSky is incredibly high quality. I'm not talking "high quality considering the price," I mean "high quality." Radio format wise, it's equivalent or superior to all of its competitors.
But, people don't know that. And they're suspicious of the low price -- how can something cheap be equally as good as something expensive?
Part of this is an education problem. Used to, extra features needed extra electronics. Now all manufacturers buy the same chips in bulk, and these are the chips the consumer electronics market has pushed down to incredibly low prices.
A new generation of consumers will understand this intuitively. Some people need to be educated about this. A certain percentage of those people will not get it, and you have to learn to accept it.
As has been attributed to various physicists, it doesn't happen that people who disbelieve in your theory change their mind, it's more that they all die off.
They're not necessarily evil, or corporate shills for competitors, or dumb, or intentionally intransigent. See the next point.
If you act crazy, people will think the thing you love attracts weirdos.
There's a certain amount of tribal enthusiasm that indicates a new thing is really a breakthrough. But you can't be impatient and crazy when people ask about it.
Examples of this craziness abound in the computer world. I would mention an example, but I don't wan't to get the mail. (executive summary: "WE'RE NOT CRAZY, YOU REALLY ARE A MORON IF YOU DON'T UNDERSTAND WHY OUR THING IS BETTER")
In particular, don't tell them that they are representative of any of the attributes mentioned above (no matter how much it seems they are!) or they will not be happy talking to you.
Be patient. The rules have changed, but people don't know it yet.
The personal electronics industry (especially smartphones) really have changed the rules of manufacturing small electronics devices. $5 for a 32 bit CPU or 6DOF gyro/accelerometer chip is an astonishing thing.
People not plugged in still don't understand this. Especially when they're somewhat technical but not up to date, when the functionality of either of those chips would have been in the hundreds of dollars.
You will prevail. Or maybe not!
If you're rooting for Taranis and FrSky, I think in a couple of years you'll look back fondly on this "we few we happy few" days and be a little sad that everyone takes FrSky equipment for granted.
Or if not, because there's been something even better come across!
Someday, you will be the old guard.
And finally prepare yourself... there will be a day when there is something better, and you'll probably be one of the old clueless SOBs hanging around wanting the youngsters to prove their new-fangled toy is anywhere near as good as your precious Taranis which you've been using for the past 20 years.
Submitted for your approval... if you don't like it, the Internet will cheerfully refund your money!
#3 Rolling the NutBall is an easy to do and basic maneuver. Once you've mastered it, the roll becomes the basis for the snap roll, spins, inverted flat spin (complete with sound effects), the inverted 'elevator', both up and down, plus other silly weird stuff.
Rolling is more than just slapping over the rudder stick with the NB, although with models like the Simple Delta, flat and with elevons, that's all it takes to look good. What you want is to practice nice smooth rolls where the speed of rotation is the same throughout the 360 degrees of travel, it can be done almost axel, it's all in the timing and rolling to the left is easier to start off with. Make sure you set the CG at 25 percent to start, you can modify that as you progress, fly the maneuver at a MEDIUM speed at first and pay attention to the amount of movement on the rudder and elevator, not too much (???) is lots. The big problem in rolling the NutBall is that with too much rudder throw it wants to flip over very quickly once past inverted. How much movement is all apart of fine tuning. Having a low wing loading is a big aid in flying aerobatics as everything is much easier to do. If there's too much of a breeze, mount a bigger battery or some lead ballast, keeping the CG unchanged.
So, here's what to do to start off with.....................
Fly along straight and level at a brisk speed, but not full tilt (yet), and just before you enter the roll, add a tiny bit of up elevator to rise the nose, then feed in the rudder nice and smooth and when it goes inverted give it a tiny blip of down elevator and let off on the rudder just after is goes past inverted. What you need to do in the beginning is to form a pattern or tune in your brain. Practice in your shop with the model in front of you, try and picture in your mind what's happening. I learned four point rolls by repeating this to myself as I moved the sticks in the proper sequence and at the proper speed................ta da, ta da, ta da, ta da. It's like a tune in your head and you keep to the timing. Not sure what key I'm in, but it works. Got that from the best 3D pilot I know.
When you go out to practice, by yourself seems best and concentrate on the one thing and do just that.
#4 Here's another easy fun one anyone can do, the 'upright elevator', although it's all down elevator, no up. You'll need a rearward CG for this one, but start off with what you've got to see the difference it makes. Gain lots of altitude and point the nose straight into the wind. Now, hit full up and hold, and kill the thottle at the same time (again, it's in the timing) and use just the rudder to keep it facing into the wind. It should float down like a leaf, and with a low wing loading and a nice breeze you can plop it right down on the wheels. You can do this one inverted too.
RCG Maven balsa or carbon has some nice shots of foamy pushrods. Here's how he does it.
Start off two two pieces of music wire, one with a Z bend and one with an L bend. Attach the Z bent wire to CF rod with CA and shrink tube .
Round the other end of the CF rod with sandpaper and attach it to the L bent wire with silicone fuel tube. Don't glue it, this allows you to adjust the pushrod.
Stick the L bent wire through a piece of rubber band. Attach the L bend to the servo horn, and stretch the rubber band around the music wire as shown. Tighten the fuel tube with a zip tie if it's loose.
Stabilize the pushrod with a zip tie glued through the airplane body if there's flex when moving the control surfaces.
If you don't have any silicone tube handy you can zip tie a rubber band to the rod. Here it is holding the L bend wire to a bamboo skewer pushrod. BoC reports that it's tight enouch that he has to use needle nose pliers to adjust. Notice hi popsicle stick control horn!
Here's the quick and easy way to balance cheap plastic props. With larger props it makes sense to use a magnetic prop balancer, but this seems to work just as well.
Start with a prop, and a screwdriver that's just about fills the shaft hole, but doesn't rub. The prop should swing freely, but not wobble too much.
Hold the prop level, and then push one side down, then the other. If the prop is balanced, there will be no tendency for the prop to move. If your prop is out of balance, one side will tend to sink lower because it is heavier.
Put a piece of scotch tape on the back of the heavy side. You don't need much. Check for balance again, and keep adding tape until the prop maintains a stable horizontal position.
Here's about how much tape I usually need. Taping closer to the outside gives a stronger counterbalance.
Here's some notes on making muellerr_ch's brushless gimbal (BLG) for the Mobius. He has a parts list of motors and other required parts on his page.
The parts printed out nicely on our Makerbot 2. There's a version 2 of arm 2 that has a deeper recess for the sensor. Use that one, it holds the standard Martinez-style sensor perfectly.
From front to back, the three pieces are Arm 2 (holds camera), Arm 1 (holds Arm 2), and Arm 3 (attaches gimbal to airframe).
I made all the motor attachments using only two bolts per motor. It seems to make a nice sturdy connection. I used M3 x 10 bolts.
Start by attaching a motor to Arm 3. Note that Arm 3 is extending away from the gimbal. This was for convenience in experimentation, and I'll flip it around so that Arm 3 extends under the gimbal when I've got everything figured out.
Atach Arm 1 to the motor attached to Arm 3. This motor controls the roll by rotating Arm 3.
Put the ball bearing into the 8mm hole in Arm 2. I screwed up ordering my ball bearings from ebay. I ordered 3x8x4, when I should have ordered (I think!) 4x8x3. Note how it stands proud by 1mm. That's not a problem. I had to replace the M4x10 machine screw lower down with an M3x10.
Attach the other motor to arm 2. Make sure the wire points towards the rear. If you get it wrong, just remove the motor and flip 180 degrees.
Oops, before you attach the motor attach the M4x10 machine screw. It's easier to screw in if you do it before you attach the motor.
Here's what Arm 2 looks like when it's completed.
Be sure your ball bearing is in Arm 1, and wiggle Arm 2 into Arm 1. Attach the motor. Arm 2 should rotate smoothly in Arm 1.
I had to replace the M4x10 machine screw with an M3X10 machine screw in order to fit in the ball bearing. The extra mm of ball bearing width did not affect the fit. I had to be extra careful tightening the M3 machine screw to make sure it was centered, since the hole was sized for an M4 machine screw. So far it doesn't seem to have had a bad effect, but I'll get the proper sized ball bearing and swap things out if need be.
Here's the entire unit assembled and hooked up.
(photo question: all these pictures were taken by the same iphone. Is there a way I can force the white balance to be consistent?)
I'm not sure why, but the roll is super-unbalanced. I drilled a hole and screwed on some random pieces from the junk box to make it balance. It would be great to figure out how to eliminate these weights.
The sensor board fits nicely in the new revision of Arm 2. I attached it with two M2x8 machine screws and locknuts. I was concerned that there wasn't enough vibration protection because of the direct attachment, but I haven't noticed a problem yet. If I do notice excess vibration, I'll try using some gyro tape instead of the screws.
I drilled a hole on Arm 3 to attach a zip tie for strain relief. Move arms 1 and to into their farthest positions to see how much wire slack is necessary.
I downloaded and installed the latest BLG software for the Martinez board. Be sure and unclick the "reverse Z axis" option, since the sensor is sitting component-side-up. I'll follow up later with some notes on the latest BLG software.
Here's two videos showing the progress so far. I've done a bit of tuning. I think the tilt axis is good, but still need some work on the roll axis. I'll get the RC tilt/roll control going as well. More to come!


.jpg)