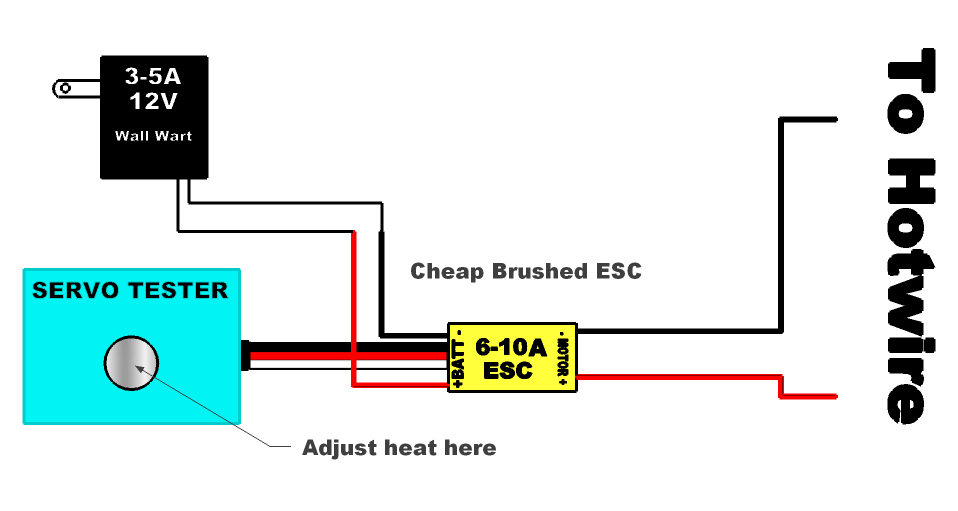
 From user 7up on rcgroups. Power from a 3-5A 12V wall wart, managed by a 6-10A brushed ESC, controlled by a servo tester. Attach the hotwire to the motor wires.
Sunday, September 26, 2010
Simply Brilliant Hot Wire Cutter Power Supply
From user 7up on rcgroups. Power from a 3-5A 12V wall wart, managed by a 6-10A brushed ESC, controlled by a servo tester. Attach the hotwire to the motor wires.

Saturday, September 25, 2010
BSD Micro - Small Plane Resources
BSD Micro RC: "BSD started in 1996 with our first product, a 2 gram ESC, followed by chargers for small NiCd cells. Today BSD is the Micro RC Specialist with a full line of micro equipment, kits, and planes in the under two-ounce category. We sell state-of-the-art equipment from firms like JMP Solutions, Falcon Models, Didel, Kokam batteries, EFlight Designs and others. We also manufacture our own BSD products like our BSD magnetic actuators, prop adapters, gearboxes, foam wings, and chargers."
A nice explanation of PPM radio signals
http://www.mftech.de/ppm_en.htm

Interestingly, the radio transmitter and receiverr does no transformation of the signal between the encoder and the servo.
Interestingly, the radio transmitter and receiverr does no transformation of the signal between the encoder and the servo.
Wednesday, September 22, 2010
Vendor: RCTimer Online RC Store
RCTimer.com:
"RCTimer Power Model Co.,Ltd, was established in 2003 in ShenZhen city, Guangdong Province, China as a professional manufacturer for R/C accessories of model toy's applications. As a master in hobby industry, we always do our best to improve our designs concepts & manufacturing technologies. We offer a wealth of manufacturing experience & technology with the expertise acquired over the past 5 years. We are constantly enhancing our R/C EQUIPMENT and ourselves according to the professional suggestions offered by our respect customers, in order to bring superior and innovative products to the customers from all over the world."
"RCTimer Power Model Co.,Ltd, was established in 2003 in ShenZhen city, Guangdong Province, China as a professional manufacturer for R/C accessories of model toy's applications. As a master in hobby industry, we always do our best to improve our designs concepts & manufacturing technologies. We offer a wealth of manufacturing experience & technology with the expertise acquired over the past 5 years. We are constantly enhancing our R/C EQUIPMENT and ourselves according to the professional suggestions offered by our respect customers, in order to bring superior and innovative products to the customers from all over the world."
Notes on cutting BluBaby 33
Some build notes on cutting BluCore:
- really sharp blade. box cutter is fine, the thick blade makes it easy to make straight cuts. there aren't enough tight curves where you will need a thinner blade.
- make two bodies at the same time if you have the foam, if you want the practice
- when laying out, flip the wing and body templates so you will have left/right sides with the good side facing out
- lay out the wings so that any foam "ripples" run longitudinally (left/right) across the wing.
- some pieces have an "inside" and "outside" (body, bulkheads). cut these from the parts of the foam with lots of ugly printing, so that the printing is hidden on the inside.
- some pieces are exposed on two sides (wings, elevator, rudder, stabilizer). Cut these from areas of the foam that look nice on both sides.
Tuesday, September 21, 2010
Concord Model Engineers
CME: "Weekly (Sunday) Fun Flying at the end of Court Lane, Concord (Electric only)
Our Club Meetings are held currently at 7:30PM on the second Tuesday of the month at the Buchanan Airport Terminal Bldg.
(Near the Control Tower)"
Our Club Meetings are held currently at 7:30PM on the second Tuesday of the month at the Buchanan Airport Terminal Bldg.
(Near the Control Tower)"
Monday, September 20, 2010
Pager Motors
Here's some links about 4mm and 8mm pager motors.
- recommending a GWS 2508 prop, with some data.
- different models at pagermotors.
- google for "namiki pager motors"
- lots on ebay, seems about $15 including shipping for 10 units.
Friday, September 17, 2010
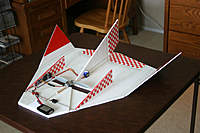
Things I'd like to try: The Simple Delta
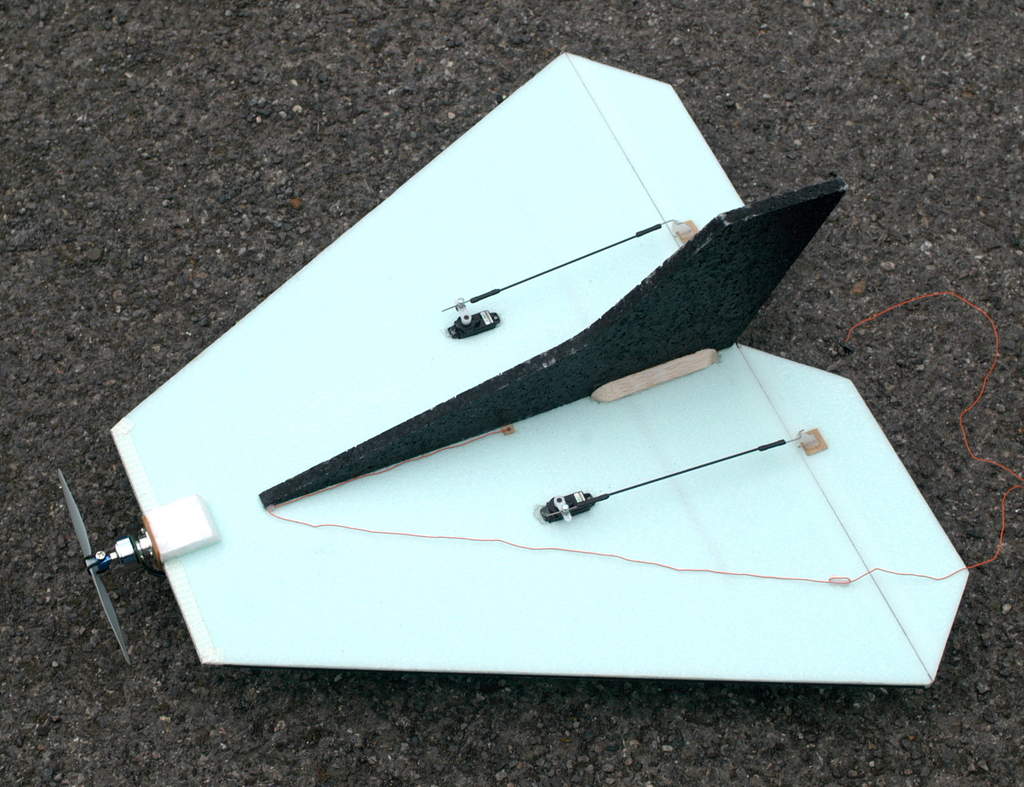 A simple easy to build Delta that makes a lot less noise than the more common pusher or prop in a slot Delta design.
- WS is 20"
- LE is 7" long
- LE to TE (hinge line) is 14.25"
- Elevons are 2" wide
Things I'd like to try: The OmniWing

Bluetooth GPS Logger

"a high-tech product combines the advanced Bluetooth technology and GPS technology. Through, Bluetooth technology, you can receive and storage GPS data through intelligent mobile phone, PDA, laptop and desktop. Can be used for location,navigation,read the history of track records, and other applications."
Plantraco: Really Small Planes!
Plantraco Microflight
This is the place to go for tiny planes. Check out the soldering video... "10-20x binocular magnifiers recommended."
This is the place to go for tiny planes. Check out the soldering video... "10-20x binocular magnifiers recommended."
Wednesday, September 8, 2010
Making a Carbon Fiber Push Rod
What you need:
Make the push rods:
measure length required
- carbon fiber rod, 2mm, cut to length
- 2 pieces music wire, .032i inch (.81mm), 2 inches each
- screw thing: 1.5mm
- 5 minute epoxy
Make the push rods:
- measure length required
- cut CF rod, length = measured length - 1 inch (wire will make up remaining length) using dremel cutoff wheel.
- cut 2 pieces of wire, 2 inches each
- put a tiny irregularity (bend) in one end of each wire. this will go into the CF tube, and provides something for the epoxy to hold against.
- clean wire
- mix 5-minute epoxy
- epoxy wire into CF rod, 1 inch. don't forget to put the tiny bend into the hole.
- after the epoxy has dried, tug on the two wires to make sure they don't slide out of the hole. If they do, you didn't do a good job on the epoxy.
measure length required
- Z-Bend one wire.
- attach z-bend to servo. (then you don't have to drill out hole in servo arm).
- drill horn to fit 1.5mm screw thing
- attach screw thing to horn
- put straight wire into screw thing. you can get clearance by pushing servo arm away from the control surface, and pushing the control surface away from the servo arm. this will give you just enough clearance for the wire to go into the screw thing hole. if there's not enough clearance, your wire is too long and you should trim it down to the proper length where it just fits in.
- turn on servos so they are centered
- align control surface to neutral position
- screw down screw things
Saturday, September 4, 2010
Giant Cod guides
Here's the battery guide. There's some others that look like they might be interesting.
Connector Mania: All Kinds of Connectors

including trainer cords.
"No matter how you call it - BEC, JST, or P connector, YES, we have these little RED connectors! This connector is also used in many park flyers power pack. For male order 2830, for female order 2832, for 6" Ext. order 2836, for switch order 2770, for Rx Batt. Box order 2911."
Connector Mania: Deans to XT converters

If you've read any of my earlier posts, you can see that I'm in equal measure obsessed with and confused by connectors. I think I've finally got it all figured out. Later I will post my Grand Unified Theory of Connectors.
Wednesday, September 1, 2010
HowTo: Using a Watt Meter

The instructions in the package are pretty inscrutable, so here's a quick HOWTO.
Basic Idea
- This thing sits between your battery and your ESC.
- It measures voltage, amperage, and wattage.
- It has a HOLD mode that keeps the highest values.
- When it's set up, you fiddle with your props, motors, etc, and see the power requirements of various setups.
- You can send it aloft to record the flight's peak power requirements.
- The unit doesn't come with any power connectors, so you need to attach your own.
- The wires labeled IN attach to the battery. Put a male power connector here.
- The wires labeled OUT attach to the ESC. Put a female power connector here.
- Black wire = Neutral (-)
- Blue wire = Hot (+)
- Plug the unit into a battery. Whatever battery you use to fly a plane is fine (the manual says the voltage rage is 8-30V, but it seems to work fine with 2S batteries as well, as seen below).
- The display of the unit will turn on.
- If you use a 2S battery, you will see something like this:
- Voltage (U=7.93V). Over time this will go down, as your battery discharges.
- Amperage (I=0.1A)
- Wattage (P=1.0W)
- Attach a motor to your ESC.
- Plug your ESC into a receiver. It's OK if there are servos attached.
- Attach the OUT wires to your ESC.
- Your setup should power up and work as normal.
- The power levels should go up a bit, since you're running servos and a receiver.
- Wiggle your servos. You will see the numbers jiggle in response.
- Make sure your motor is secure, and bring the speed up.
- You will see the amperage (I=) and wattage (P=) increase.
- Bring the speed back down.
- You will see the values decrease back to the original values.
- The voltage may have gone down a bit, since you've been using some power to run these tests.
- HOLD mode will measure the Peak values.
- To turn it on, click the HOLD button.
- Rev your motor and bring it back down a couple of times.
- You will see these peak values displayed. Rearranging the order a bit, they are:
- P 14.3W -- maximum power (wattage). This is the peak power output of the battery.
- Up 7.71V -- voltage when P was at max.
- Ip 1.9A -- amperage when P was at max.
- Im 1.9A -- maximum amperage, even if it didn't correspond to P above.
- Um 7.84V -- the minimum voltage of the time period.
- Click HOLD again to go back to instantaneous mode.
- If your plane is big enough to carry a couple of extra ounces, you can attach the meter between the battery and ESC in your plane, set HOLD mode, and find out your peak usage aloft.
- If you have a good quality multimeter, you can adjust your unit's readings.
- Depress HOLD for three seconds and you will be in adjustment mode.
- Measure an unloaded power source with both the watt meter and your reference multimeter.
- Use the ADD and SUB menu items to make the two units agree.
- SAVE will of course save your calibration.
Sunday, August 29, 2010
Connector Mania: JST-XH

Two adjacent wires will connect to one cell. The first and last wires will be connected through all the cells.
Batteries can be charged through this connector up to a current of 3A.
The crimper seems to be $480 (!!?!?!??) Some possible replacements are mentioned here. Magic search keyword seems to be "D-SUB/DOUBLE-D SERVICE TOOL".
Connector Mania: T Connectors, aka Deans Ultra

- popular 'Battery to ESC' connector
- male plug is soldered to the ESC
- get the polarity right
- sometimes tight fit, lube with graphite
- put shrink tube on before soldering
- plug M/F together before soldering
- polarity: while flat on table: vertical bar is positive, horizontal bar is negative

Wednesday, August 25, 2010
Things I'd like to try: Parrot AR.Drone

Flying Hobby has it here.
Controlled by iPhone. There's a development SDK and related web site.Imagine you are the pilot of an aircraft that flies like a dragonfly, and with an on-board video camera, you see exactly what the pilot sees. By tilting your iPhone you control the AR.Drone, and by releasing it, the Drone is instantly stabilized.
The AR.Drone is the result of a high tech development: the quadricopter, a helicopter that is extremely easy to fly. It is controlled by means of micromechanical accelerometers, gyros, ultrasonic sensor, two video cameras, combined with a powerful embedded Linux platform. All of these technologies have been combined for the first time by Parrot’s engineers to create the first fully-integrated Augmented Reality device: the Parrot AR.Drone.

Arducopter project on google code
http://code.google.com/p/arducopter/wiki/ArduCopter_Quad
Arducopter dev team member kinderkram's RCGroups blog.
We're pleased to announce that we've joined forces with the other Arduino-based powerhouse in the aerial robotics world, the AeroQuad quadcopter team, to extend the ArduPilot platform to whirlybirds of all kinds. The project will use the ArduPilotMega and IMU shield hardware along with a low-cost custom platform that will be available commercially to provide a full quad UAV with both stabilization and GPS waypoint navigation. It builds on the awesome work of Jose Julio in ArduPilot quad development, with the excellent full-systems integration of the AeroQuad team. We expect that first code and hardware will be available this summer.
Arducopter dev team member kinderkram's RCGroups blog.
Tuesday, August 24, 2010
Things I'd like to try: Gaui 330X-S QuadCopter
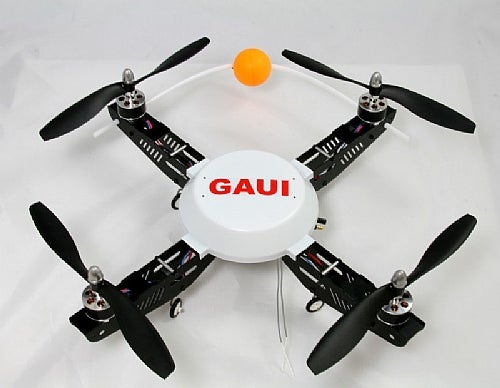
Photoship 1 has a nice camera mount.
RCGroups discussion of 300X.
DIY Drones unboxes and reviews a 300X.
A nice camera mount with dual servo.
Another nice review.
GotHeliRC has a nice page including spare parts.
CNCHelicopter has a lot of camera mounts and other generic helicopter photography stuff.
Monday, August 23, 2010

ESC with data recording capability
Phoenix Ice from Castle Creations.
Data Logging
Ice brings another incredibly useful feature, extensive data logging capabilities. The controllers are able to measure and record many parameters at sample rates that you choose between 10 samples per second and 1 sample per second. Data points include:
This data is stored directly in the controller and may be accessed once the run is over using the Castle Link USB adapter (sold separately) and Castle Link software (available free at castlecreations.com). The Max Log Size is 21,504 bytes, everything takes one byte except for motor rpm which takes two.
- Battery Voltage
- Battery Ripple
- Battery Current
- Controller Temperature
- Controller Input Throttle
- Controller Motor Power Output
- Motor RPM
- Logging 'Battery Current' at only a 1 sample / second - 358 minutes of logging time (almost 6 hrs)
- Logging 'Motor RPM' at only 1 sample / second - 179 minutes of logging time
- Logging everything at only 1 sample / second - 44 minutes of logging time
- Logging everything at 10 samples / second - 4 minutes and 28 seconds
Porco Rosso was a manga!
And in other Porco Rosso news, Miyazaki originally drew Porco Rosso as The Age of the Flying Boat.
 Story here, and all parts posted online here. Beautiful!
"Hayao Miyazaki wrote and painted The Age of the Flying Boat in 1989 for Model Grafx Magazine in Japan. This story was later evolved and expanded into Studio Ghibli's 1992 movie, Porco Rosso. In 1993, Animerica Magazine scored an impressive scoop: an English translation, released in three monthly installments, as part of their extensive coverage of Porco Rosso and all things Miyazaki".


Porco Rosso to fly again!

asdf"So I want to escape to "Porco Rosso: The Last Sortie". I have all its materials." "It should be interesting." "It is set for Spanish Civil War."
"If next two films succeed and Suzuki-san lets me make it (Porco) while saying, 'It cannot be helped because it's a hobby of the old man', I'm happy. It's my hobby."
If you have any interest in planes at all, you owe it to yourself to see this heart-breakingly great movie.
All about wattmeters

A better manual for another product, that has some nice electrical theory: fillin...
Two Chinese Manufacturers
Aero Electronics. Lots of nifty electronics, including fpv. It looks like a lot of vendors source their things through here. Their programming card is awesome, just a PCB waiting for a cover.
Maytech. Check out the ESC programming tools.
Maytech. Check out the ESC programming tools.
Note on reprogramming ESC's for tricopter
Msg 4 by Les Newell in this aeroquad thread:
And some notes on RCGroups.
These were HobbyKing Super Simple card programmable ESCs, not Turnigy Plush. They are virtually identical to the Towerpro 18A.
I don't think I2C is really needed. PWM can easily go up to 400Hz which is plenty fast enough.
This thread has a vast amount of Tricopter info. Tricopters use three motors for roll/pitch and rotate one motor for yaw. Stabilization can be done with one standard heli gyro per motor plus one for yaw. You use helicopter CCPM mixing to generate the correct throttle signals. This approach has a few drawbacks so I would like to have a go at doing all of the signal processing on-board.
And some notes on RCGroups.
Sunday, August 22, 2010
Improving connectivty of T Connectors (Deans clones)
From a DX discussion group:
If you push hard enough on the soldering side of the tabs, they should pop right out! I did that on mine, and the contact resistance is indeed lower.and
If you look at the original (compatible) plugs, you'll see that they mate using the flat part of the metal. (One side is flatter than the other).
These mate with the almost-flat, slightly round side of the metal parts. We modified the DX connectors by reversing the metal parts so that mating happens with the flattest possible part of the metal.
I measured the contact resistance:
Original expensive: 0.4 mOhm.
DX replacements: 5.2 mOhm.
DX replacements, modified: 0.5 mOhm.
With these values, I would recommend: Max 50A for original, Max 15A for unmodified DX connectors, and Max 45A for modified DX version.
Saturday, August 21, 2010

Reselling Hobby King Assan Micro Linear Servos

Assan Micro Linear Servo 2.1g (Left) from HobbyKing
Completely stock/NIB servo as sold here:
HobbyKing Product Here
All I've done is taken it out of the package and fully tested it for you!
This servo has no service/warranty at all
Vendor: RC Connectors
Specializing in small connectors and accessories, as for a Vapor and 1S batteries.
http://www.rc-connectors.com
http://www.rc-connectors.com
Wednesday, August 18, 2010
Power Guidelines
Courtesy of PhilipA on RCGroups:
- 50 watts/lb: Minimum required for flight.
- 70-90 watts/lb: Trainer and slow flying aerobatic models.
- 90-110 watts/lb: Sport aerobatic and fast flying scale models.
- 110-130 watts/lb: advanced aerobatic and high speed models
- 80-100w/lb nice target for many planes.
- The Blue Wonder maxes out around 85 watts on a 3S lipo and GWS 9x5HD (straight blade) prop.
- Sufficient for up to a 16oz AUW plane with decent performance including a 4ch aileron version.
Things I'd like to try: The Tuffy

Power is a TP 2408-21 which is a BP-21 clone with a 1060 prop and 1100 mah 2s lipo.
Variable Pitch prop system

Revolutionary variable pitch prop system allows for midair reverse-thrust -- making "stop-and-start" direction-changing maneuvers an exciting reality for experienced flat foam pilots!
Monday, August 16, 2010
Nifty night-flying kites in Singapore
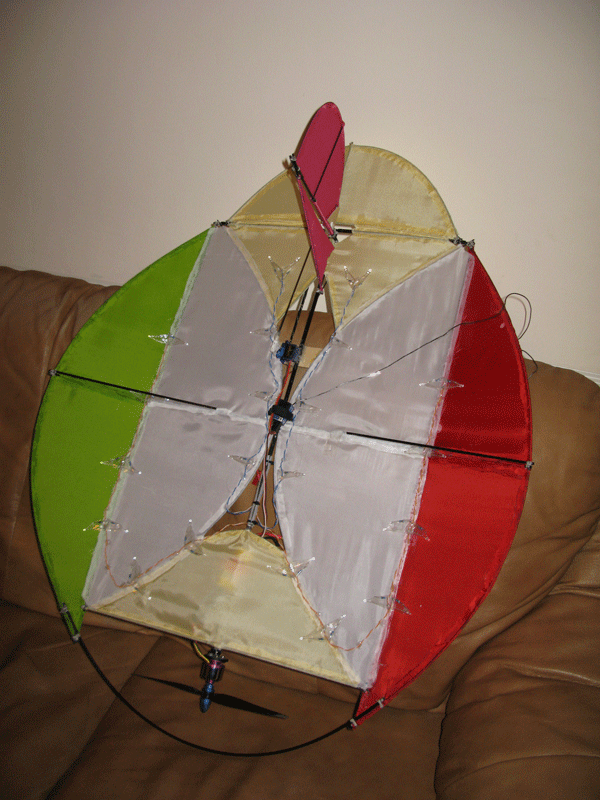
And a DIY version based on the Nutball! Carbon Fiber + Fabric + Lights = Awesome!
And lights on a nutball...
WASP - WiFi Aerial Surveillance Platform
Some random linkage:
- WASP home page
- Slashdot story, where they are mistake for the Dutch guys
- the ever-awesome DIY Drones guys
- Swiss next-generation multicopter
- Video of cute Norwegian military multicopter
Sunday, August 15, 2010
Changing an Outrunner Motor Shaft

- Remove firewall mount. Requires 1.5mm allen wrench (12 cents at Ace Hardware!). Sometimes can be quite difficult to remove.
- Remove C-clip and washer at rear of the motor that retains the shaft. Removing washer can be most difficult part, as it tends to hang in C-clip groove.
- Pull motor bell off of stator. (motor bell = outer part with the magnets, stator = inner part with windings). Do this by grasping motor tube with a pliers where the firewall mount was located, and pull on the motor bell with your fingers. There will be resistance from the magnets.
- Remove flange from the motor bell by removing 10mm retaining nut on inside of motor bell. (May be asier to remove nut if shaft removed from the flange first. Loosen two set screws on front of motor bell, then drive shaft out of flange with hammer and small punch.)
- Insert the new shaft with flange, and secure with nut on inside of motor.
- Reinstall stator, washer and C-clip.
Saturday, August 14, 2010
Things I'd like to try: The NutBall

It's what you get when you combine a Pizza Box Flyer with a Smart Dart, the best of both. It's round and it flies like crazy, hence the name.
It can be setup for flying from mild to wild. It's an easy quick build, so any repairs are a breeze. There's no nose or tail to break off and the wing can't fold. As a trainer it can fly slower than slow, super stable and no bad habits. Turn up the volumn for advanced flying or silly fun. It flies almost as if has ailerons......rolls, loops, snaps and spins both way, flies inverted (but, not it's forte unless you drop the dihedral), prop hanges like a full blown 3D machine and has no pitch problems at high speed.
Adding a 1S lipo to a KeyCam
Quick YouTube video showing how to replace a KeyCam battery with the small E-Flight style battery.
Friday, August 13, 2010
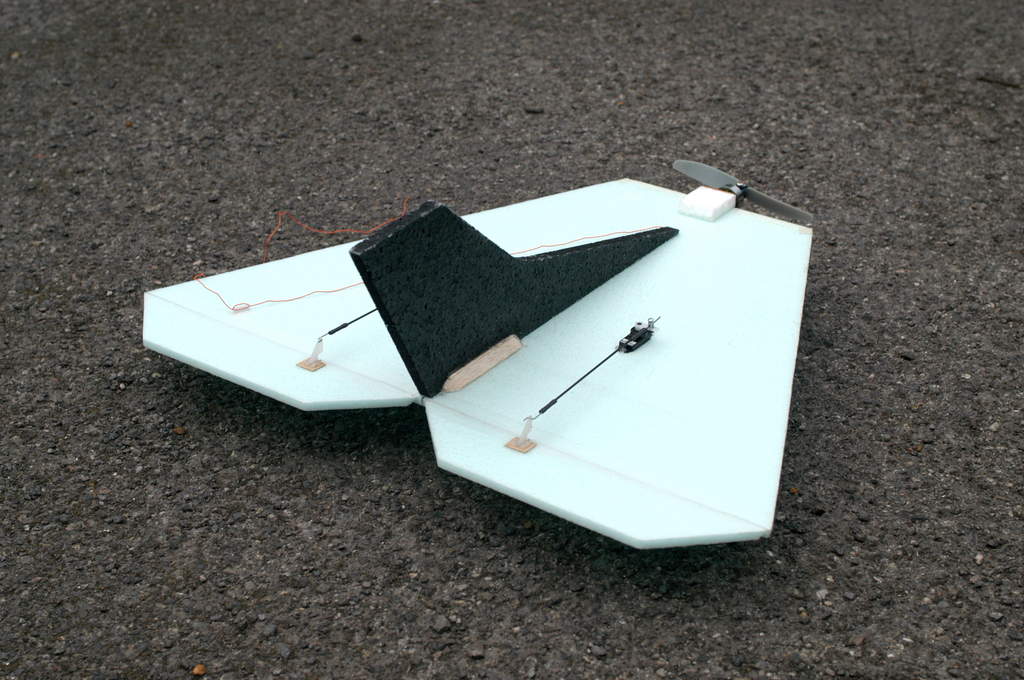
Things I'd like to try: The Cheap and Easy
Most succinct intro ever, for the Cheap and Easy:
- one piece dollar store foam board.
- RET
- Blue Wonder equivalant motor
- 3cell 500 mah

Thursday, August 12, 2010
The legendary Blue Wonder motor

Turnigy 2730 Brushless Motor 1300kv
- Dimension: 32mm x 27mm, 43mm(with shaft)
- Weight: 28g (not including connectors)
Diameter of shaft: 3.1mm - Voltage: 2~3S
- Max current: 3.5~7.5A/20S
- Propeller: 7x3.5~9x4.7
- Pull: 250~470g
- For small parkflyer and gliders.
Tuesday, August 10, 2010
Tricopter build linkage
Got to get these sorted out... which ones are really necessary?
http://www.youtube.com/watch?v=Dwus5FOuYac
http://hobbyking.com/hobbyking/forum/forum_posts.asp?TID=6776
http://www.rcgroups.com/forums/showthread.php?t=1219598
http://www.rcgroups.com/forums/showthread.php?t=1210445&page=3#post14841496
http://www.rcgroups.com/forums/showthread.php?t=1097355
http://www.rcgroups.com/forums/showpost.php?p=14841496&postcount=40
http://www.rcgroups.com/forums/showthread.php?t=1142429
http://www.youtube.com/watch?v=Dwus5FOuYac
http://hobbyking.com/hobbyking/forum/forum_posts.asp?TID=6776
http://www.rcgroups.com/forums/showthread.php?t=1219598
http://www.rcgroups.com/forums/showthread.php?t=1210445&page=3#post14841496
http://www.rcgroups.com/forums/showthread.php?t=1097355
http://www.rcgroups.com/forums/showpost.php?p=14841496&postcount=40
http://www.rcgroups.com/forums/showthread.php?t=1142429

Monday, August 9, 2010
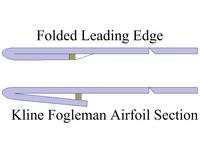
Kline-Fogelman airfoil thread
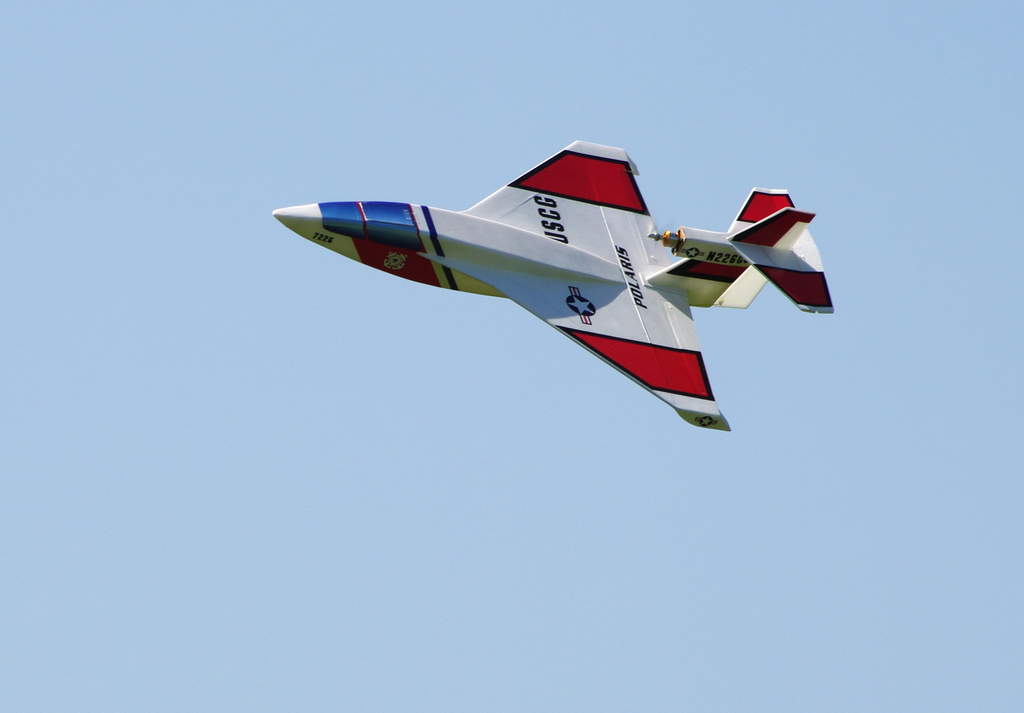
Things I'd like to try: Polaris Seaplane Parkflyer
A beautiful plane that takes off from water or grass.
 Detailed review here.
[...]top speed is in excess of 70 mph, yet the model slows down well and can plop down into the water at high alpha under full control at less than 10 mph. This allows the model to be flown in very tight spaces if desired, or if you have a bigger flying site you can open it up and enjoy the speed. It handles wind and waves remarkably well, too. This model also flies very well off of grass—takeoffs require only 10-20 feet and it can even do easy touch and goes off grass.
Things I'd like to try: Gym-Blu

Vendor: Radical RC

- $3 shipping
- lots of cables, tons of great construction pieces.
- awesome attitude - read the FAQ
TxDuino -- controlling a Futaba transmitter via PC
Controlling a transmitter via PC.
PC -> USB -> Arduino -> PPM -> Futaba module -> receiver.
PC -> USB -> Arduino -> PPM -> Futaba module -> receiver.
http://cheshirekow.com/blog/?p=236The TxDuino project aims to create a single device that allows a PC to control an RC vehicle. At the time of starting this project, the only option for doing this was a device from here that could be plugged into the trainer port of a transmitter. An arduino has been used to achieve this same setup as described here. Going through the handheld transmitter, however, is a huge hassle for a number of reasons so I set out to create a simple single device that could accomplish this. As it turns out, so did the guys at Tom’s RC, their solution being this guy here. Anyway, since the work is done, I’ll share the results.

Stick movement and Control Surfaces
Because I seem to live in backwards-universe, here's what the sticks do. Thanks to the NASA Aeronauticshttp://virtualskies.arc.nasa.gov/aeronautics/5.html guide for the images.
 elevator
 rudder
 aileron
- stick back, elevator up
- stick forward, elevator down
- stick left, rudder to left
- stick right, rudder to port
- stick left: left aileron up, right aileron down
- stick right; left aileron down, right aileron up
Saturday, August 7, 2010

Three Hinge Methods
The first two are for EPP foam. The third is for medium to large foamies that also need stiffening at the joint.
Wednesday, August 4, 2010
Atrium Measurements

height to top of horiz beams: 32'
south bridge: 20' 8" to walkway, 24' 2" to railing
north bridge: 16' 9" to walkway, 20' 3" to railing
length, bridge to bridge: 143'
Tuesday, August 3, 2010
Introducing Radiocontrolpedia
A new web site: Radiocontrolpedia.
Launched by rcqna contributor Pablo Fernández, here's a wiki for all thing RC. Check it out and add an entry!
Launched by rcqna contributor Pablo Fernández, here's a wiki for all thing RC. Check it out and add an entry!
Amphibious Quadracopters!

Watch the videos for full impact.


Controlling Servos

Bonus:
- Electric Motors 101 -- DC, AC, brushless, servo, stepper, more...
Monday, August 2, 2010
Things I'd like to try: Polaris Seaplane Parkflyer

There's a review thread show it taking off from grass, gravel, and water.
Here's a laser-cut kit.
Things I'd like to try: The Twins
A pair of Cargo Planes over on RCGroups. Looks like a lot of fun to fly together!


Subscribe to:
Posts (Atom)