Well I finally got all my stuff together and put together my OPQ. I'm not wanting to boast (hmm actually I do!), but it is a genuine Crash Hancock Signature Edition!
The new OPQ models have nice mounting slots. This early model didn't, so I had to drill my own mounting holes.
It was easy enough, just clamp a motor mount onto the arm and use it as a drill guide.
I make a bit more clearance for the bottom of the motor.
Looks good! I understand why people enjoy working with delrin.
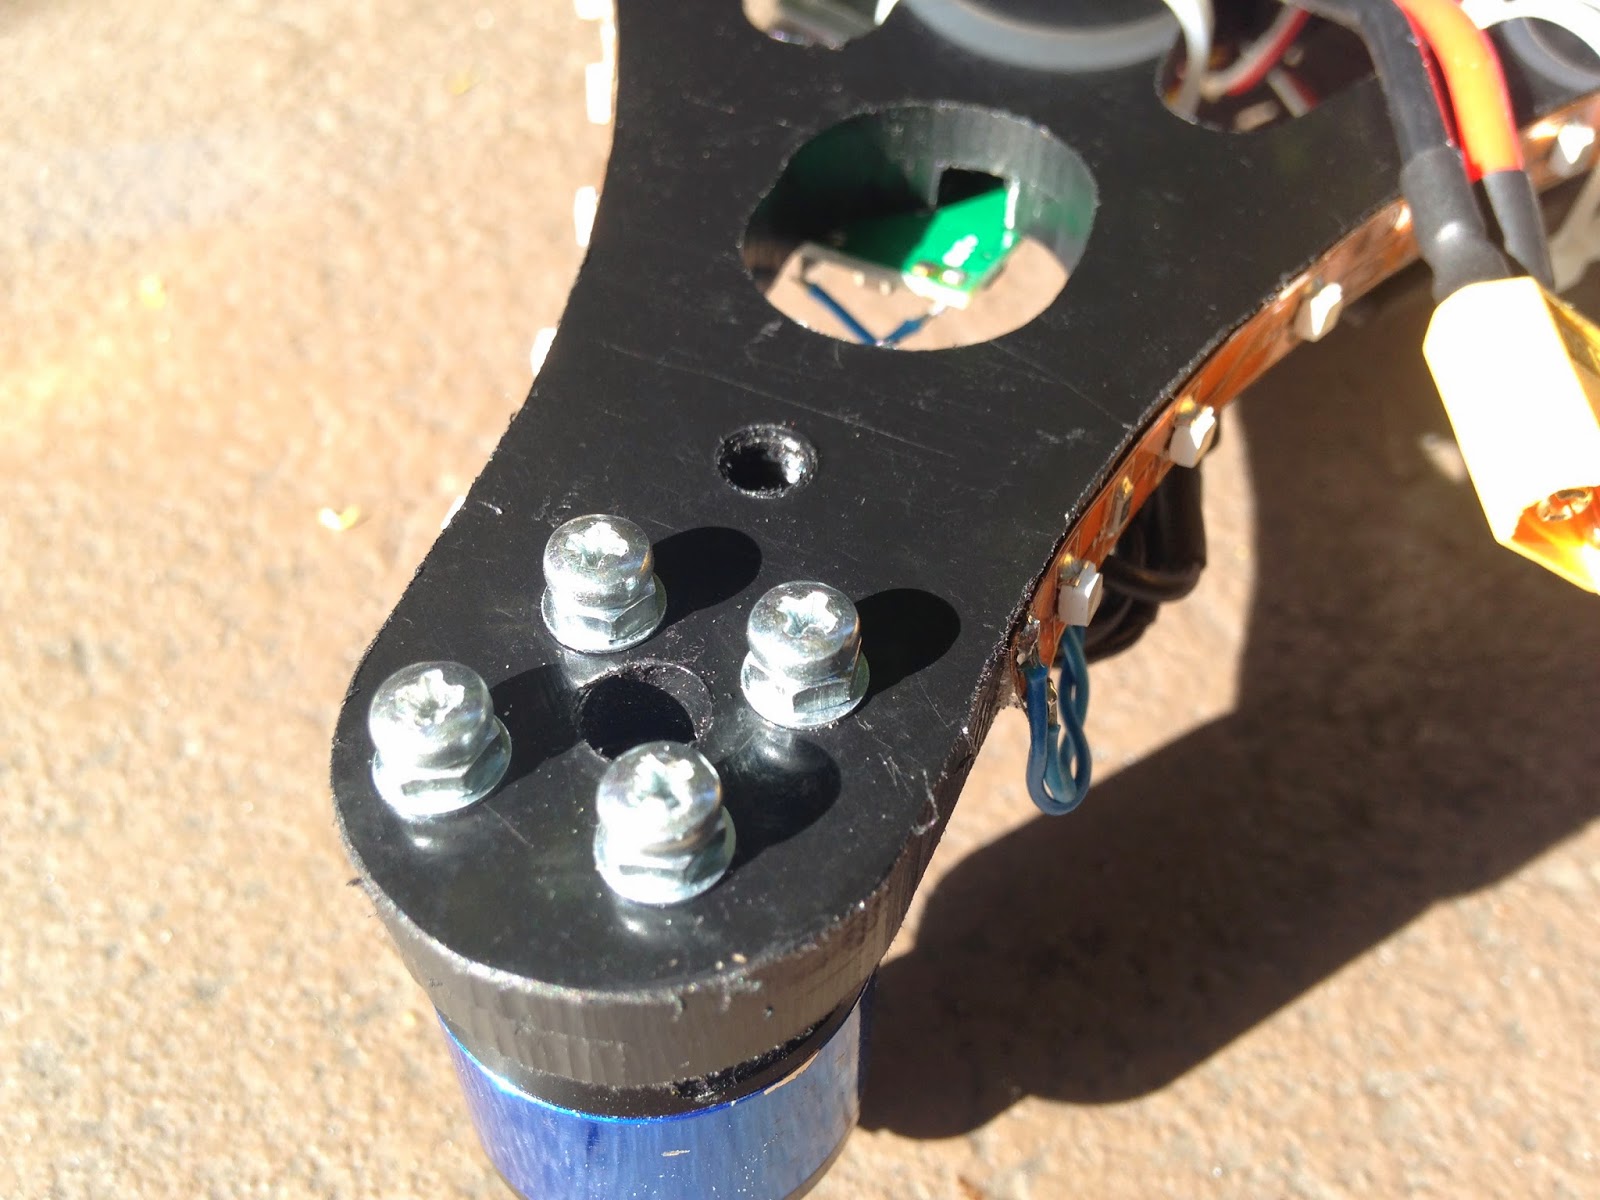
Here's the final mount. That motor's not going anywhere! Not shown: two of the arms were a bit off, so I just used two bolts. They still look rock solid.
It was handy to have some metric sized drill bits to get the exact size holes. I wish Amazon had better deals, or that HobbyKing or somebody would carry metric drill bit sets. I bought this set from a tiny shop in the Akihabara district of Tokyo that specialized in all kinds of electronics and small machine tools.
I screwed the power distribution board onto the top. It was nice and flat, so no problem to mount the flight control board on top.
Black on black with black trim looks cool, but might be a bit hard to see in the evening! Here's some lights.
The lights look good outside, but are a bit bright. I'm going to wire them to a brushless motor controller so I can adjust the light while flying.
Ethernet wire seems to be great for wiring LEDs.
I'm trying this 3M Dual Lock for attaching the battery. It's super-strong and has a nice clean "snap" when it connects. (update: way to strong, you have to give a King Kong yank to pull the battery off. But it's great otherwise... I'm going to try trimming the piece down so there's a smaller surface area and see if that's better. If so, I'll try it on some other air units.)
As soon as I get around to it, I'll shorten all wires to eliminate the clutter.
Flying with a Flip 1.5. Forcing myself to be a better pilot who doesn't rely on a bunch of sissy autopilot stuff!
Hot glue seems to work well for insulating the LED strips.
I tried this voltage converter for the dimmer, but the adjustment was pretty rough.
Part 2 coming up, it's a sweet flyer!
blogodex = {"toc":"The One Piece Quadicle","index":["opq","builds","Crash Hancock", "CrashCast","The Fleet"]};
Somebody asked "what's a Trappy?" Answers here, here, and especially here.
Trappy posted a nice note congratulating Andreas. Just another reason we're both such big fans!
Hmmm, it looks like TBS lost a challenge. We put a bet out that it's not possible to build a frame from scratch within 1 hour (from zero to flying). Andreas Oesterer rose to the challenge and looks like he had 10 minutes to spare! Congratulations, the free TBS DISCOVERY shall be in the mail soon!
Any TBS DISCOVERY builders out there that can help us regain our confidence levels? Can we do it in half the time? The sheep has been served ... but we shall rise from the ashes :) The NAZA RTF sets will ship very soon, with this it should be possible in half the time!
(end updates)
So following an interesting discussion on Facebook, Trappy made Andreas an interesting offer: If Andreas could build one of his signature wooden quads from scratch to flying, Trappy would send Andreas one of his nifty new TBS DISCOVERY frames.
Here's the result!
tl;dr: finished build in 49 minutes, in the air in 51 minutes. Watch the videos at the end to see the entire build; The pictures below show some details of the finished quad.
Arm 4, which rotates clockwise. The ESC is on the side. The wood is 3/4 inch Fir.
The prop spinners are nice feet when you've got the quad upside down. Two bolts are plenty strong to hold the motor securely.
APC props are sturdy and well balanced. Andreas manfully used needle-nose pliers to tighten his spinners. You can use a small screwdriver if you like.
The APM sits on top of a piece of foam recycled from a box holding a piece of electronics equipment. It's cut to the approximate size of the autopilot.
Foam pad attached to the top plate with hot glue.
The autopilot is attached to the foam pad with bamboo skewers. Coat the top of the skewer with hot glue, and then stick the skewer through the hole. When the glue sets, snip the skewer to a convenient length. The hot glue holds the autopilot onto the skewer; the skewer sticks into the foam and keeps its position. The velcro strip holds the autopilot onto the top plate.
Here's the power distribution spider. It's based on this design and uses Wago connectors to connect the wires.
Here's a closeup at another angle.
The battery carrier is coated with some hot glue. The hot glue is less slippery than the bare wood, and keeps the battery stable in the mount. Use the high heat setting.
The top plate is used to make a flat surface for the autopilot and other things on the top of the quad. You could skip the top plate if you cut some divots in your autopilot foam pad so it's not skewed by the bolt heads. The wood for the plates is 5mm ply.
Andreas didn't do it for this video, but it's a good idea to put a helmet of some sort over the autopilot.
If you want to, you can tidy up the wiring by drilling some extra holes and running the wires through the inside of the body.
Here's the videos. First is a time lapse, and then the build. I edited it a bit to get the time down to about 45 minutes. If you've seen one arm drilled, you've seem them all drilled!
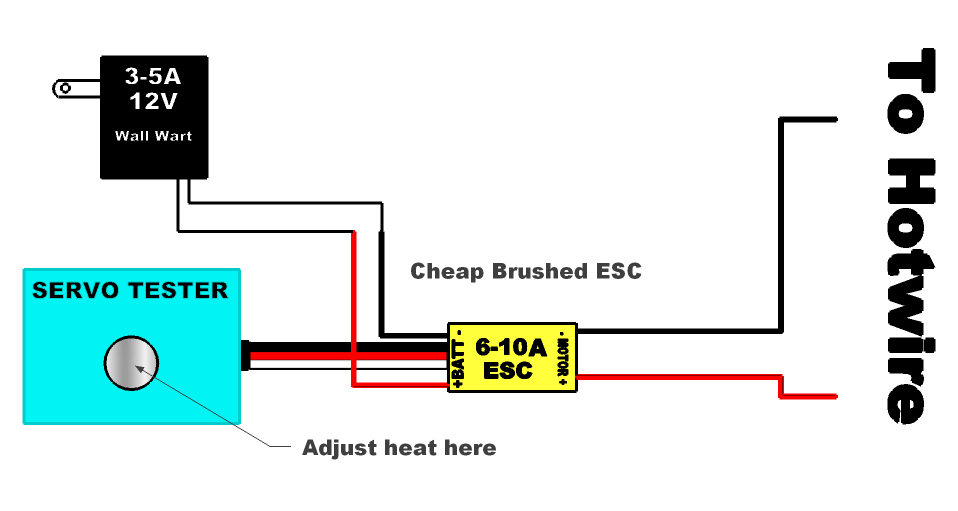
From user 7up on rcgroups. Power from a 3-5A 12V wall wart, managed by a 6-10A brushed ESC, controlled by a servo tester. Attach the hotwire to the motor wires.


 APC props are sturdy and well balanced. Andreas manfully used needle-nose pliers to tighten his spinners. You can use a small screwdriver if you like.


 If you want to, you can tidy up the wiring by drilling some extra holes and running the wires through the inside of the body.
 From user 7up on rcgroups. Power from a 3-5A 12V wall wart, managed by a 6-10A brushed ESC, controlled by a servo tester. Attach the hotwire to the motor wires.