Showing posts with label repair. Show all posts

Saturday, November 17, 2012

Ladybird Repairs

 Here's the before picture.  The mainframe was cracked, and more importantly the motherboard wouldn't bind.
 Here's the unit with the motherboard removed.  The four screws come out pretty nicely.
 Here's the repaired frame.  It took a bit of jiggling to get the arms to seat properly.
 And all put back together!  It flies as nicely as it did before on my desktop testing.  I replaced my V1 board (which has an accelerometer) with a V2 board (which doesn't).  I'll see how well it flied in real life and see if I want to get a V1 replacement board.  They're more expensive because of the accelerometer.
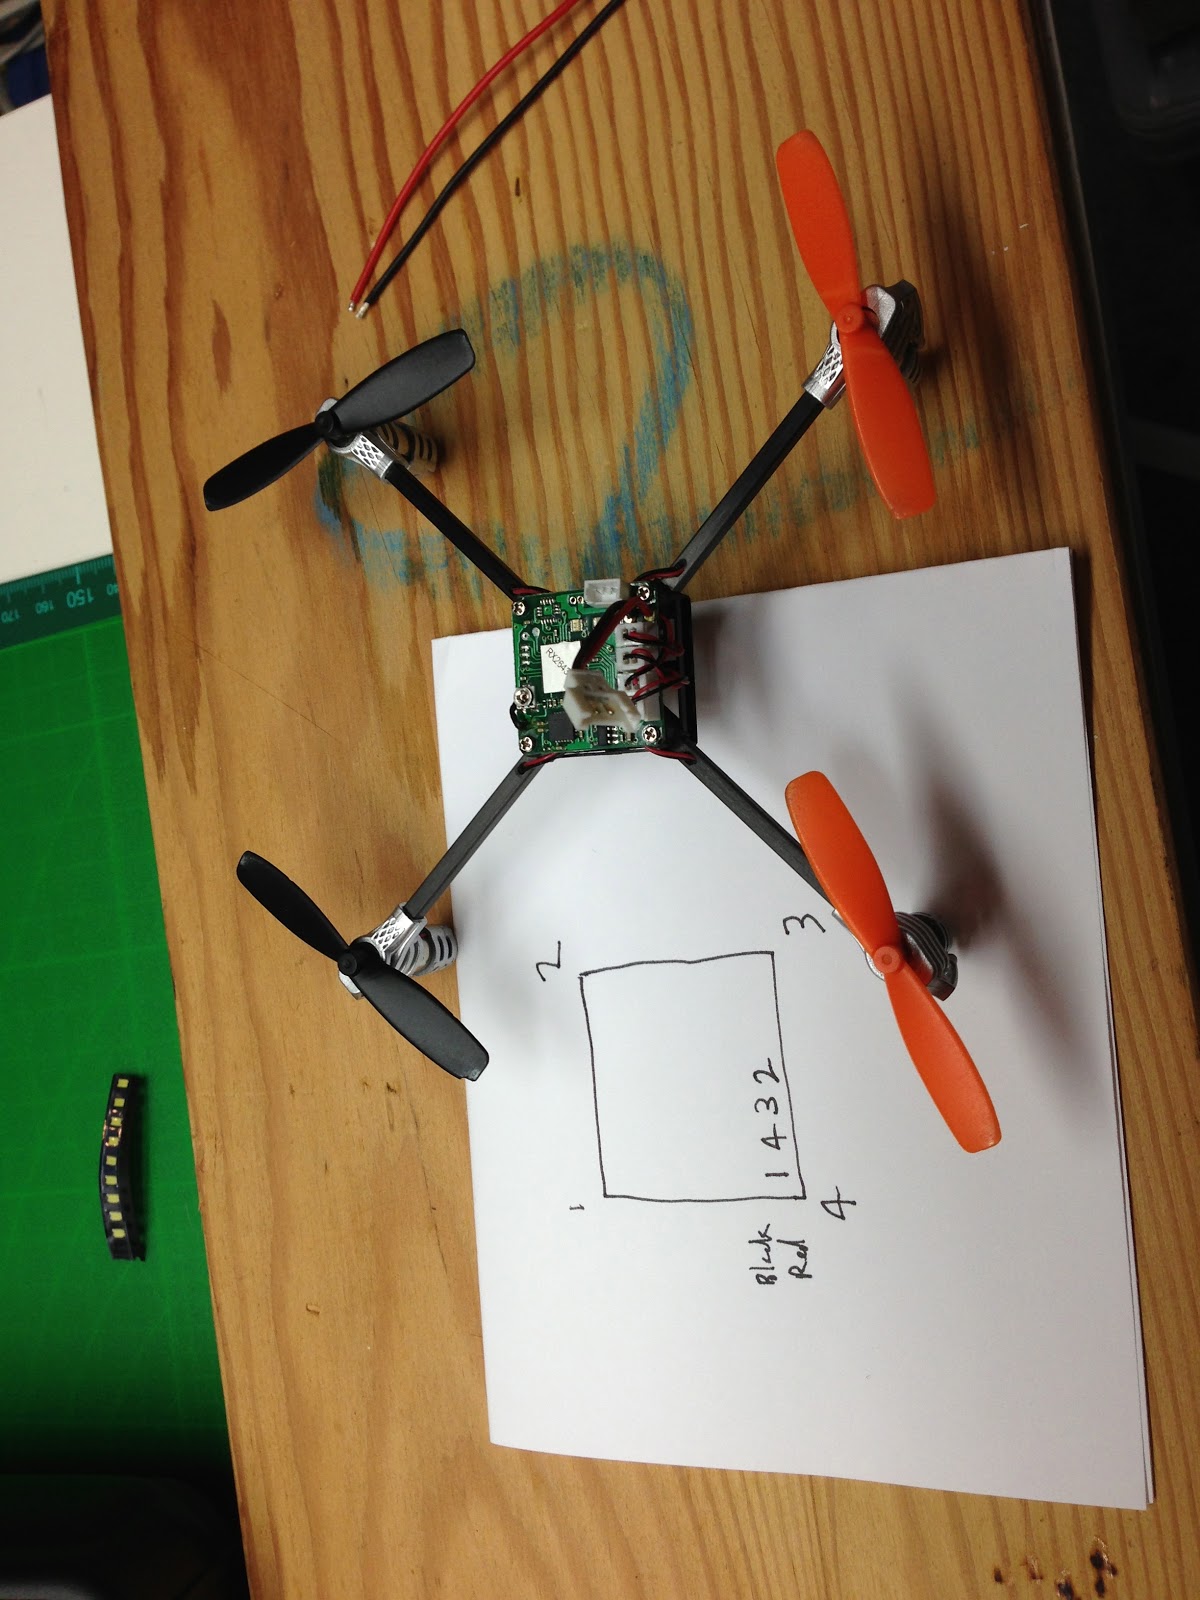
Here's the wiring diagram for future use.

Saturday, September 15, 2012

Easy Star Stabilizer Repair

 You can read the details (and see the video!) over at the Brainwagon, but the tl;dr is that the EZ* lost half the horizontal stabilizer in a crash.  I could tell MarkV felt pretty bad about it, but I told him it would be no problem to get things good as new.
I double-checked on the EZ* RCG thread, and Elapor (the proprietary foam mix that Multiplex uses is CA-safe, and CA is the recommended repair glue.

So, I used a couple of drops of cheapie Harbor Freight CA (10 tubes, $1.80 on sale) and a spritz of HobbyKing kicker and put the stab back to normal.  Total repair time: about 2.5 minutes, including taking the pics.  Don't tell MarkV, I don't even think he noticed a previous repair from where I busted off the vertical stab!

Saturday, July 28, 2012

Ladybird motor repaired!

Finally received my replacement motor.  I was going to take a few pics of the Ladybird disassembled, but was so concentrating on not loosing the screws I got distracted.  Anyways:  pop the body off and unscrew the leg with the bad motor.  Undo the power and swap the leg.  You might have to undo some of the other screws to route the wire.  The screws go through rubber standoffs -- don't let them fall out!

Thursday, October 20, 2011

Sugru: repairing DX6i charger port

Another note to Sugru about repairs.  This to my DX6i where the charge port had busted loose.

Here's a simple, unglamorous repair that saved me time, money, and the expense of being without a radio transmitter that I use frequently.

The battery recharging port had worked its way loose, due to a crack in the groove that holds the connector in place.  It's a standard sized connector that's available at any local electronics
store, but it turns out this particular piece is a nonstandard size and can only be replaced by sending the unit in for warranty service.

I was actually opening the case each time the unit needed to be charged; in addition to being inconvenient, I was worried that the wires attached to the case would undergo more stress than they were designed for and might work their way loose.

I considered using epoxy, but then the connector would be permanently bonded to the case, and if it ever went bad I would have even more work to put things right.

The sugru worked perfectly; the connector is held very tightly and resists the pressure when the power cable is attached;  and if I should ever need to remove the connector, the Sugro can be easily scraped away with a small blade.

The work took about 10 minutes including opening and closing the case, and I let the Sugru cure overnight before testing, so I didn't have any downtime related to the repair.  I didn't bother making it
pretty since (a) there wasn't a lot of room for my fat fingers, and (b) with any luck it will be many years before somebody has to look at the inside of the case again.  I guess if it ever gets stolen I'll have the perfect identifier -- my fingerprints permanently embedded inside the case!

And the package of Sugru was so much cheaper than the shipping cost of returning the unit to the manufacturer (via tracked mail) I'm money ahead as well!

Thanks again Sugru, you've saved me time and money!

Sugru: repairing macbook feet

I recently bought a package of Sugru.  It's neat stuff and I'm happy with the results, so I sent them a note and picture to their gallery, and reproducing it here.

For some reason I seem to be pretty hard on the plastic "feet" on the bottom of my macbook pro.  I've busted three of them right off and the fourth was looking pretty dodgy.

So, I popped the fourth one off and replaced them with sugru feet.  I used one package of black sugru, divided it into five equal pieces and reserved one piece for an unrelated repair. The remaining four pieces I shaped into chubby "coins" the same size as the original feet.  Underneath the feet the case is open to the inside, and I wanted to be careful not to fill up the guts of the computer by squishing the Sugru through the holes.

Using pressure around the edges gave a nice convex surface and ensured a good bond with the case, in addition to keeping the Sugru on the outside of the case.  After it looked like all the feet were pretty equal, I put a bit of soapy water on a flat tabletop and set the computer down for a second or two to make sure everything was level and the unit wouldn't rock.  I turned the computer over to let the Sugru cure.

The Sugru is working much better than the original plastic feet. In addition to being a lot more sturdy, the grip of the sugru on a desk or tabletop is excellent.

And as a bonus, my macbook pro got much quieter!  I had not realized how much of a loud hum the disk drive made with the missing foot.

Thanks Sugru, I don't know what else would have worked so well!

Monday, April 25, 2011

Blade mSR: Motor Replacement

 The motor on my Blade mSR started getting weak:
  • losing lift.
  • blades needed a flick to get started.
Consulting RCGroups, the diagnosis was a new main motor replacement.  I ordered a replacement motor from 38oceanss on eBay.  Delivery was quick and replacement was quick and easy.
 First, detach the canopy.  The little grommets pull off the mainframe, and stay attached to the canopy.  Here you can see the first grommet coming off.
Pulling on both sides worked pretty well.  Press your thumbs against the frame and "pinch" the grommets and canopy off.
Here you can see the port side grommets.  They stay quite attached to the canopy.  If you're pulling hard enough on the canopy for the grommets to become loose, reposition your fingers so that you're pulling against the grommets.
With the canopy removed you can see the motor and motor wire.  The motor wire is attached with an L-shaped connector, and the wire goes down the front of the main card.
 Detach the landing gear so you can get a good grip on the bottom of the mainframe.  It's all a bit delicate, so be careful not to grip the card, the servos, and especially any of the tiny wires.  Especially watch out for the antenna wire on the top right (facing forward) of the main board.
 Disconnect the motor wire.  It will slide out easily.
 Here's the tricky part.  Use needle nose pliers to hold the motor, and apply gentle traction.  Wiggle the motor gently and it will start to slide out.  Be careful, the pliers are right next to the servo rods.  Don't break them off!
 After the old motor has been pulled out, use your fingers to push the new motor in.  It will slide in smoothly.  Line up the pinion with the main rotor gear and make sure everything spins smoothly.
 Attach the new motor connector to the main board with the same orientation as the old connector.  The wire will go down and not up.  Power up the unit and check to make sure everything is operating smoothly before reattaching the canopy.
Any use for an old motor?

Thursday, April 7, 2011

Repairing an AeroQuad motor mount

I crashed pretty dramatically over the weekend, and bent a motor mount almost 45 degrees.  It took under a minute to repair to like-new condition.

Interestingly, it was the perfect object lesson, as Chris Anderson (of DIY Drones -- we were at a Bay Area get-together where he was testing some of the new Ardupilot Mega 2.0 features) had just finished telling me that it was more important to make things easily fixable than it was to make things hard to break.


Here's links to the frame, which I'm quite impressed with:

http://aeroquad.com
https://www.aeroquadstore.com/ProductDetails.asp?ProductCode=FRAME-001