(updates)
(end updates)
So following an interesting discussion on Facebook, Trappy made Andreas an interesting offer: If Andreas could build one of his signature wooden quads from scratch to flying, Trappy would send Andreas one of his nifty new TBS DISCOVERY frames.
- Somebody asked "what's a Trappy?" Answers here, here, and especially here.
- Trappy posted a nice note congratulating Andreas. Just another reason we're both such big fans!
Hmmm, it looks like TBS lost a challenge. We put a bet out that it's not possible to build a frame from scratch within 1 hour (from zero to flying). Andreas Oesterer rose to the challenge and looks like he had 10 minutes to spare! Congratulations, the free TBS DISCOVERY shall be in the mail soon!
Any TBS DISCOVERY builders out there that can help us regain our confidence levels? Can we do it in half the time? The sheep has been served ... but we shall rise from the ashes :) The NAZA RTF sets will ship very soon, with this it should be possible in half the time!
(end updates)
So following an interesting discussion on Facebook, Trappy made Andreas an interesting offer: If Andreas could build one of his signature wooden quads from scratch to flying, Trappy would send Andreas one of his nifty new TBS DISCOVERY frames.
Here's the result!
tl;dr: finished build in 49 minutes, in the air in 51 minutes. Watch the videos at the end to see the entire build; The pictures below show some details of the finished quad.
Here's the body templates: quad, hex, octo.
tl;dr: finished build in 49 minutes, in the air in 51 minutes. Watch the videos at the end to see the entire build; The pictures below show some details of the finished quad.
Here's the body templates: quad, hex, octo.

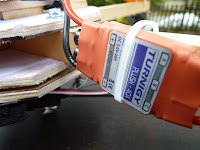
Arm 4, which rotates clockwise. The ESC is on the side. The wood is 3/4 inch Fir.
The prop spinners are nice feet when you've got the quad upside down. Two bolts are plenty strong to hold the motor securely.
 APC props are sturdy and well balanced. Andreas manfully used needle-nose pliers to tighten his spinners. You can use a small screwdriver if you like.
The APM sits on top of a piece of foam recycled from a box holding a piece of electronics equipment. It's cut to the approximate size of the autopilot.
Foam pad attached to the top plate with hot glue.
The autopilot is attached to the foam pad with bamboo skewers. Coat the top of the skewer with hot glue, and then stick the skewer through the hole. When the glue sets, snip the skewer to a convenient length. The hot glue holds the autopilot onto the skewer; the skewer sticks into the foam and keeps its position. The velcro strip holds the autopilot onto the top plate.
Here's the power distribution spider. It's based on this design and uses Wago connectors to connect the wires.
Here's a closeup at another angle.
The battery carrier is coated with some hot glue. The hot glue is less slippery than the bare wood, and keeps the battery stable in the mount. Use the high heat setting.
The top plate is used to make a flat surface for the autopilot and other things on the top of the quad. You could skip the top plate if you cut some divots in your autopilot foam pad so it's not skewed by the bolt heads. The wood for the plates is 5mm ply.
Andreas didn't do it for this video, but it's a good idea to put a helmet of some sort over the autopilot.
 If you want to, you can tidy up the wiring by drilling some extra holes and running the wires through the inside of the body.
Here's the videos. First is a time lapse, and then the build. I edited it a bit to get the time down to about 45 minutes. If you've seen one arm drilled, you've seem them all drilled!
Detailed Video, Part 1:
Detailed Video, Part 2:


No comments:
Post a Comment