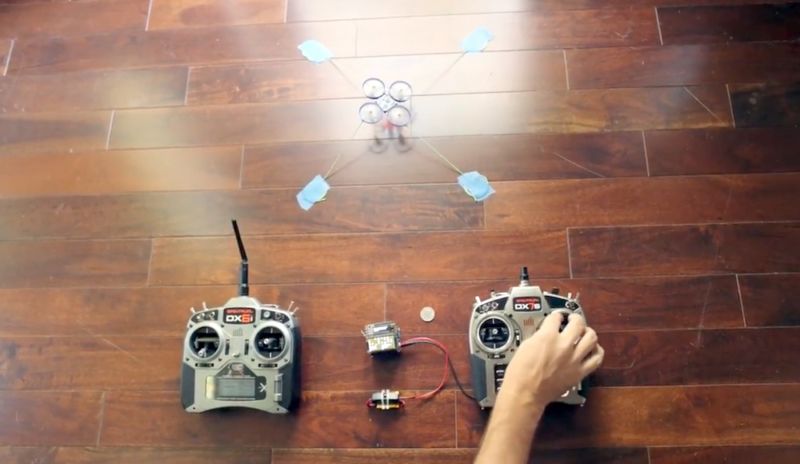
Here's the original article:
http://arstechnica.com/security/2016/10/drone-hijacker-gives-hackers-complete-control-of-aircraft-in-midflight/
The speaker's notes from the presentation:
https://prezi.com/vh4in2krlaoh/attacking-dsmx-with-sdr-pacsec-2016-english/#
An upcoming course:
https://www.cansecwest.com/dojos/2016/radio_reverse.html
And where he sourced his equipment:
https://1bitsquared.com/
Pages
▼
Saturday, November 5, 2016
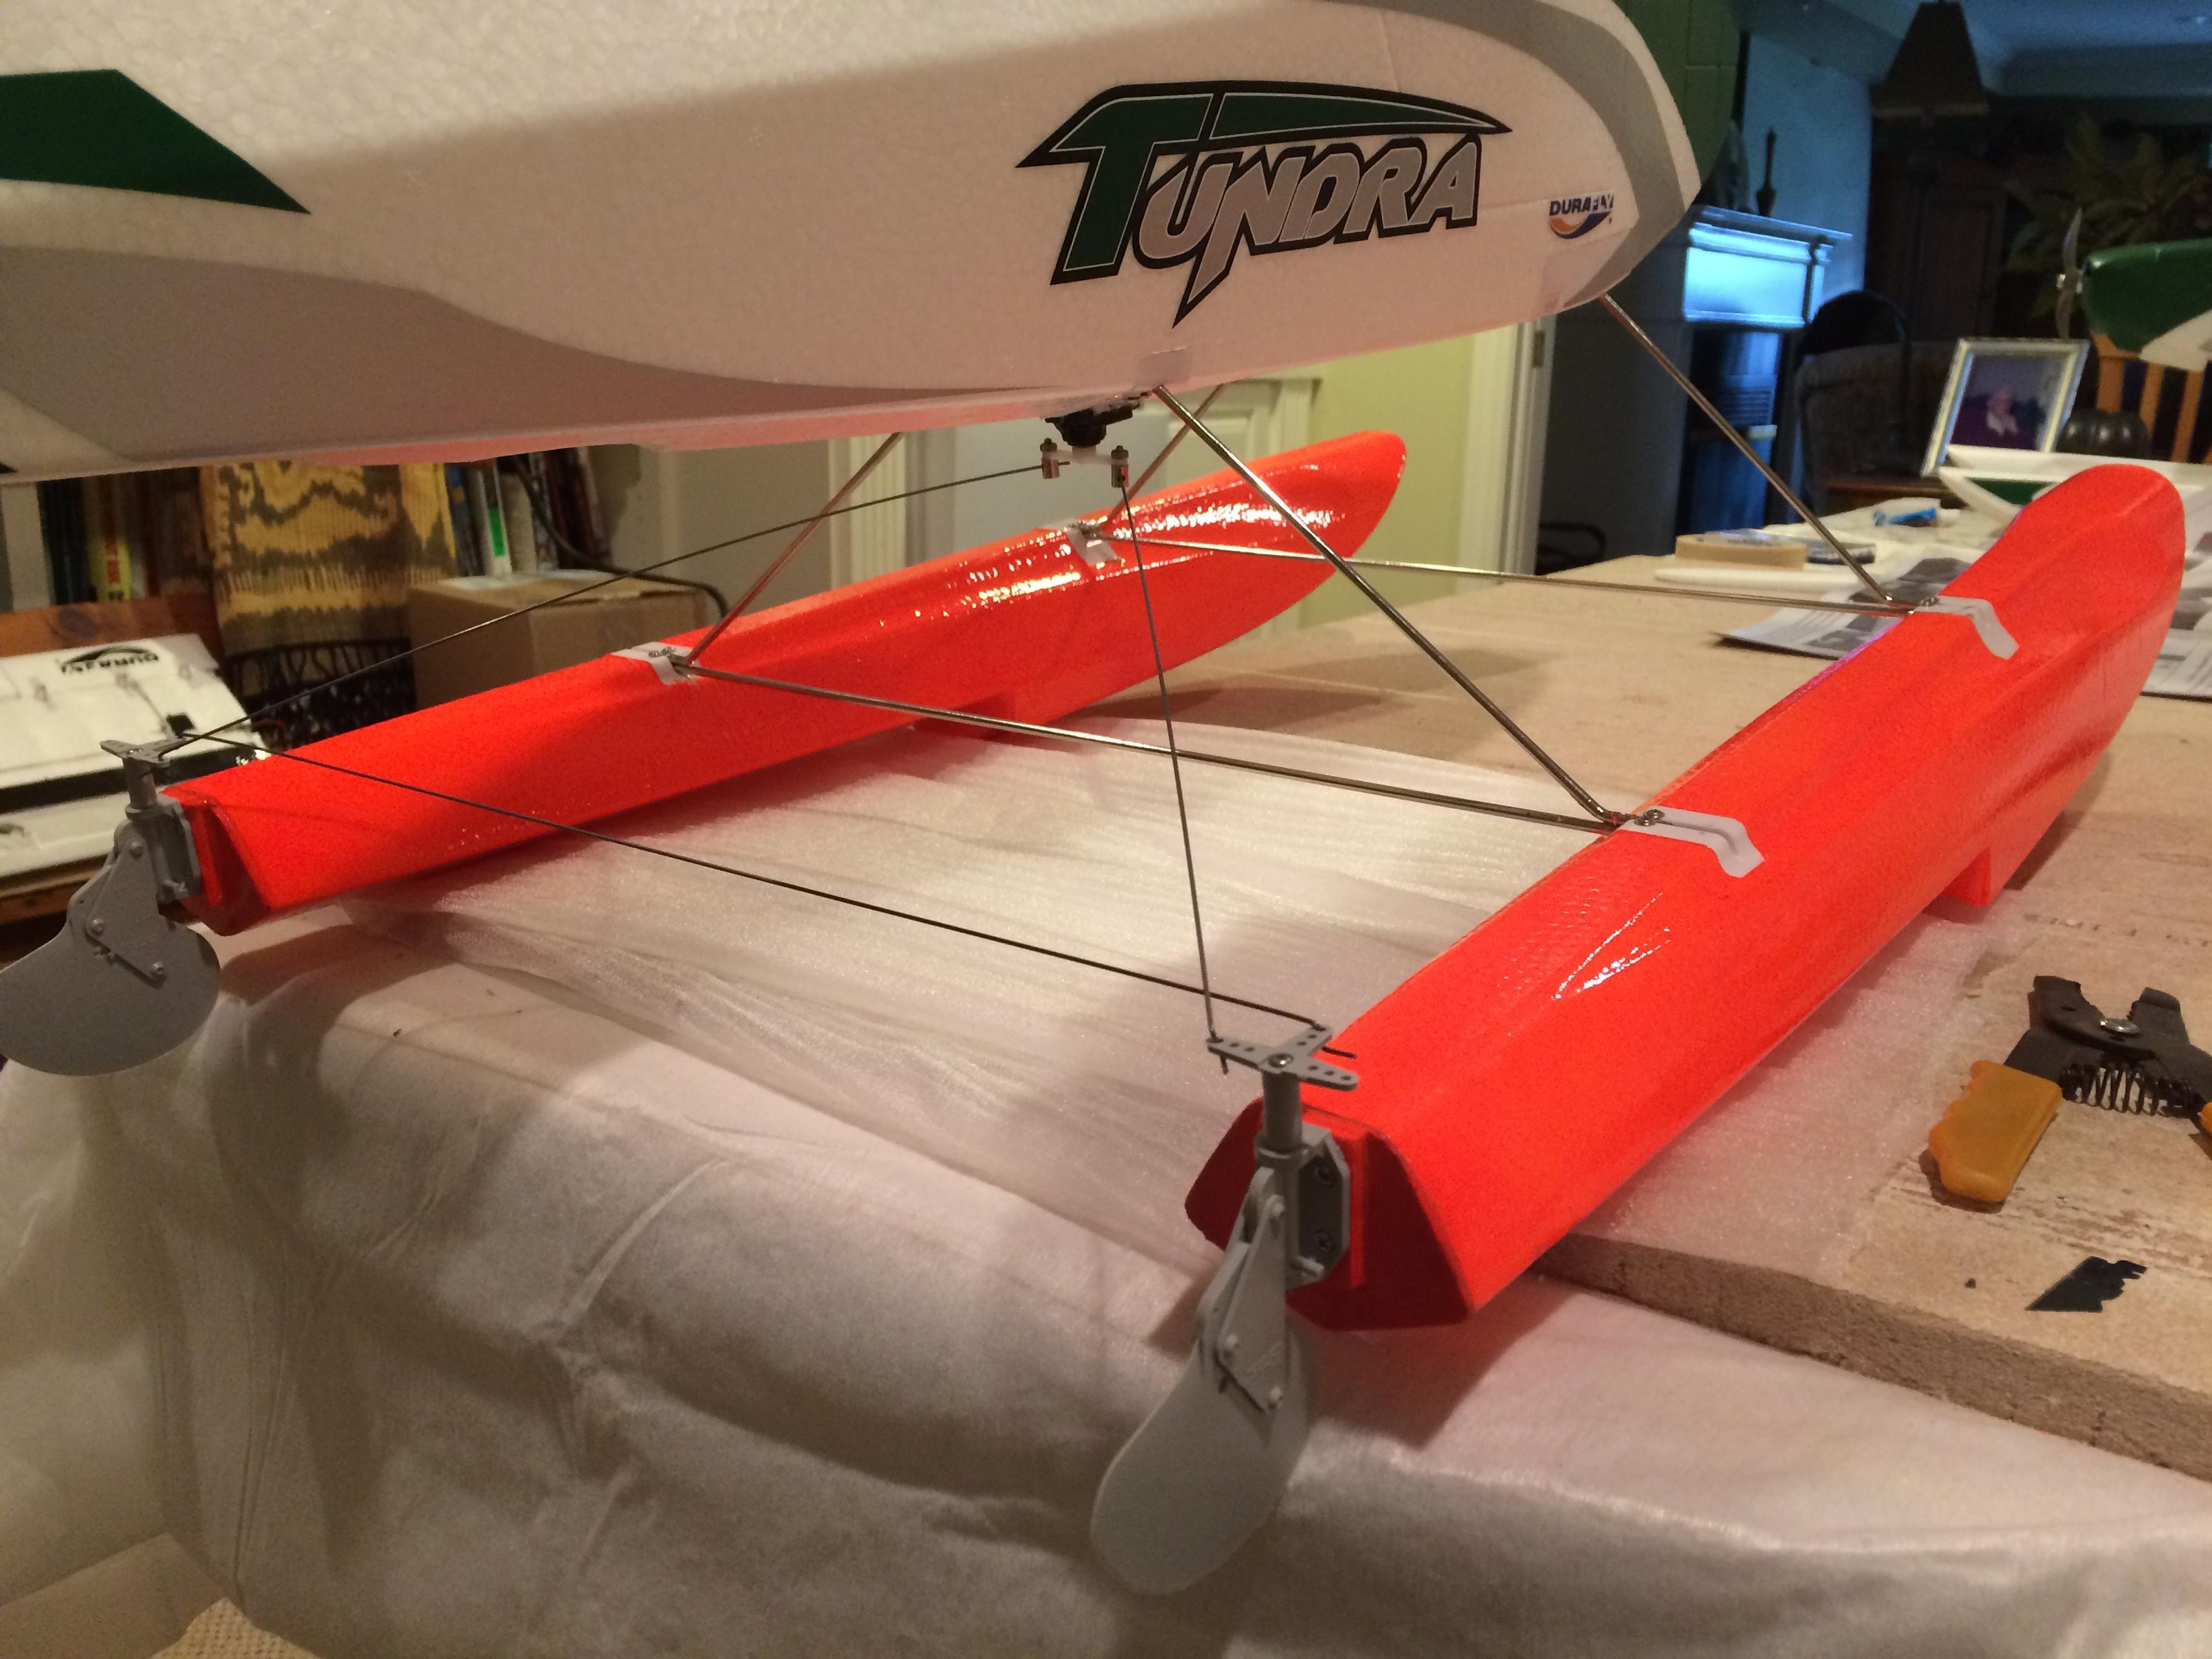
Ernst Rudders for HobbyKing Tundra
Saw this on RCGroups. This seems a better solution than the stock rudder mount. gravity keeps the Ernst rudders down and will kick up as necessary. I'm not sure of the exact size. Note the pull-pull mechanism connecting to the single servo.
Here's a picture of another plane with the rudders mounted on wood at the back.
Part description is:
Water Rudder .40-.60
ERNST MANUFACTURING INC. ERN155
https://www.hobbyzone.com/ernst/ERN155.html
blogodex = {"toc" : "Tundra", "idx" : ["Ernst", "floats", "rudder", "water rudder"]};
Here's a picture of another plane with the rudders mounted on wood at the back.
Part description is:
Water Rudder .40-.60
ERNST MANUFACTURING INC. ERN155
https://www.hobbyzone.com/ernst/ERN155.html
blogodex = {"toc" : "Tundra", "idx" : ["Ernst", "floats", "rudder", "water rudder"]};
Friday, September 2, 2016
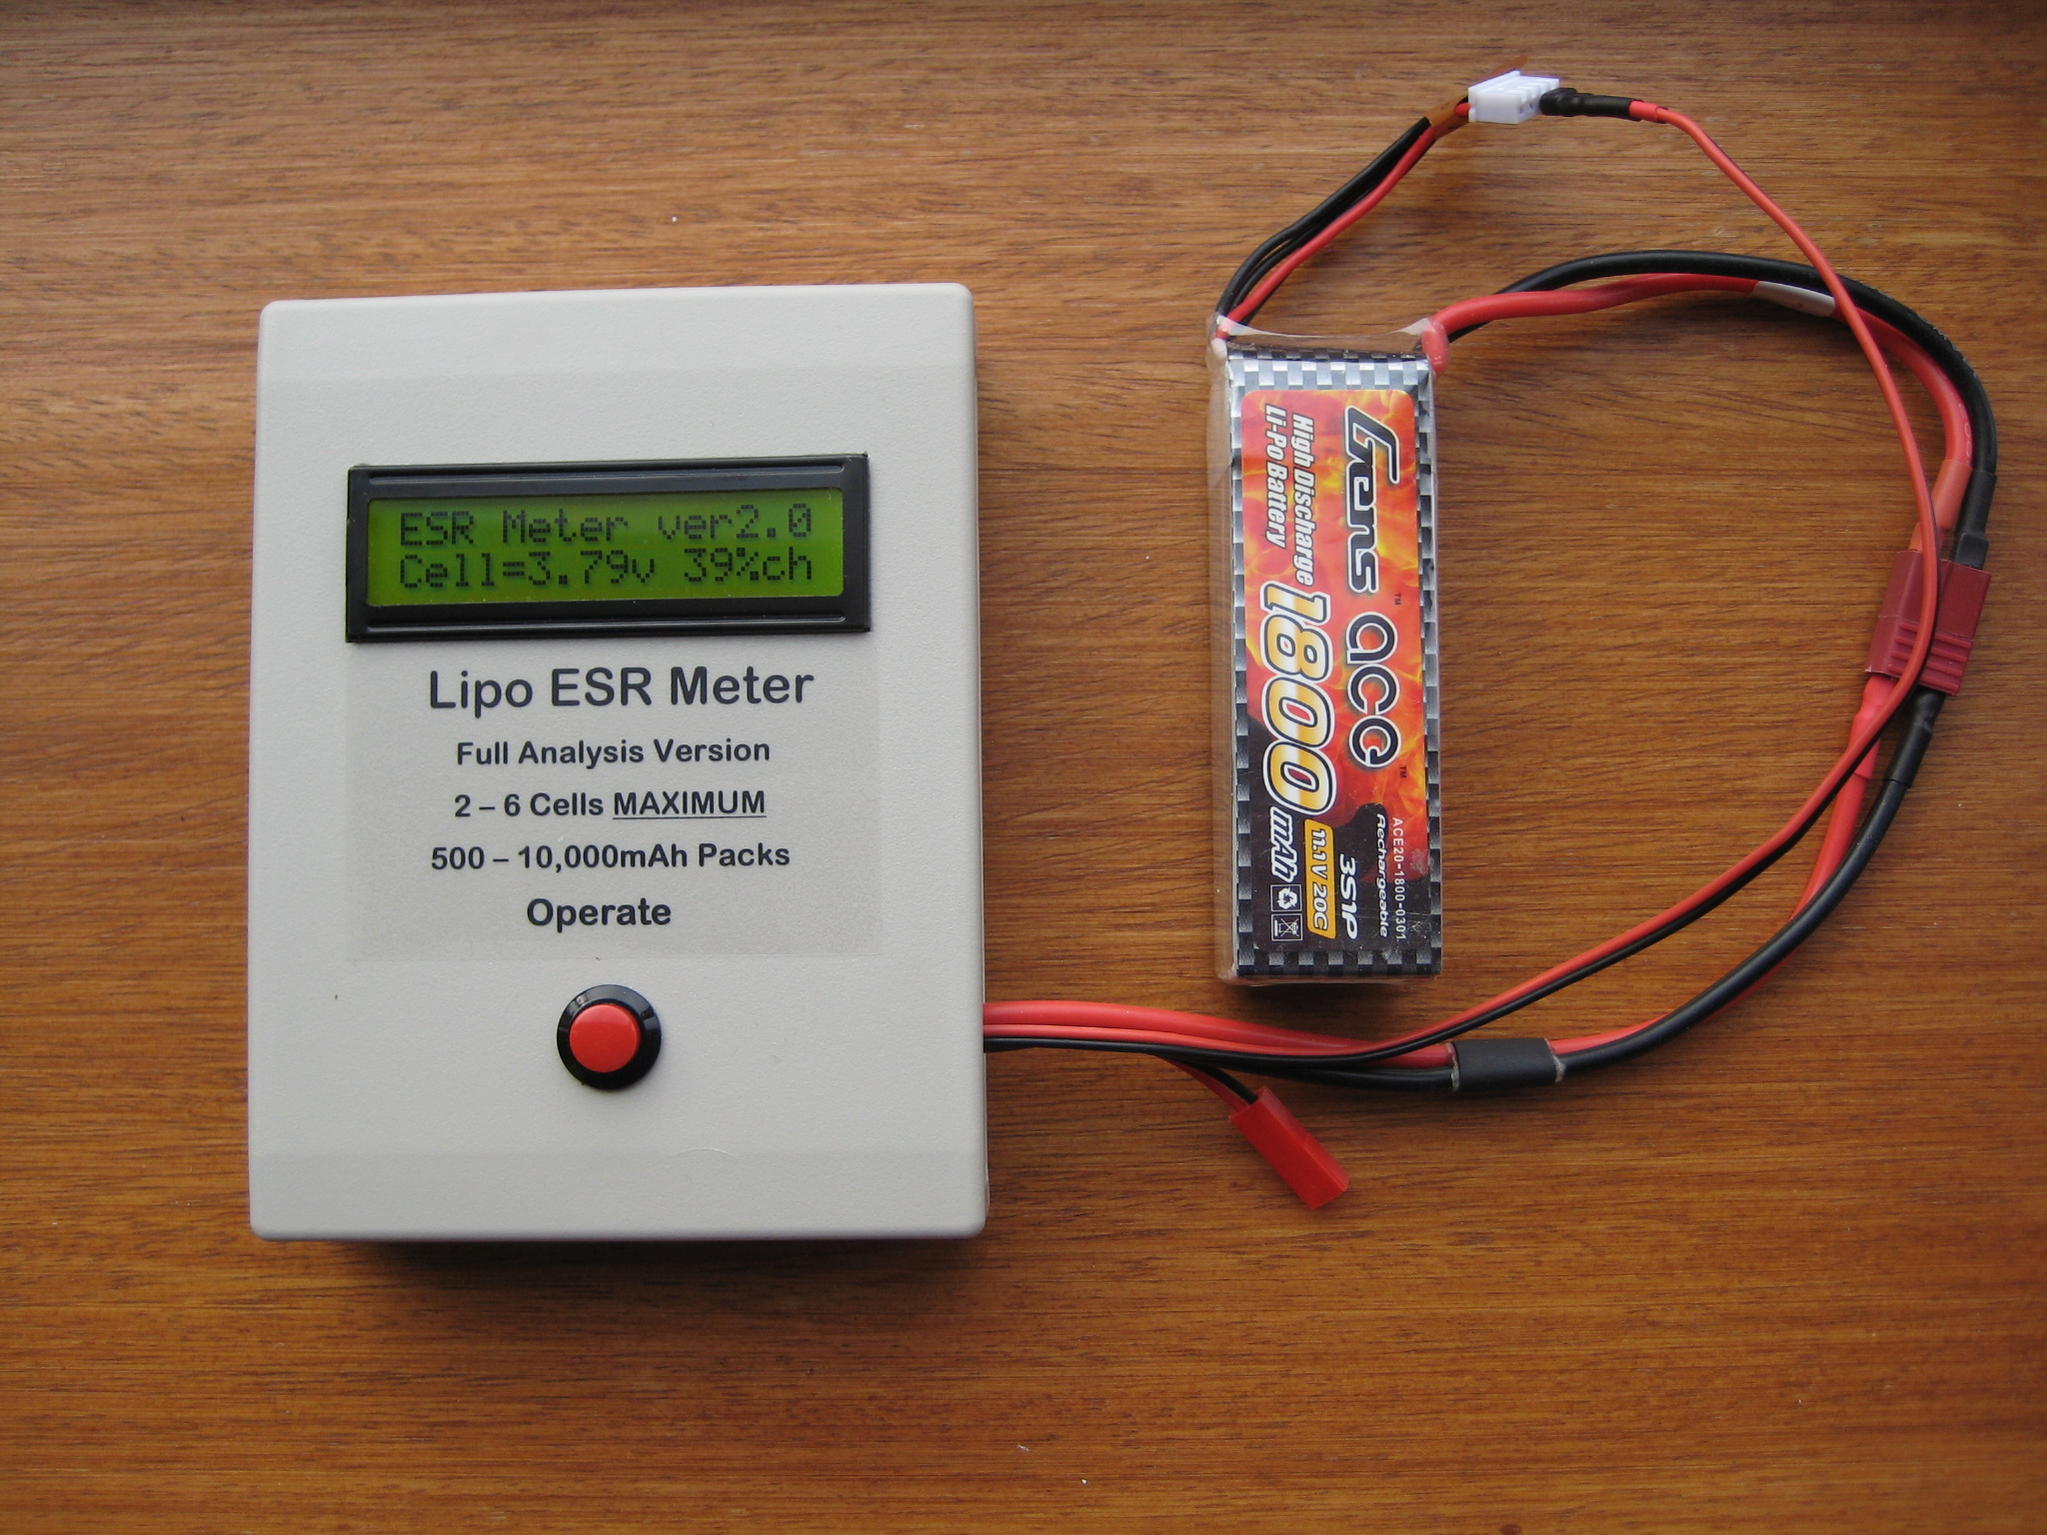
Links for Wayne Giles ESR Meter
Wayne is shutting down production himself as he moves on in retirement; I hope somebody picks it up!
Thanks Wayne, and hope you enjoy your retirement!
Here's some random links for posterity.
RCGroups Thread on V2 unit
RCGroups Thread on V1 unit
Unit at Progressive RC
Proof C Ratings are Useless -- very true!
 Four-Wire (Kelvin) Resistance Measurements
Due to the limitations of the two-wire method, the four-wire (Kelvin) connection method shown in Figure 2 is generallypreferred for low resistance measurements because it reduces the effect of test lead resistance. These measurements can be made using a DMM, SourceMeter SMU instrument, or a separate current source and voltmeter. With this configuration, the test current (I) is forced through the test resistance (R) via one set of test leads, while the voltage (VM) across the DUT is measured through a second set of leads (sense leads). Although some small current (typically less than 100pA) may flow through the sense leads, it is usually negligible and can generally be ignored for all practical purposes. The voltage drop across the sense leads is negligible, so the voltage measured by the meter (VM) is essentially the same as the voltage (VR) across the resistance (R). As a result, the resistance value can be determined much more accurately than with the two-wire method.
Note that the voltage-sensing leads should be connected as close to the resistor under test as possible to avoid including part of the resistance of the test leads in the measurement.
and another Explanation of 4 Wire Kelvin Testing.
This video covers the V1 unit:
Thanks Wayne, and hope you enjoy your retirement!
Here's some random links for posterity.
RCGroups Thread on V2 unit
RCGroups Thread on V1 unit
Unit at Progressive RC
Proof C Ratings are Useless -- very true!
 Four-Wire (Kelvin) Resistance Measurements
Due to the limitations of the two-wire method, the four-wire (Kelvin) connection method shown in Figure 2 is generallypreferred for low resistance measurements because it reduces the effect of test lead resistance. These measurements can be made using a DMM, SourceMeter SMU instrument, or a separate current source and voltmeter. With this configuration, the test current (I) is forced through the test resistance (R) via one set of test leads, while the voltage (VM) across the DUT is measured through a second set of leads (sense leads). Although some small current (typically less than 100pA) may flow through the sense leads, it is usually negligible and can generally be ignored for all practical purposes. The voltage drop across the sense leads is negligible, so the voltage measured by the meter (VM) is essentially the same as the voltage (VR) across the resistance (R). As a result, the resistance value can be determined much more accurately than with the two-wire method.
Note that the voltage-sensing leads should be connected as close to the resistor under test as possible to avoid including part of the resistance of the test leads in the measurement.
and another Explanation of 4 Wire Kelvin Testing.
blogodex = {"toc" : "ESR Meter", "idx" = ["Wayne Giles", "power", "batteries"]};
RC Receiver USB Adaptor
 An interesting project from gregnau @ rcgroups:
http://www.rcgroups.com/forums/showthread.php?t=2714430
gregnau writes:
RC Receiver USB Adapter
Arduino based game controller adapter for regular RC receivers up to 6 channels.
It acts as an USB joystick, dispatching the channels values read from a PWM RC receiver. Aimed to be fast and responsible, though simple to use with automatic calibration function. It can be useful to play simulator wireless from the computer with your favourite transmitter. Compatible withWindows, Mac, Linux, Android,IOS.
Parts-list
- Sparkfun Pro Micro (5v/16Mhz)
- 6 CH RC receiver (PWM, 5v)]
- Tactile SPST switch (momentary pushbutton)
- some jumper wires (female-female)
Requirements
The .hex file and the supplied installer is only compatible with Sparkfun Pro Micro, do not try to flash it on other Arduino compatible devices. If you want to give it a go on other boards, then compile from source! Source:http://github.com/gregnau/wireless_rc_adapter
Installer should be easy as double-clicking the install.bat while the Pro Micro is plugged in. Everything is detailed to the screen, so if there is any error you can start investigating

Worth checking before flashing!
hex-file checksum: d7065aed90c259e7ef3d8fe3dad3f1d7
Some jumperwires are needed to connect the receiver to the Pro Micro. Below on the picture you can see an example of wiring and setup in details.
Wiring
(it is attached below to the post, i have no idea how to put it here)
wiring.png
Manual
The Pro Micro boards usually have 2 leds side-by-side, which are the TX and RX status lights. These are used to reflect the state of the adapter:
On every startup these are flashing twice, then one of them is going off, the other one stays on. This means booted up successfully and ready to play.
But if they stay on, that means the adapter is in calibration mode. The calibration data is loaded and verified during setup,
but if these are incorrect/missing than it goes to calibration mode automatically.
Automatic calibration
Calibration process is the same as everywhere, the sticks, pots, switches on all channels must moved to their extents. Preferably more than once and in slow motion.
The leds are lit
During calibration there is no sending of joystick values to the host, there is no feedback at all, except it is in '#DEBUG_ENABLED' mode. Though in debug mode it's only using terminal to send data, there is no hid interface. While in normal operation after the calibration data is accepted and saved it goes directly to play mode.
Manual calibration---
Sometimes it is needed to re-calibrate the adapter, although there is valid calibration data saved. To achieve that just plug in the usb while pushing the attached button. Then everything should be the same as with automatic process.
> Still under development so any advice is welcome regarding the code or feedback on use! Only known restriction is the calibration autosave function accepts only if there is 6 working channels calibrated. In case you connect less channels then you always need to push the button to save calibration data.
blogodex = {"idx" : "radio"}
Reverse Engineering a Quadcopter
Michael Melchior has an interesting series of four articles where he reverse engineers a quadcopter, including the radio protocol. It's really good, and he includes links to his code that listens to the radio. As they say, read the whole thing!
(Part 1) (Part 2) (Part 3) (Part 4)
blogodex = {"idx" : "reverse engineering", "Michael Melchior"};
(Part 1) (Part 2) (Part 3) (Part 4)
blogodex = {"idx" : "reverse engineering", "Michael Melchior"};
Colored Sealing Tape for Covering RC Planes
http://rcfoamfighters.com/blog/?p=426
http://www.tapeplanet.com/Colored-Carton-Tape-s/149.htm
blogodex = {"toc" : "Foamy Tape"};
Saturday, July 16, 2016
Tuesday, June 28, 2016
Blu-Baby Built Up Wing
Here's a nice post on RCG which shows a built-up wing for the Blu-Baby. Wish I had a laser cutter to print it out nicely!
blogodex = {"toc" : "Blu Baby", "idx" : "Wing"};
blogodex = {"toc" : "Blu Baby", "idx" : "Wing"};
Saturday, June 18, 2016
Saturday Electronics: $1 555 Doorbell Kit
Saturday Electronics posting... it's a thing!
I'm a big fan of Julian "Yes I have a personalized flashlight" Ilett. Check out his youtube channel if you're interested in electronics. The "postbag" videos are great if you like hands-on reviews of cheap ebay components.
 He's got a two-part video where he builds and then reverse engineers a cheap doorbell kit. It's a really clever design. I learned a lot from Julian's explanation! Check it out and buy a kit if you're interested.
blogodex = {"toc" : "Saturday Electronics", "idx" : ["Julien Ilett", "Doorbell Kit", "electronics"]};
Friday, June 3, 2016
Replacement Hakko 936 Heating Element
Heard on RCGroups, this heating element works perfectly as a replacement for the Hakko 936 heating element.
https://www.fasttech.com/products/1408401
Not bad for $1.55
blogodex = {"toc" : "Hakko 936", "idx" : "soldering iron"};
https://www.fasttech.com/products/1408401
Not bad for $1.55
blogodex = {"toc" : "Hakko 936", "idx" : "soldering iron"};
Thursday, June 2, 2016
New OrangeRX Module
- Set transmitter to TAER.
- Set Channel 6 if you need it (e.g. for SAFE)
- (Matt recommends forcing the module to DSM2. Maybe that's only necessary if you've got an old model?)
- Set External RF to
Mode: PPM
Channel Range: 1-12
PPM Frame: 30.5ms 300u - - Bind as usual
blogodex = {"toc" : "OrangeRX Module", "idx" : ["DSM2", "DSMX", "Taranis", "Spektrum"]};
Tuesday, May 31, 2016
Khan Academy / Pixar Aerial Video by Me
Spent a couple of hours helping make this video, and got two seconds of screen time. According to the film people, that's a pretty good ratio!
And of course always sweet to do something to help the Khan Academy.
Anyways, quite proud to have done a real bona fide bit of aerial camera work.
I'm embedding the YouTube page, and the Khan page is here. If you wanna skip the boring parts and see my two seconds of fame (starting at 0:46), go here.
blogodex = {"toc" : "Aerial Photography", "idx" : ["Pixar", "Khan Academy"]};
Saturday, May 28, 2016
Radio Signal Latency
Transmitter-to-Receiver latency is a much-cited metric when discussing radio systems.
Andy Kunz, a member of the Spektrum development team, wrote a couple of posts going into great detail about how latency is measured and what it means. Because RCG posts get hard to search, I'm capturing them here for posterity.
I've moderately edited from these posts and a couple in between (quoting people asking questions).
Thanks Andy!
Friday, May 20, 2016
DIY FrSky Receiver
Here's how to make a FrSky compatible receiver with an Arduino and CC2500 radio.
It's also sold as the AirWolf models 1 and 2. I'm ordering one to test it out.
Tons of technical information at the link.
http://www.rcgroups.com/forums/showthread.php?t=2124647
blogodex = {"toc" : "AirWolf"};
It's also sold as the AirWolf models 1 and 2. I'm ordering one to test it out.
Tons of technical information at the link.
http://www.rcgroups.com/forums/showthread.php?t=2124647
blogodex = {"toc" : "AirWolf"};
Saturday, May 14, 2016
A Couple of UMX Radian Videos
Here's a couple of videos of my UMX Radian, a really sweet plane.
Quiet morning flying at the Berkeley Marina
Here it is with a wing mod that makes it into a really slow flyer.
And pretty sweet indoors.
blogodex = {"idx" : ["UMX Radian", "Videos"]};
Quiet morning flying at the Berkeley Marina
Here it is with a wing mod that makes it into a really slow flyer.
And pretty sweet indoors.
blogodex = {"idx" : ["UMX Radian", "Videos"]};
Saturday, May 7, 2016
Taranis Sound File Formatting
Here's the incantation to generate a sound file playable on Taranis.
ffmpeg -i myfile.mp3 -ar 32000 -ac 1 -acodec pcm_s16le myfile.wav
In human being terms:
- 32,000 bps sampling
- mono
- PCM signed 16-bit little-endian
well for a certain type of human being anyway.
blogodex = {"toc" : "Taranis Audio", "idx" : ["audio", "ffmpeg", "deep, dark magic"]};
Monday, May 2, 2016
An interesting RCG note from Springer at Model Plane Foam. They're a pretty cool outfit... they asked the manufacturer of Dollar Tree foamboard for a foam more suited to model building.
Model Plane Foam is available from modelplanefoam.com. it is the same recipe as the latest Dow fff, white, no film or printing or perforations. Shipping to AZ is high, but it is still typically less than Depron.
Here's the thread with the history and info on it:
http://www.rcgroups.com/forums/showt...del+plane+foam
Adams says that the dtf formula is different from the Dow formula which is what we get (less the pigment, of course). A grade MPF has a fine skin with almost a rubbery feel to it that is decently dent resistant. A big part of the difference in both stiffness and durability comes from that skin.When the paper is removed the dtf surface is composed of open cells (no dense skin left at all) which is fragile and dents easily. So the difference in strength/stiffness is a combination of factors. Current A grade MPF is running between .2 and .23" thick, on the low side of the thickness spec.
I'm sure that a big part of the cost difference is shipping (I find it is awfully expensive to ship mostly air!), but process may also be a factor, if I understand correctly, Depron is extruded in flat sheets (probably why it has best flatness) wheras MPF and fff are extruded in a different process that has higher throughput, but sacrifices flatness (sometimes - it varies within a run and is one of the parameters we specifically ask them to control better than they do for fff).
As far as stiffness, density, etc. MPF is targeted at 2lb/cu. ft. From what I have seen of depron, it seems like similar density. Depron is stiffer but more brittle, which I attribute to the formula difference. One customer who made 3d plane kits loved MPF for his planes because a crash that would previously result in a bunch of Depron pieces was a non issue for MPF. He was one of those who milled away foam to make a girder structure in the foam sheet so the increased toughness was important.
blogodex = {"toc" : "Model Plane Foam"};
Saturday, April 30, 2016
SQ8 Hatcam Notes
Got an SQ8 camera to try as a hatcam. It has a nice clip system. I made an adapter out of instamorph, Even if the camera turns out to be a dud, I'm super impressed with how well the instamorph holds on to the brim of the hat.
I'll try it out "for real" soon and report back on image quality, etc. So far not too bad for $20.
I think I need to get a faster memory card though. 1080p carries about 15 FPS.
Some stats: 720p, about 6Mbps, 29.79 FPS; 1080p, a bit less than 15FPS.
The way I've got it mounted now holds the camera upside down. Here's the incantation to flip the image and convert to h.264. The duplicate transpose items aren't a type.
ffmpeg -i PICT0002.AVI -vf transpose=2,transpose=2 out22.mov
blogodex = {"toc" : "SQ8", "idx" : ["hatcam", "video", "instamorph"];
Wednesday, April 27, 2016
April 2016 Shopping List
Here's what you need to get started.
Basic Idea:
Here's the raw materials for the E-Fly Body. For each body, you will need 3 sheets of foam, 1 carbon tube, and two pieces of steel wire. I think severlthe shipping won't go
Basic Idea:
- Transmitter and Receiver
- Airplane Electronics
- Body Parts
Nice Starter Plane:
- EZ-Fly
Transmitter and Receiver.
Get these from Aloft Hobbies, one of the best vendors on the net!
- FrSky Taranis Plus
- FrSky D4R-II (one for each plane)
- Voltage Sensor (optional, but nice, one for each plane)
(to be continued)
Airplane Body
Here's the raw materials for the E-Fly Body. For each body, you will need 3 sheets of foam, 1 carbon tube, and two pieces of steel wire. I think severlthe shipping won't go
You can also buy the foam pieces pre-cut:
Power System
Supplies
Here's some other stuff you will need
Supplies
Here's some other stuff you will need
- White Gorilla Glue (Home Depot)
- Beacon Foam-Tac Glue
blogodex = {"toc" : "Parts List", "idx" = ["Beginner's Guide"]};
Saturday, April 23, 2016
Mini Drake Flying Boat
Got this from Hobby King... comes in a flat pack, gonna have to really glue it up old school!
HK Page
RCG Thread
Manual
Based on the original 1951 Drake.
Recommended bits:
AeroLite or MicroLite
Micro Control Horns
Linkage Connectors
1811-2900 Motor
MultiStar 10A ESC (pre-BL Heli) (6A would be fine too)
Random RCG notes:
HK Page
RCG Thread
Manual
Based on the original 1951 Drake.
Recommended bits:
AeroLite or MicroLite
Micro Control Horns
Linkage Connectors
1811-2900 Motor
MultiStar 10A ESC (pre-BL Heli) (6A would be fine too)
Random RCG notes:
- use two (2) #16 rubber bands to hold my wing on.
- The CG per instructions is on the main spar for the wing. It should balance there when placed on your fingertips.
- Construction Notes
blogodex = {"toc" : "Mini Drake", "idx" : ["flying boat"]};
Thursday, April 7, 2016
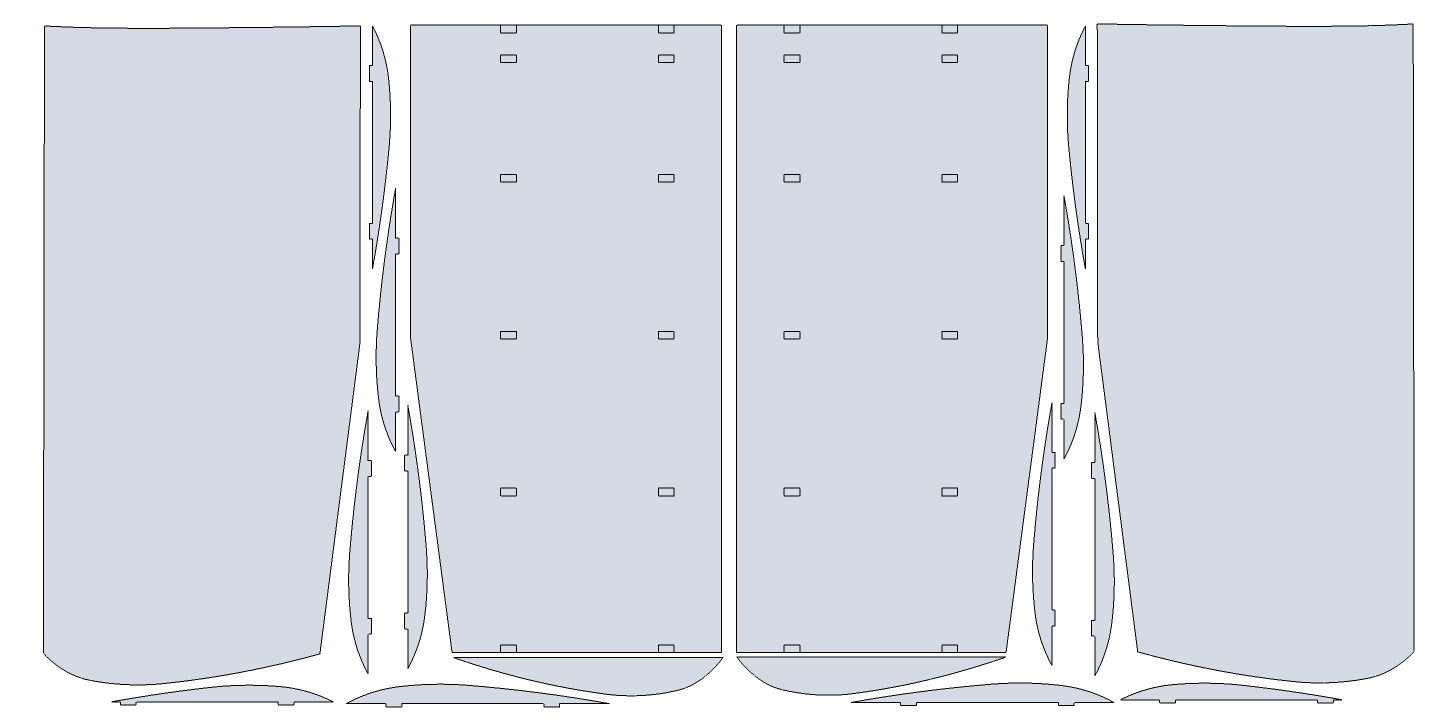
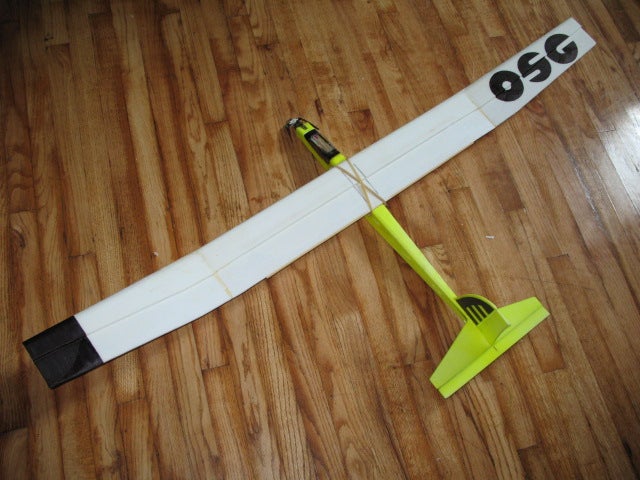
60 inch OSG - One Sheet Glider
Completely uses exactly one sheet of $Tree foam.
The mighty Springer has a build thread.
blogodex = {"toc" : "OSG", "idx" : ["One Sheet Glider", "Springer", "DollarTree foam"]};
The mighty Springer has a build thread.
blogodex = {"toc" : "OSG", "idx" : ["One Sheet Glider", "Springer", "DollarTree foam"]};
Tuesday, March 29, 2016
Arduino Current Sensing
Here's a current-sensing module from Sparkfun. It's non-invasive, clamping around the wire carrying the current you wish to measure. I'm planning to use it to watch a particular appliance and see when it's on and off.
My initial plans are to attach it to an ESP8266 (Huzzah breakout), upload the measured current to thingspeak via a local wifi, and watch it from there.
Example apps:
(example 1)
(example 2)
blogodex = {"toc" : "current sensing"};
My initial plans are to attach it to an ESP8266 (Huzzah breakout), upload the measured current to thingspeak via a local wifi, and watch it from there.
Example apps:
(example 1)
(example 2)
blogodex = {"toc" : "current sensing"};
Saturday, March 19, 2016
Friday, March 18, 2016
Tiny Shopping List
$1.25 8x4 props (2)
$0.00 theraband prop saver bands
$0.19 JST pigtail, ESC side
$0.72 2mm bullet plugs, male (3) (motor side)
$0.72 2mm bullet plugs, female (3) (ESC side)
$0.00 2.5mm heat shrink tubing
$6.46 9g servos (2)
$0.29 control horns (2)
$13.73 2S/3S balance charger
$14.40 3S 500 mAh LiPo batteries (2)
Sunday, March 6, 2016
Monday, February 29, 2016
ReadiBoard EZFly
Over on rcgroups, user balsa or carbon shares some hints on making ReadiBoard EZFlys. Check out his videos, you can see the great results he gets.
I make EzFlys out of ReadiBoard, both paper on and paper off. Single layer everywhere except the wing's leading edge will be double layer with the KFm, and the nose will be triple layer with the two nose doublers.
For a stronger, faster flying EzFly - I leave the paper on and scotch tape over all the edges. But the exposed paper will be susceptible to moisture.
For a very lightweight slow and floaty EzFly , I cut out all the parts and then peel the paper off. I also use lightweight electronics and increase the wingspan to 40" for very light wing loading.
blogodex = {"toc" : "EZFly", "idx" : ["ReadiBoard"]};
I make EzFlys out of ReadiBoard, both paper on and paper off. Single layer everywhere except the wing's leading edge will be double layer with the KFm, and the nose will be triple layer with the two nose doublers.
For a stronger, faster flying EzFly - I leave the paper on and scotch tape over all the edges. But the exposed paper will be susceptible to moisture.
For a very lightweight slow and floaty EzFly , I cut out all the parts and then peel the paper off. I also use lightweight electronics and increase the wingspan to 40" for very light wing loading.
His Slow and Floaty model:
blogodex = {"toc" : "EZFly", "idx" : ["ReadiBoard"]};
Wednesday, February 3, 2016
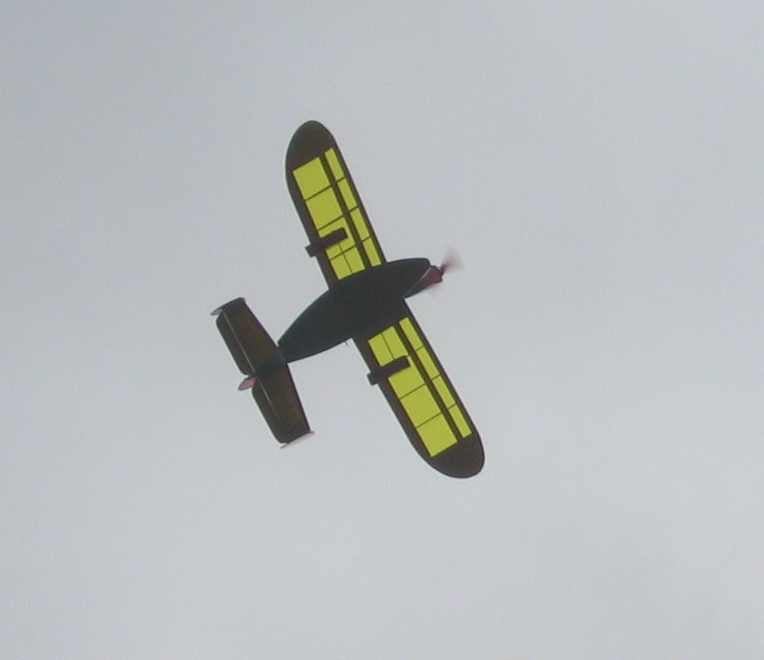
Phantom Flash ROG
Here's the Phantom Flash from 1937. It's an ROG ("rise off ground"), meaning that it takes off and lands, instead of being hand-tossed.
blogodex: Phantom Flash / balsa models;
blogodex: Phantom Flash / balsa models;
Saturday, January 30, 2016
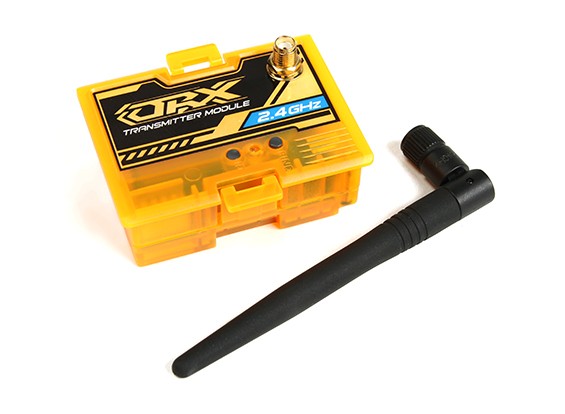
OrangeRX DSM2/X Modules
Here's the current state of OrangeRX modules. There's a lot of discussion that the Devo-compatible module has problems with the Eflight UMX receivers.
OrangeRX DSMX / DSM2 Compatible 2.4Ghz Transmitter Module (JR/Turnigy compatible)
OrangeRX DSMX / DSM2 Compatible 2.4Ghz Transmitter Module (JR/Turnigy compatible)
PRODUCT ID: 9171000302-0
PRODUCT ID: 9171000536-0
PRODUCT ID: 9029000274-0
blogodex = DSM2 / DSM2, DSMX, modules, radios
Friday, January 29, 2016
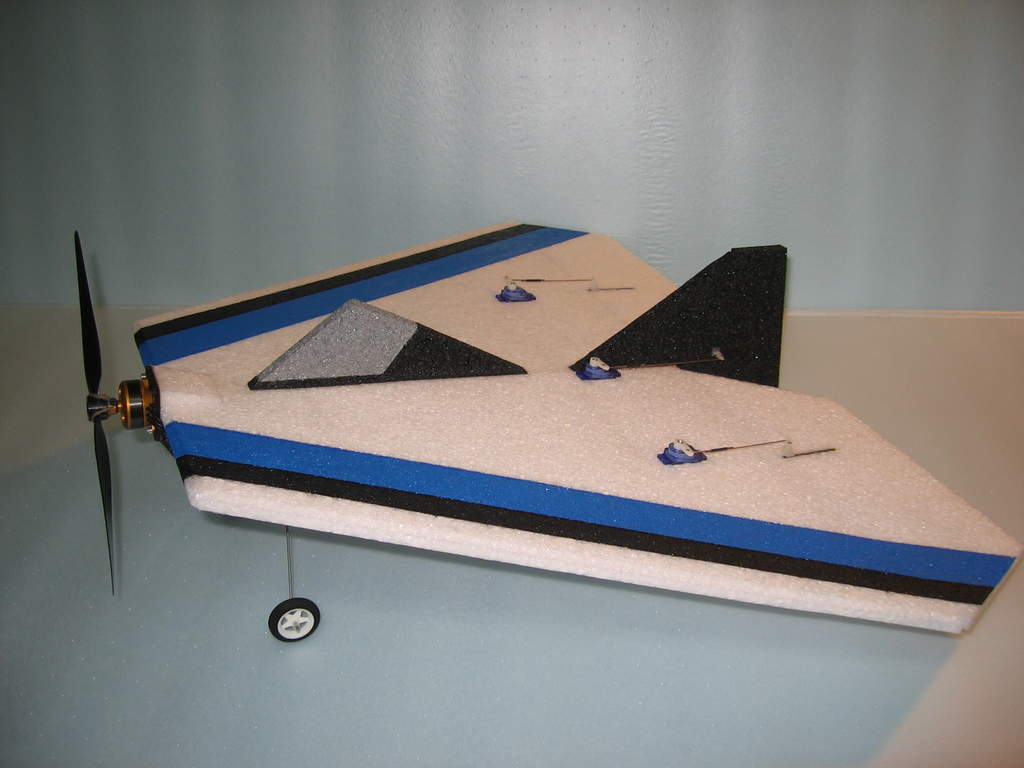
GoldGuy's Slofly Simple Delta
Looks like a nice slow-flyer to build for beginners. Based on the late Dekan's Simple Delta.
GoldGuy Says:
Twenty more square inches than my first 22 incher and one ounce lighter for a loading of 3 ounce per square feet at a 6 ounce RTF weight. It's a 8X22X17 with the elevon hinge line at 3 1/2 incher. Start off with the CG at 5 1/2" and then fine tune to taste.
Take your SD to the next level, the SSD will loop, roll, spin, snap, stall turns, harrier, prop hang, torque roll and flies inverted on rails, all this and no pitch sensitivity at any speed. Oh ya, and crazy climbing inverted flat spins the guys call 'the Dilbert' (?????).
Build it light, keep it tight.............
WS is 20"
LE is 7" long
LE to TE (hinge line) is 14.25"
Elevons are 2" wide
Fus is 8.5x1.75"
Try 5" as a CG start point from LE, mine works ok at 6"
The Fin is 5" tall by 10.5" long.The Fin proper starts 8" from it's front and slopes back 2.5"
There are 3mmx.5mm CF flats on the leading edges....prevents damage from weeds!
There is also a 3mmx.5mm CF spar
blogodex: Simple Delta / GoldGuy, Dekan;
Thursday, January 28, 2016
Laminate recommended on RCG
Premium CP Laminating Film -- 3mm regular, 5mm heavy duty.
Premium clear gloss (CP) roll laminating film is a high-clarity, abrasion-resistant, low-melt, polyester-based film. CP Laminating Film is a higher quality roll laminating film that activates 20-30 degrees cooler than standard polyester films. CP film is available in 1.7 mil, 3 mil, 5 mil, and 10 mil. Standard widths are 9", 12", 18", 25", and 27". The activation temperature is 210-230 degrees.
blogodex: laminate / supplies;
Monday, January 25, 2016
Some Skipper Notes
Courtesy of DrBamBam:
http://www.rcgroups.com/forums/showpost.php?p=28540928&postcount=1148
Stock Propeller: APC 6x4
Stock Motor - Turnigy D2826-6/2200kv
expo: 40% all travel (up/dn, l/r)
Ail - high rates 60% / 60% (12mm / 12mm)
Ail - normal rates 40% / 40% ( 8mm / 8mm)
Ail - low rates 20% / 20% ( 4mm / 4mm)
Ele - high rates 60% / 50% (19mm / 16mm)
Ele - normal rates 50% / 45% (16mm / 14mm)
Ele - low rates 40% / 35% (13mm / 11mm)
Rud - all rates 100% / 100% (35mm / 35mm)
http://www.rcgroups.com/forums/showpost.php?p=28540928&postcount=1148
Stock Propeller: APC 6x4
Stock Motor - Turnigy D2826-6/2200kv
EASY GOING SKIPPER
Ail - high rates 60% / 60% (12mm / 12mm)
Ail - normal rates 40% / 40% ( 8mm / 8mm)
Ail - low rates 20% / 20% ( 4mm / 4mm)
Ele - high rates 60% / 50% (19mm / 16mm)
Ele - normal rates 50% / 45% (16mm / 14mm)
Ele - low rates 40% / 35% (13mm / 11mm)
Rud - all rates 100% / 100% (35mm / 35mm)
blogodex: Skipper / The Fleet;












%20(1)%20(1).jpeg)

.jpg)


